

Windows allows multiple user accounts to be used. One user account is the administrator accounts, while other accounts are local, domain, account with admin rights etc. These user accounts actually help users to manage their own files and applications separately. However, you can disable an existing user account and enable an already disabled account. The following tutorial will show you how to do that. In order to enable or disable user accounts, you need to be signed in as Administrator.
Steps to Enable or Disable User Accounts in Windows 10
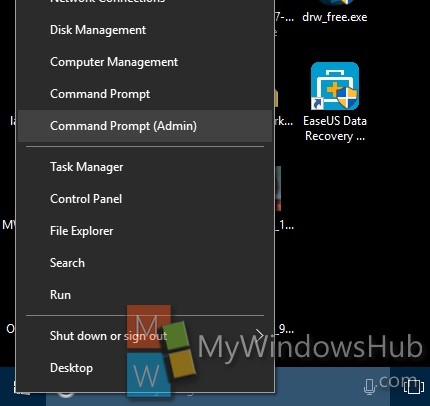
1. Right click on Start Button and go to Command Prompt (Admin). This will open your Elevated Command Prompt.
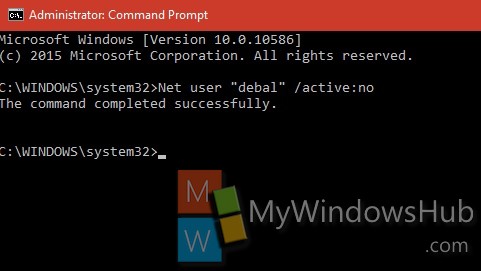
2. If you want to disable a local account, then type or copy-paste the following command and hit Enter.
Net user “User Name” /active:no
E.g: Net user “debal” /active:no
3. If you want to disable a domain account, then copy and paste the following command and then hit Enter.
Net user “User Name” /active:no /domain
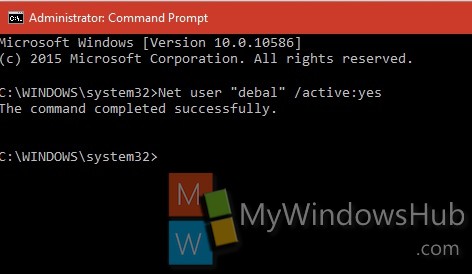
4. If you want to enable local user account, then type the following command and hit Enter.
Net user “User Name” /active:yes
5. If you want to enable a domain account, then type the following
Net user “User Name” /active:yes /domain
About Nick
Nick is a Software Engineer. He has interest in gadgets and technical stuffs. If you are facing any problem with your Windows, feel free to ask him.