

AHCI stands for Advanced Host Controller Interface (AHCI). AHCI is a standard of Intel which specifies the operation of SATA host controller in a non-implementation-specific manner in its motherboard chipset. AHCI is enabled in BIOS/UEFI by default. Some older versions of motherboards may have IDE enabled. For those motherboards, you can enable AHCI. In this tutorial, you will learn how to do that.
Steps To Enable AHCI In Windows 10 After Installation
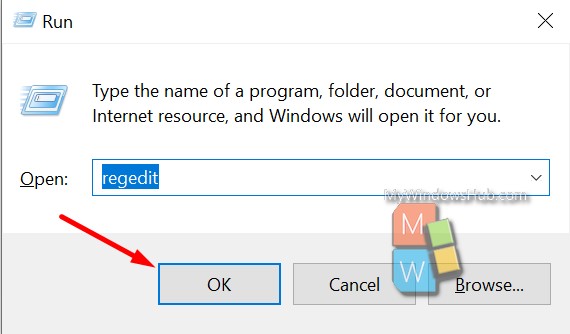
1. Press Win+R to launch the Run command box. Type regedit and hit Enter. This will take you to the Registry Editor. If prompted by UAC, tap on Yes to continue.
2. Now, navigate to the following location
HKEY_LOCAL_MACHINE\SYSTEM\CurrentControlSet\Services\iaStorV
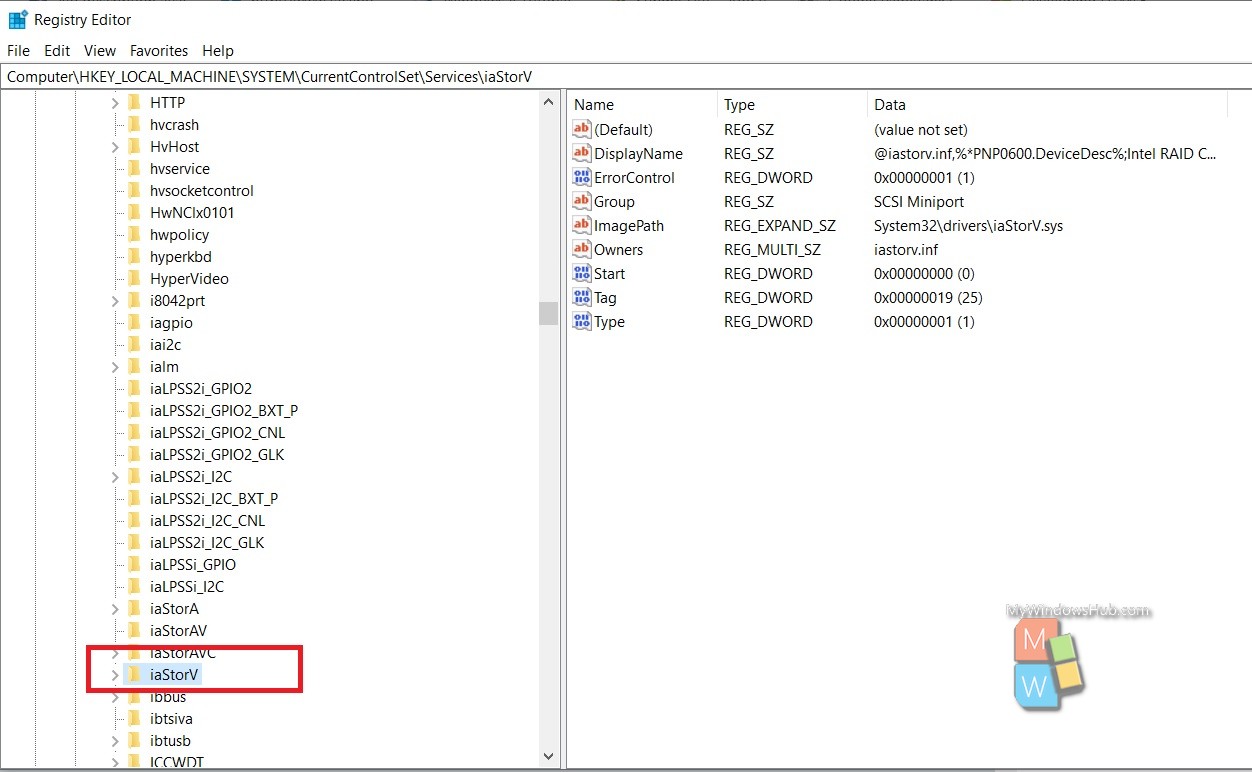
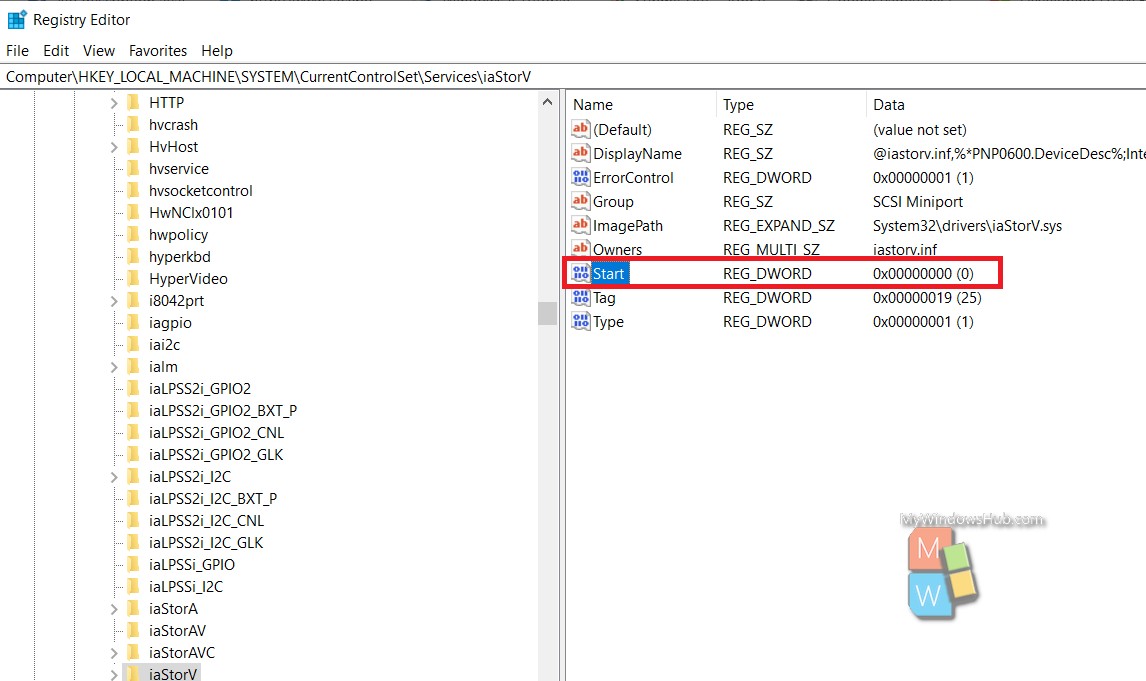
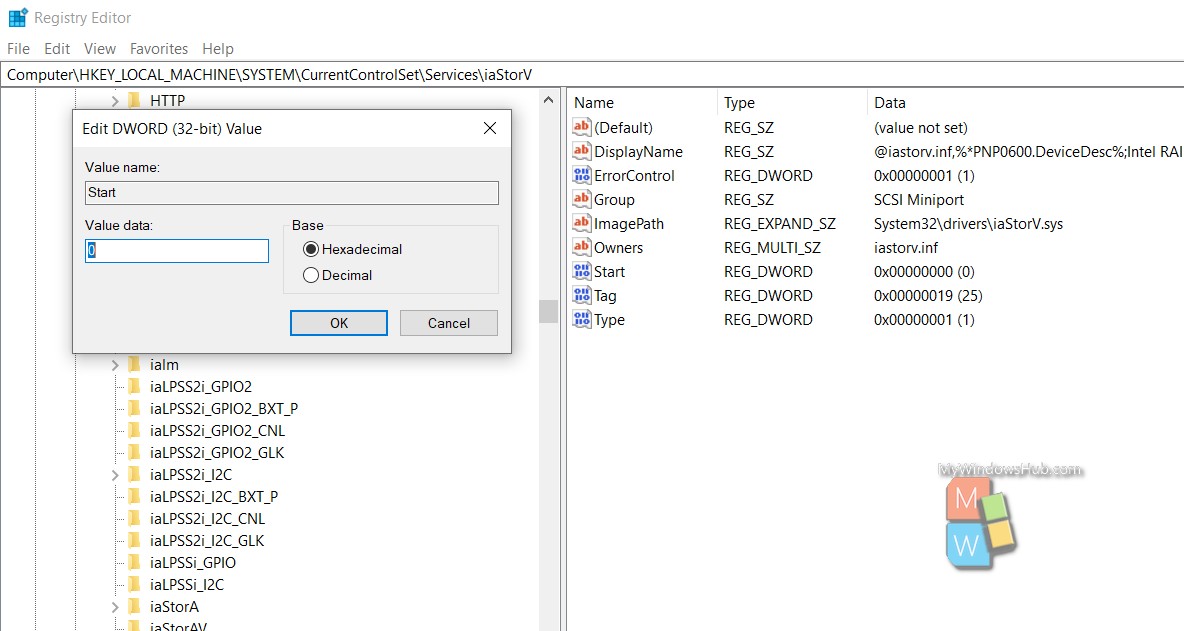
3. In the right panel, there is a DWORD named Start. Double tap on it to edit it.
4. Type 0 for AHCI, and click on OK.
5. Next, similarly like step 2, in the right pane of Registry Editor, go to the following location
HKEY_LOCAL_MACHINE\SYSTEM\CurrentControlSet\Services\iaStorAVC\StartOverride
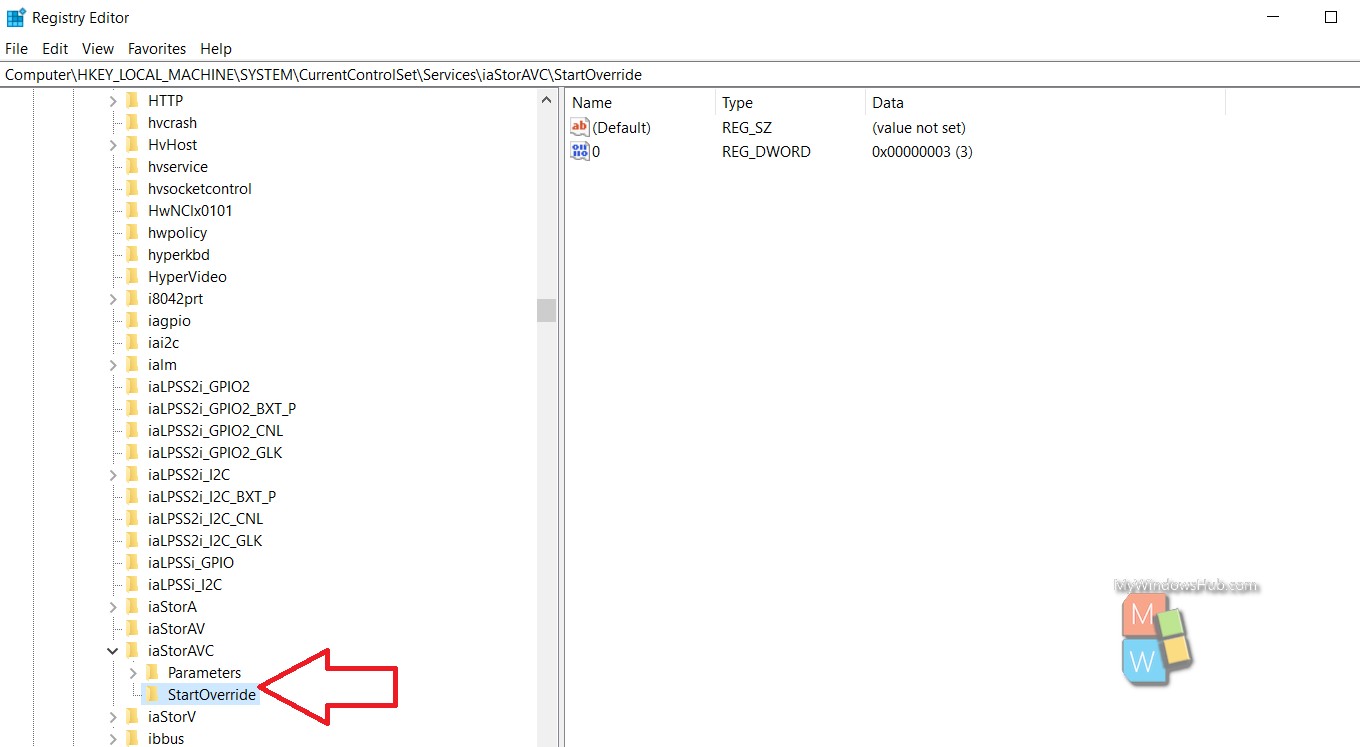
6. In the right pane, there is the 0 DWORD. Double click on it to modify it. Double tap on it and change the value to 0. You will find that the value set is 3. When you restart your computer, this value will be changed to 3 once again.

7. Now, again in the left pane, go to the following location
HKEY_LOCAL_MACHINE\SYSTEM\CurrentControlSet\Services\storahci
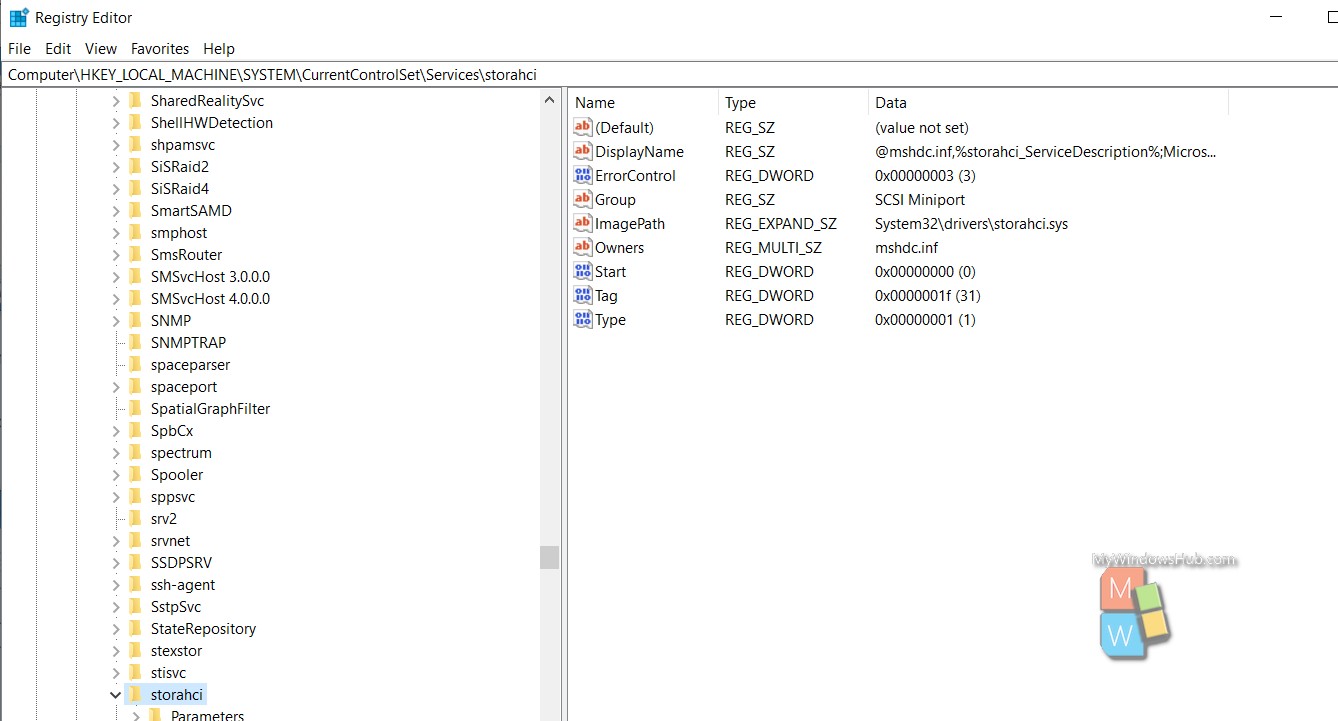
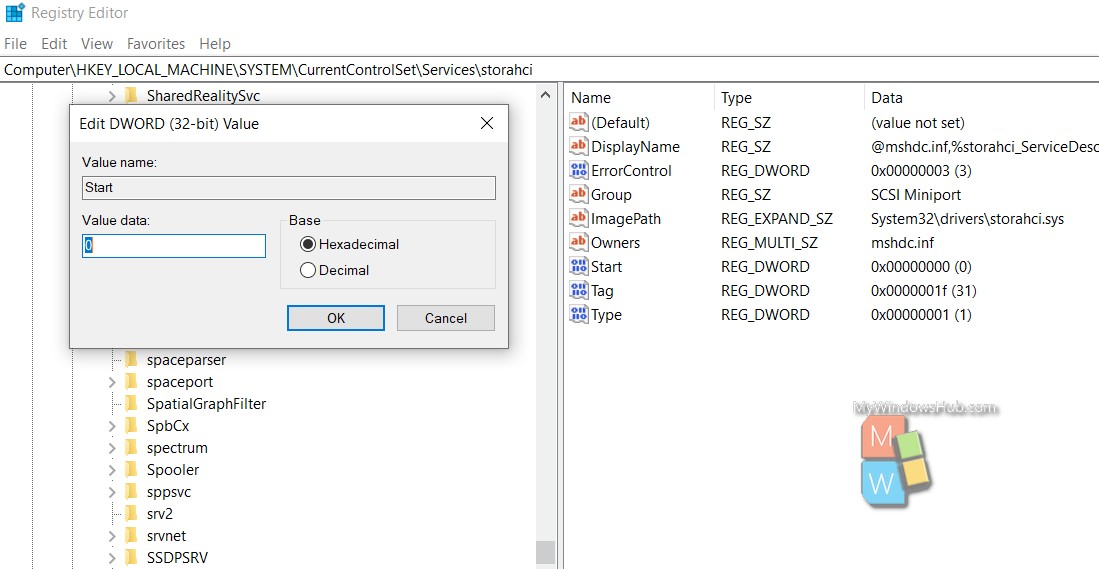
8. In the right pane of the storahci key, double click on the Start DWORD to modify it. Set the value to 0 (zero) for AHCI, and click on OK.
9. Now, go to the following location
HKEY_LOCAL_MACHINE\SYSTEM\CurrentControlSet\Services\storahci\StartOverride

10. In the right pane of the StartOverride key, double click on the 0 DWORD to modify it. Type 0 (zero), and click on OK.
11. Close Registry Editor.
12. Next, boot the computer to BIOS or UEFI firmware settings. Now in the UEFI settings, turn on AHCI, under Peripherals.