

System unattended Sleep Timeout is the timestamp, which when achieved, takes the PC to a low power state. Why would some one need to alter the system unattended sleep timeout? If you have any work scheduled in the Task Scheduler, you can set the time to a longer timestamp, so that, the PC does not go to a low power state amid the ongoing work.
In this article, you will learn how to change system unattended sleep timeout in Windows 10.
Steps To Change System Unattended Sleep Timeout In Windows 10
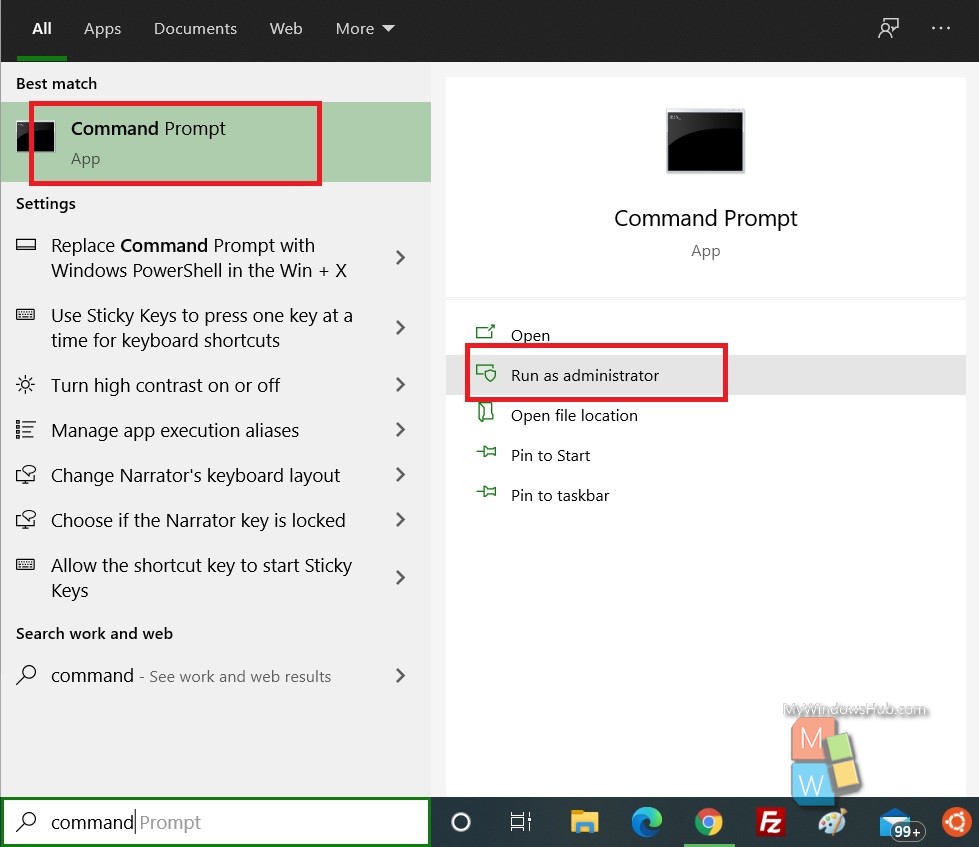
1. Open Windows 10 Search panel, and type Command Prompt. From the search result, right click on Command Prompt and select Run as Administrator. This will launch the Elevated Command Prompt.
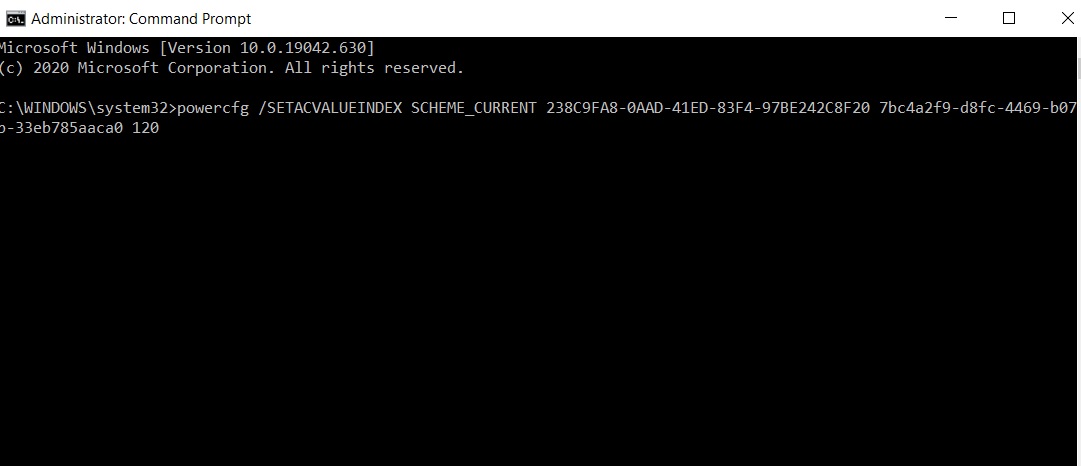
2. Now, copy and paste the following command and hit Enter after that. Choose the command based on your requirement.
When the Device is On battery
powercfg /SETDCVALUEINDEX SCHEME_CURRENT 238C9FA8-0AAD-41ED-83F4-97BE242C8F20 7bc4a2f9-d8fc-4469-b07b-33eb785aaca0 <seconds>AND/OR
When the device is Plugged in
powercfg /SETACVALUEINDEX SCHEME_CURRENT 238C9FA8-0AAD-41ED-83F4-97BE242C8F20 7bc4a2f9-d8fc-4469-b07b-33eb785aaca0 <seconds>Important Note: In the above commands, replace <seconds> by the actual number of seconds that you wish to set for the purpose. The value you set, i.e, the number of seconds you set will be rounded off to the nearest number of minute value. The default time is 2 minutes (120 seconds). If you set the value to 124 seconds, then it will be rounded off to 2 minutes.
That’s all!