

The Device Idle Policy is not added to the Power Options be default in Windows 10. You need to add it. The process is quite simple. Check it out!
Steps To Add Or Remove “Device Idle Policy” From Power Options In Windows 10
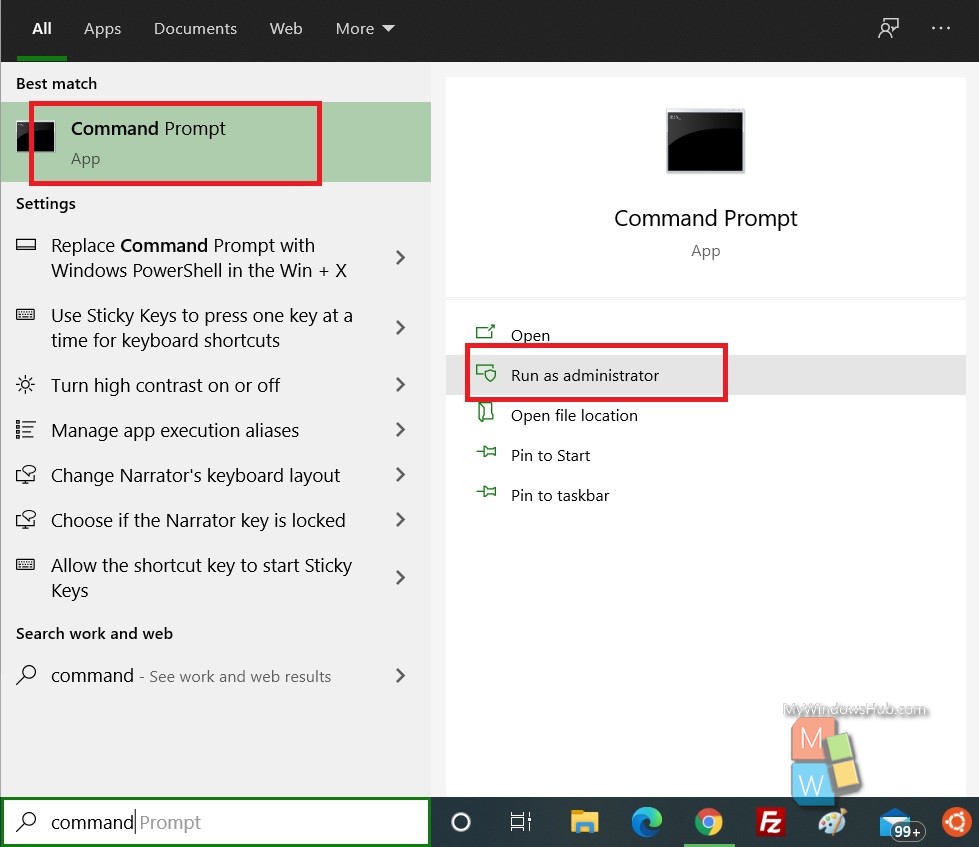
1. Open Windows 10 Search panel, and type Command Prompt. From the search result, right click on Command Prompt and select Run as Administrator. This will launch the Elevated Command Prompt.
2. Now, copy and paste the following command and hit Enter after that. Choose the command based on your requirement.
For Adding Device Idle Policy
powercfg -attributes 4faab71a-92e5-4726-b531-224559672d19 -ATTRIB_HIDE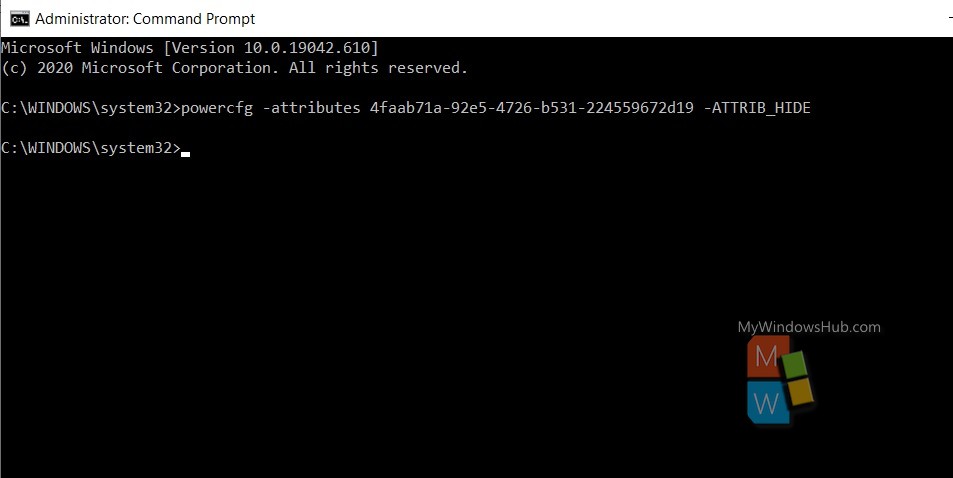
For Removing Device Idle Policy
powercfg -attributes 4faab71a-92e5-4726-b531-224559672d19 +ATTRIB_HIDECheck How To Find Device Idle Policy In Power Options In Windows 10
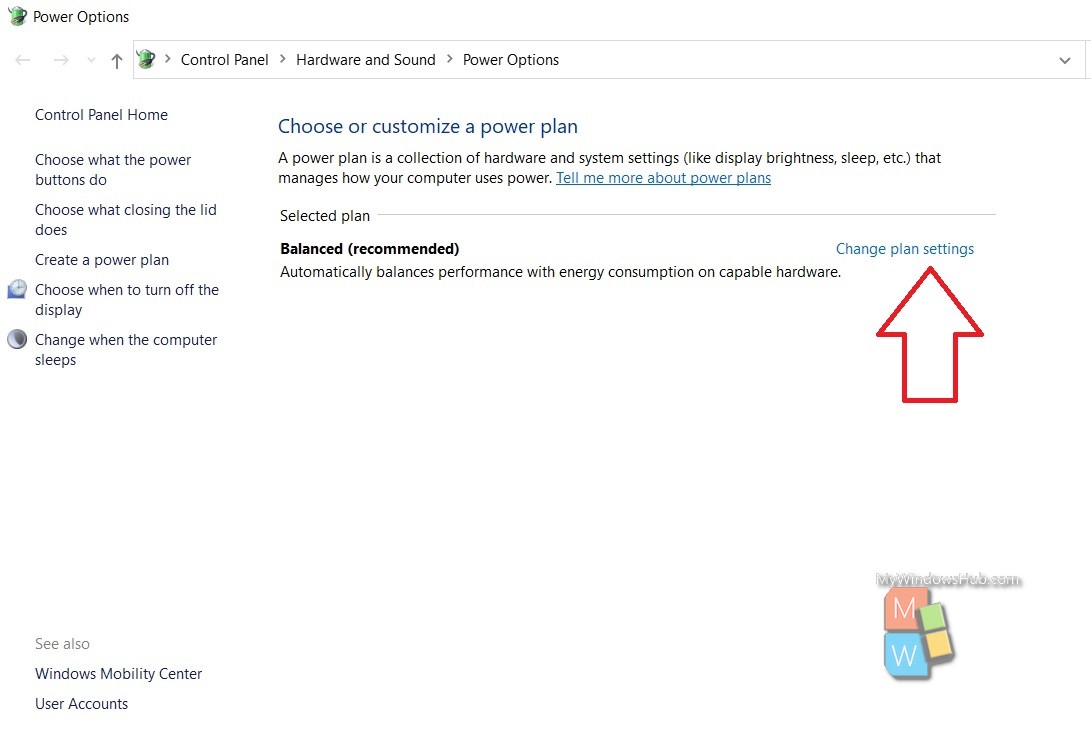
1. Open Windows Search panel, and type Control panel. Select Control Panel and open it. Now, in the location field, copy and paste the following to navigate to the Power Options.
Control Panel\Hardware and Sound\Power Options
2. Next, click on Change plan settings.
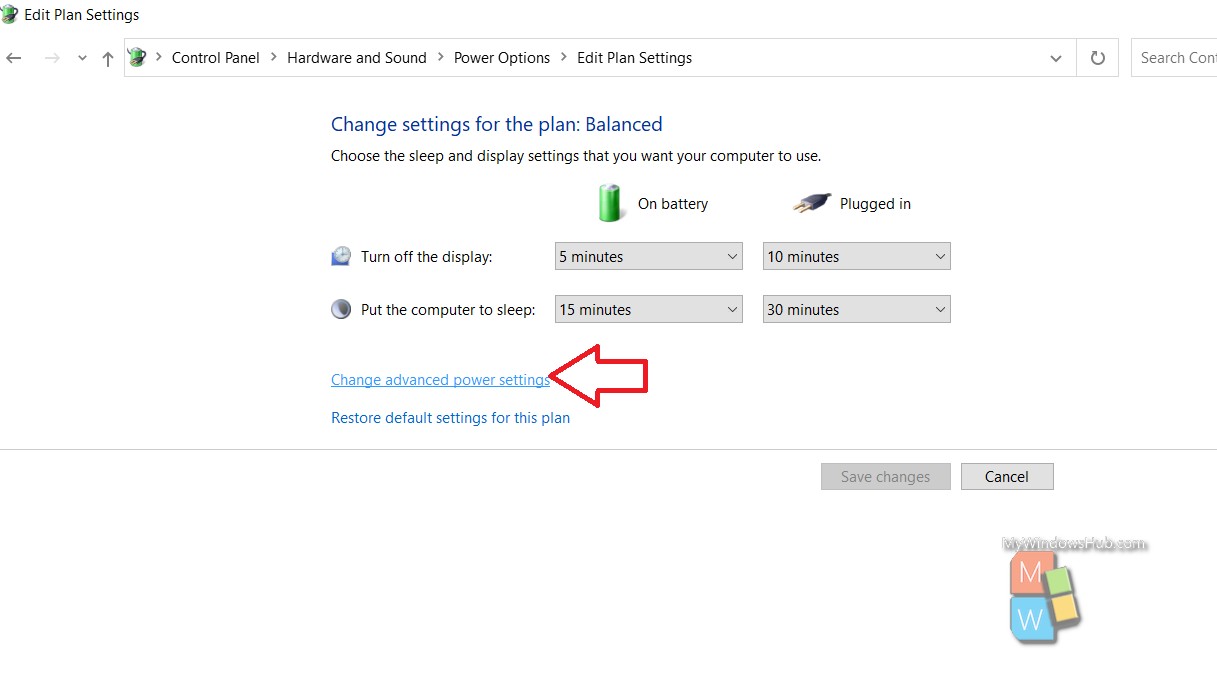
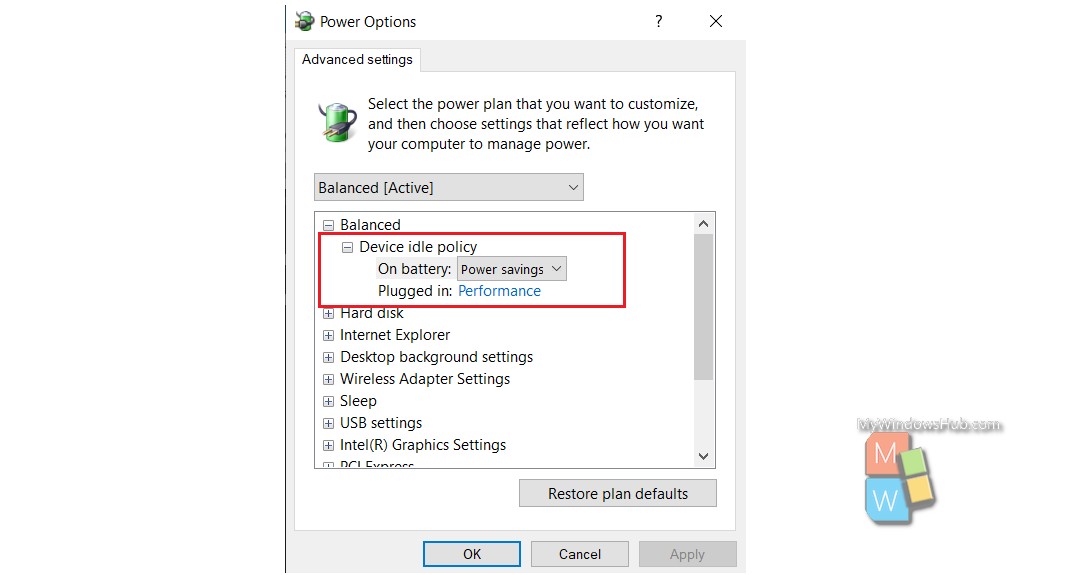
3. As the Edit Plan Settings window opens, click on Change Advanced Power Settings.
4. As the Power Options open, find out Device Idle Policy as shown below:
That’s all!