

Virtual Memory is feature in the operating system world that provides the computer to make up for the scarcity of the space or so-called physical memory technically. It does so by by transferring some pages of data from the RAM to the HDD and thereby preventing issues like sudden slow down of machine, Blue Screen of Death (BSOD) to help to continue the smooth operation of the OS.
In the event of shortage of space, the OS will be required to extract the data that was moved to the HDD temporarily. To resolve this issue, the OS will be required to move the non-required pages to the hdd so that it gains up some space to bring back the pages which is required. This whole process is called as paging or swapping & the temporary space on the hard disk is called as the swap file or pagefile.
This memory operating system manages by itself only but at times you might be required to alter the memory allocated. It is always said to customize the virtual memory into a size which is within the permissible limit.
Steps to customize the virtual memory in Windows 10
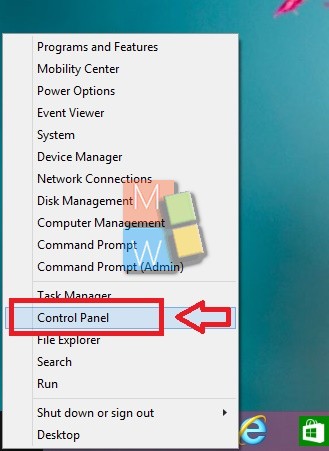
1. Right click on Start button and click on Control Panel or else search in Start menu for Control Panel.
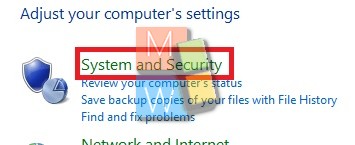
2. Go to System & Security Settings in control panel.
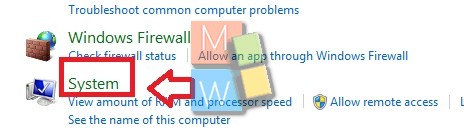
3. Click on the option System.
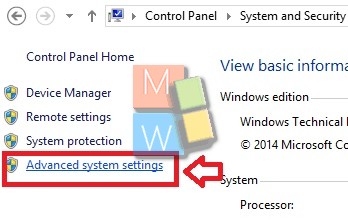
4. Click on the option Advanced System Settings from the panel present on the left hand side.
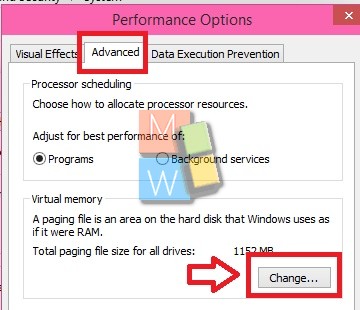
5. Go to the Performance Settings under the Advanced tab.

6. Inside the opened window, go to the Advanced tab and click on the change button available for Virtual Memory.
7. Uncheck the box “Automatically manage paging file size for all drives”.
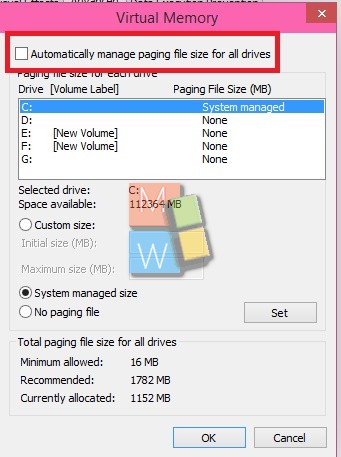
8. Under Drive column, click the required drive that has the paging file you want to alter.
9. Click on the Custom size radio button, assign a fresh entry in megabytes in the Initial size (MB) or Maximum size (MB) box, click Set, and then click OK.

That’s all folks for managing the Virtual Memory on your system. For more updates, keep following this space.
About Nick
Nick is a Software Engineer. He has interest in gadgets and technical stuffs. If you are facing any problem with your Windows, feel free to ask him.
Good one Nick.
Suggestion: Nick, Please suggest 2 numbers for VM Max and Min. I kept getting bumps of ‘low memory’ when set to 16 and 511 as I got automatically. I went to 1000 and 1306, but my min was a wild ass guess. PS:This above VM process was very well presented to a neophyte. Keep up your good work for non-geeks! 🙂 Now, I hope it works…
Thanks Jim, You may keep lower as 16MB and max as 1700MB (It depends on your machine and usage)
The way I’ve understood it, at least in the past with hard drives. I’ve read that you shouldn’t use virtual memory with SSDs because of the constant writing to your SSD could cause premature wear. Anyway, with hard drives, you should use the same amount of memory as your RAM and the max should be double your RAM size. So if you have 8 GB of RAM, then use 8 GB min and 16 GB max. Of course if you have like 64 GB of RAM, that would just be ridiculous. You could set it at 24 GB and leave it without ever having to worry again.
No two settings for min/max will work for everyone and every program. I have a program that suggests 8X the smallest CAD file that I run. That puts the minimum allocated size at 2G. It I try a smaller allocated memory size, the program freezes. Few people need to allocate 2G minimum.
Hello,
I’m having trouble in creation of windows 10(*64bit) system in virtual box.It is showing error “enable allocate and lock memory.Please close application to free up memory.Error ID-Host memory low”
so how can I solve this problem.
I have created windows xp system and it’s running properly.for xp I have selected 1024 memory.