

End of this article you will get a clear view on Windows DHCP flag and how to change the value of DHCP flag in Windows 8 or Windows 7.
DHCP Flag
DHCP is the abbreviation of Dynamic Host Configuration protocol which means it is a protocol that configures IP addresses to hosts dynamically and not statically. DHCP is a network protocol that is used to configure various network devices in order to make them communicate with each other on a global network. A DHCP Client assigns an IP address to a computer or a server.
Whenever a user connects his machine to the internet the Internet Service Provider takes help of this DHCP to assign a unique IP address. The DHCP server requires certain parameters. These are complete information about the pool of available IP addresses, the subnet masks, gateway and name server addresses. This gives you a brief idea of what a DHCP is.
In the networking section of this site I have discussed about DHCP message format. In the picture below you can see in a DHCP message 1 bit field is reserved for Broadcast Flag.
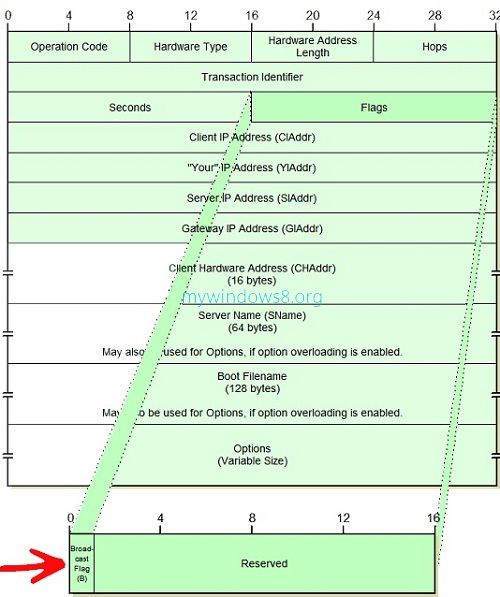
It is the first bit of the Flag field. When the value of this field is “1”, it indicates that the client expects broadcast response, and when the value is “0”, it indicates that the client expects a unicast response. Though most of the DHCP Servers and Relay Agents support both the values for the broadcast flag, some of them do not support either of DHCP flag values. So, you may need to change the flag values according to your need.
Steps to Configure DHCP flag for a specific interface
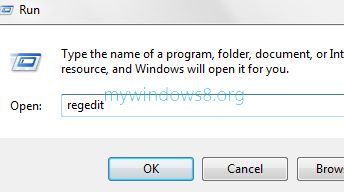
1. Open Run Window by pressing Windows + R -> Type regedit-> press Enter.
2. Now as Registry Editor opens go to the following location.
HKEY_LOCAL_MACHINE\SYSTEM\CurrentControlSet
\Services\Tcpip\Parameters\Interfaces\{GUID}
Here double click on the GUID sub key that corresponds to the network adapter which is connected to the network.
3. Right click DhcpConnForceBroadcastFlag -> Click on Modify.
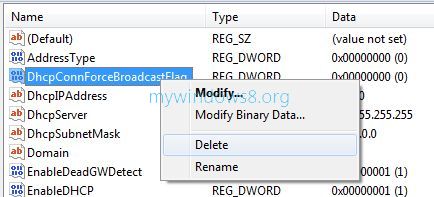
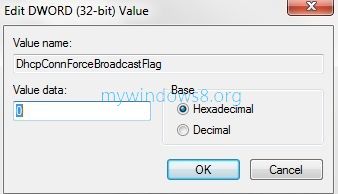
4. Change the default value to 1 or 0 as per your requirements.
. Close the Registry Editor. Restart the machine to experience the changed effect.
Steps to Configure DHCP flag for all interfaces
1. Open Registry editor -> Go to the following location
HKEY_LOCAL_MACHINE\SYSTEM\CurrentControlSet
\Services\DHCP\Parameters
2. Go to IgnoreBroadcastFlag. If it does not exist, right click on the right pane-> Go to New-> click on DWORD(32 bit)-> Name it as IgnoreBroadcastFlag.
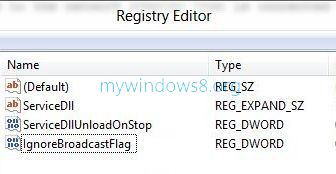
3. Change the value of IgnoreBroadcastFlag to “1” to allow broadcast or else to “0”. Close the Registry Editor. Restart the machine to experience the changed effect.
Steps to configure the toggle settings
Indicates whether the client can toggle the broadcast flag or not. Toggle is ON by default.
1. Press Windows Key + R to open Run-> Type regedit-> Press Enter to open Registry Editor.
2. Go to the following location
HKEY_LOCAL_MACHINE\SYSTEM\CurrentControlSet\Services
\Tcpip\Parameters\Interfaces\{GUID}
3. Select DhcpConnEnableBcastFlagToggle. If it doesnot exist, right click on the right pane-> Go to New-> click on DWORD(32 bit)-> Name it as DhcpConnEnableBcastFlagToggle
4. Right-click onDhcpConnEnableBcastFlagToggle-> click on Modify.
5. In the Value data field, type 1 (ON) or 0 (OFF)-> click OK. Close the Registry Editor. Restart your machine for the change
About Nick
Nick is a Software Engineer. He has interest in gadgets and technical stuffs. If you are facing any problem with your Windows, feel free to ask him.