

Razer launched world’s first gaming mouse in the year 2006 with on-board memory. In 2011, Razer made a revolution by launching another gaming peripherals Synapse2.0. Synapse 2.0 is world’s first cloud-based gamming software configuration that saves all your settings to the cloud automatically and assign macros to any of your peripherals.
Latest version of Razer Synapse is Synapse 3. It is pre-installed in Razer laptops, but if you can download it if you want to use it with mouse and keyboard.
How to get it?
Razer Synapse 3 is supported on Windows 7, Windows 8 and Windows 10 and Mac also. After downloading it, you can see the green circular icon on the settings tray, or you can have it by searching on start menu. Click on the icon and select Launch Synapse.
First time users can get free registration option and after registration profile and settings of the device can be synchronized.
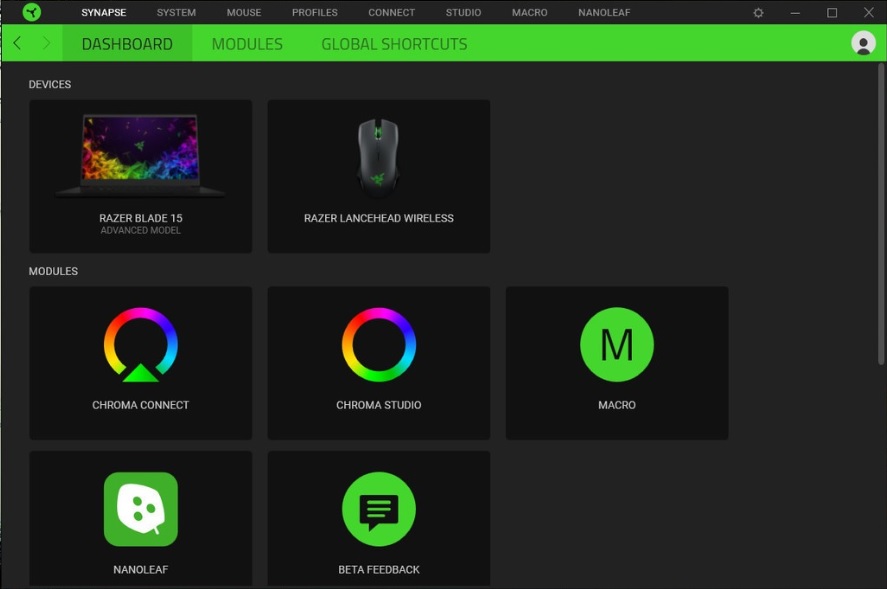
Different modules and settings options are available on the dashboard of the Razer Synapse software.
Razer Synapse can detect Razer branded hardware like mouse, keyboard automatically. If you are using Razer laptop, then you have system option to control varieties laptop features.
To get all latest versions of synapse 3 delete all supported peripherals from Razer laptop. If you face any difficulty to open Synapse 3 then uninstall it and reinstall with its latest version.
Dashboard
The dashboard of Razer Synapse software includes different settings and modules. From settings section you can control various features of your laptop. By default, module section includes Chroma studio to control light and macro suite for setting up keyboard sequences. From module submenu you can install extra module.
Razer Synapse configuration
Open Settings System option on your Razer laptop to configure different features of your system like keyboard binding.
The Profile section helps to configure different binding per game.
Razer Hipershift on the System section helps to add various function key. You can make any key or mouse button as Hipershift key. To configure Hipershift key, just click on the button Standard which is under the mouse image on Razer software.
You could bind right control key or fn key as Hipershift modifier.
Other than binding option, you have Lighting and Performance option. Click on the settings and you can easily modify the available options. Lighting section allows you to change the color of the keyboard keys and set up power saving option to backup your laptop when battery of the laptop gets reduced.
Performance section allows to adjust power of the fans.
By default, the system automatically controls the speed of fans to adjust system temperature but if you want to make your system cooler you can set it up from performance section. You can adjust refresh rate of the display too. Instead of 120Hz panel, if you use 60Hz panel battery longevity can be increased.
Configure Accessories with Razer Synapse
Click on the Mouse tab from the top bar and you will be brought to the key binding section from where you can modify various mouse button and set them as Hipershift key. From this section you can choose and drag any profile onto onboard memory. Click on the chip icon next to profile drop down menu to access device’s onboard memory. This feature helps when you move the mouse outside and use it with another device and you do not have full access of Synapse suite.
Razer launched an update version of wireless Razer Lancehead mouse with high configuration. Now you will get a lot of configuration options in lighting and performance. Reducing Chroma light, you can increase battery life of the mouse and you can set it to automatic turn off mode when your device is in idle mode.
Module Section
Module settings is to add extra features to the software. Go to dashboard and you can see Module option. Click on it to see the list of the ingredients. It’s not huge now but Razer updates it gradually. After installation each module will appear as it’s own tab on the top bar. You can remove or add extra module from the main module section.
Here is the list of modules which you can add or remove:
- Macro: This will help to record key sequence and run them automatically.
- Amazon Alexa: This will help to synchronize Razer laptop with external assistive speaker. The only disadvantage is that you have to turn it on manually. The speaker of your laptop can not start the speaker.
- Chroma Studio: It helps to modify lightning settings.
- Chroma visualizer: This will activate light according to game and music for an amazing experience.
- Chroma Connect: This will synchronize Razer Chroma RGB with games, other apps and other platforms.