The following article will help you to turn on or off Aero Snap in Windows 10. Standard window controls sometimes become the hard part if your Windows device has high resolution and on top of that features like multi tasking. In that case, Aero Snap somes to rescue. There are several shortcut keys for Aero Snap. by default it is turned on. if you want, you can turn it off also.
Windows + Left arrow
Windows 10 facilitates multi desktop tasking. If you want to snap the current active window to the left half of the screen, then you can use this shortcut.
Windows + Right arrow
Press this key combination to snap the current active window to the right half of the screen.
Windows + Up arrow
If the window isn’t snapped, then it will maximize the window. If the window is snapped to a side, then it will snap the window to the top quarter of that side.
Windows + Down arrow
This shortcut will minimize the window if the window is not snapped and will maximize if it’s snapped. If the Windows is snapped to a side, then this shortcut will snap it to a quarter and vice-versa.
Steps to Turn On of Off Aero Snap in Windows 10
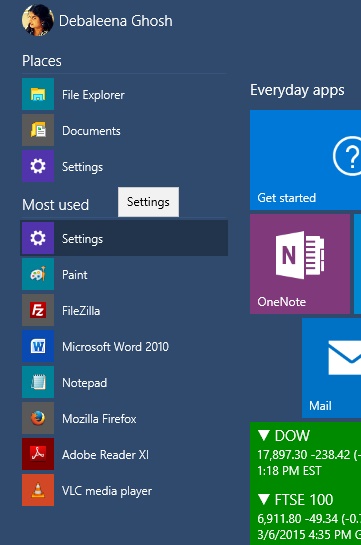
1. Open Start Menu and select Settings.
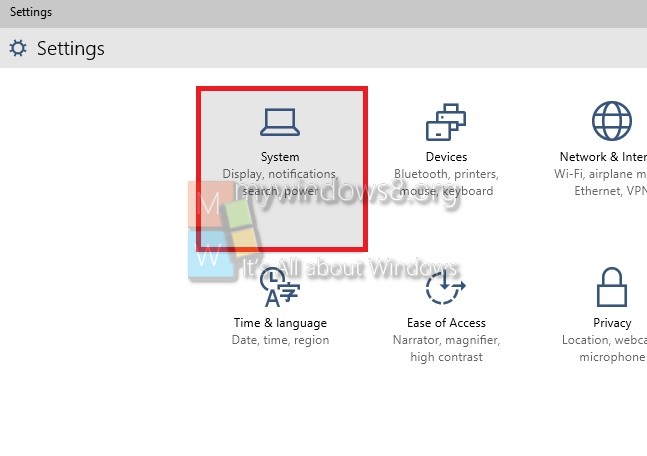
2. Now go to System.
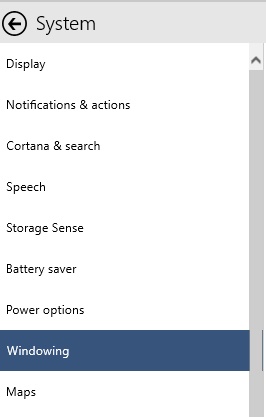
3. Go to Windowing.
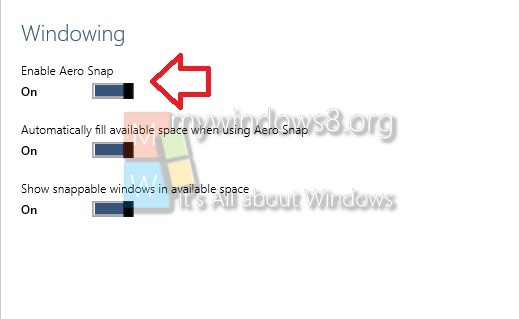
4. Now in the right panel, you will find Aero Snap feature. By default it is turned on which will be understood by the blue slider. if you want to turn it off, just tap it once.