HEIC is the acronym for High Efficiency Image File Format (HEIC). HEIC file format is nothing but an image container format that saves your phone storage. Images on iOS 11 and onwards, are saved in this format in order to save phone memory of iPhones. As we know that iPhone memory is not expandable, hence, the company has started using this format for photos. The HEIC image format has been developed by the Moving Picture Experts Group (MPEG) and is defined by MPEG-H Part 12 (ISO/IEC 23008-12). The efficiency of HEIC is twice that of a JPEG image. This means HEIC image can contain twice the information than that of a JPEG file of the same size. Moreover, the quality of HEIC image is better than that of JPEG. According to the specification mentioned in the definition of HEIF, it can also Efficiency Video Codec (HEVC)-encoded intra images and HEVC-encoded image sequences in which inter prediction is applied in a constrained manner. HEIC support has been included in iOS since iOS 11. Now that this is a nacent technology, mane platforms have still not gained full compatibility. The Windows operating system has not gained full compatibility with HEIC file format. So, you can understand the hazard that a user will face while viewing these photos on Windows PC.
It’s not that Apple has done nothing regarding compatibility. iOS 11 automatically shares HEIC files as the default JPEG format for apps, so you won’t notice anything when you share a photo on Twitter or Instagram or on Gmail. But if you are sharing any video and photo via cloud services like Google Drive, OneDrive, then the images or videos are transferred in HEIF formats only. iOS 11 also offers to automatically transfer photos and videos in a compatible format for Mac or PC users. Still, sharing and importing is not always smooth and issues arise while conversion.
But you need not worry anymore. Here is an amazing software that we have tested. The HEIC Image and Video converter from Joyoshare for Windows is a super awesome HEIC to JPEG Converter software that can seamlessly convert HEIC files to JPEG, PNG, GIF, BMP etc., without degrading the image quality.
1. So, first you have to download the Joyoshare HEIC Converter for Windows. The software has both free and Paid versions.
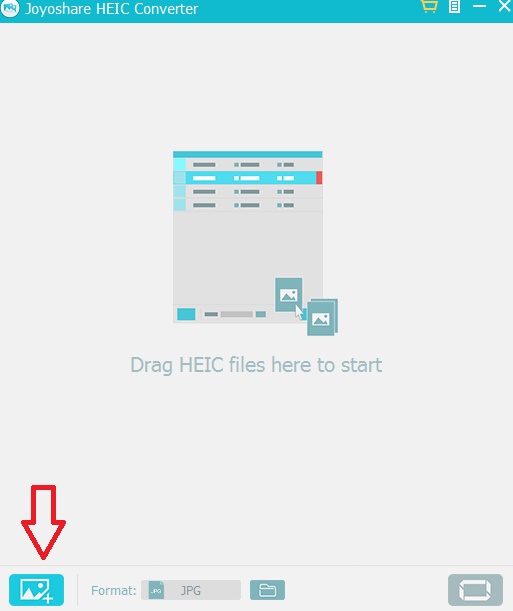
2. As you download the software, install it. The application opens. The user interface looks like this. Click on the Add image icon located at the bottom left corner of the screen or simply drag and drop the file.

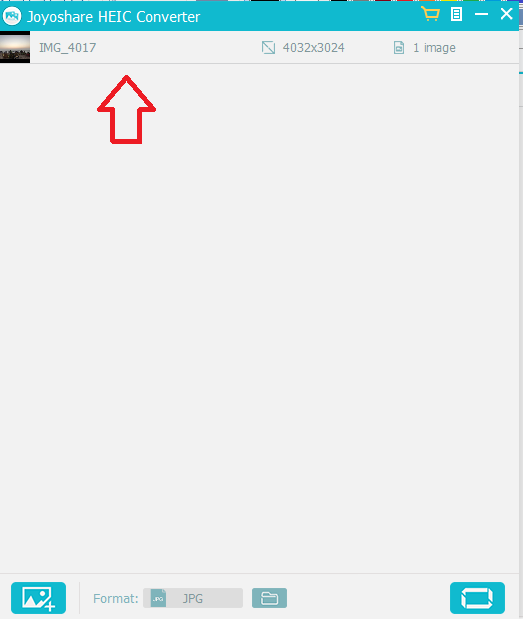
3. Use the File browser to add the HEIC image. The file browser is not designed well and has the UI just like that of Windows XP. So, I was not quite impressed with the in-built file browser of the HEIC converter. The image is added instantly.

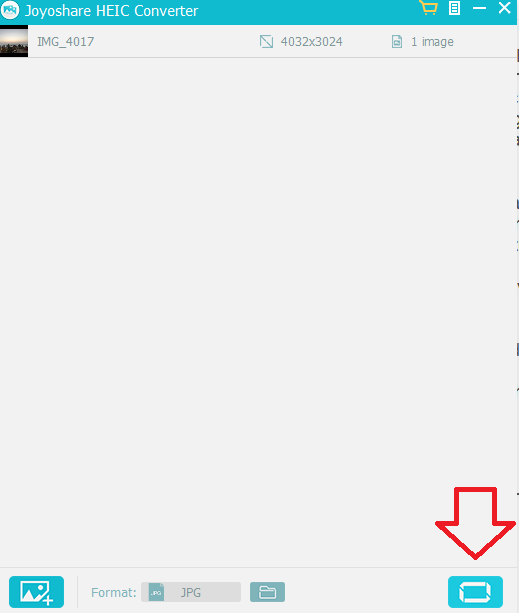
4. Now click on the convert button located at the bottom right corner of the screen.

5. The conversion is done and the location of output file opens immediately.
That’s all about the software. It is extremely easy to use and no unnecessary complexity has been given to this software. However, one thing that I personally did not like is the file browser of the application. It is indeed backdated. The free version will also give your edited picture the watermark. So you cannot get your desired image unless you subscribe to the paid version. Other than these two factors, the software is really a great companion for iOS users. It enables you to convert HEIC to JPG, PNG, GIF, TIFF, BMP, etc. in one click. This instantly convert HEIC images individually or in Bulk, adjust photo quality in your way.

