Macrium Reflect is a highly efficient System Image backup software for Windows operating system. the following tutorial will help you to create and restore system image backup in Windows 10. there are two types of Backup offered in this application: Full/Differential and Incremental.
The salient features of this software are:
Differential Images
Differential Images for faster backups and reduced storage space.
Auto verification
Automatically verify images after creation to ensure integrity.
Pre-defined backup plan templates
Macrium Reflect backup templates allow for quick creation of scheduled backups.
Windows PE rescue environment improvements
If additional drivers are required for disk or network access, they are now automatically identified and if possible copied from the host operating system.
You can now add a boot menu so you can easily restore a system image without inserting rescue media.
Steps to Create and Restore a System Image Backup Macrium Reflect
The Main steps for creating and restoring system image backup Macrium Reflect are:
1. Install Macrium Reflect
2. Create Rescue Media
3. Create a Full Backup image
4. Create Differential and / or Incremental backups
5. Restore a system backup
6. Service, update & upgrade a Macrium Image
I. Installing Macrium Reflect
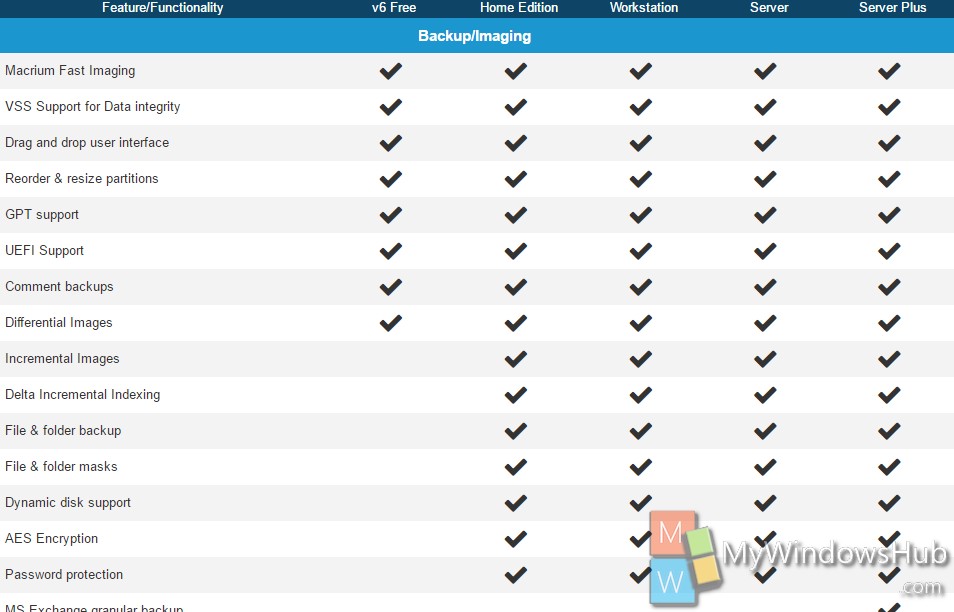
1. The software is available in Free edition and Home Edition. The free edition lacks some facilities compared to the Home Edition. You can download the free version or the paid version here.
2. Now check that the version is set to free. You can change it if you want. If you wan to change the default save location of the installation, which is Downloads, then you can do it.
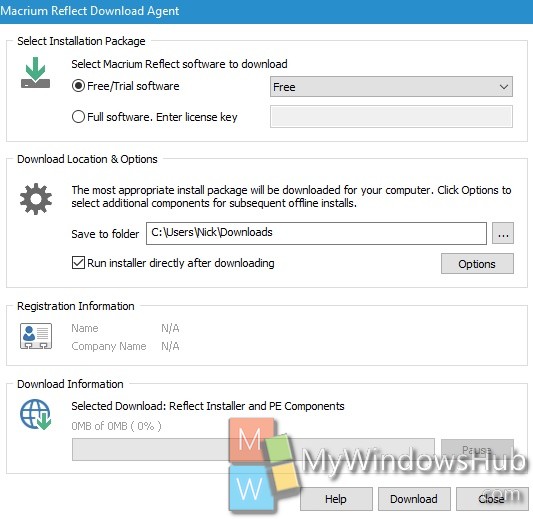
3. Click Download.
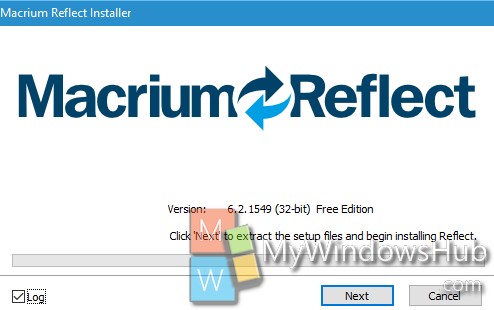
4. Installation will take some time.
II. Creating Rescue Media
1. When the app is installed, go o Desktop and double tap on the Macrium Reflect Shortcut.
2. You will be prompted by UAC if you want to open the Rescue Creation wizard. Click Yes to continue.
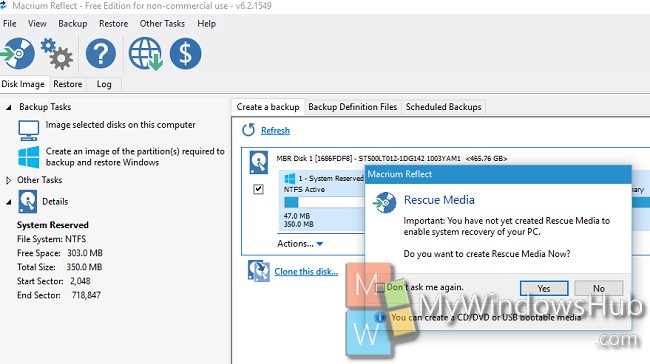
3. The Rescue Media Wizard will open. Click on Next and keep on following instructions.
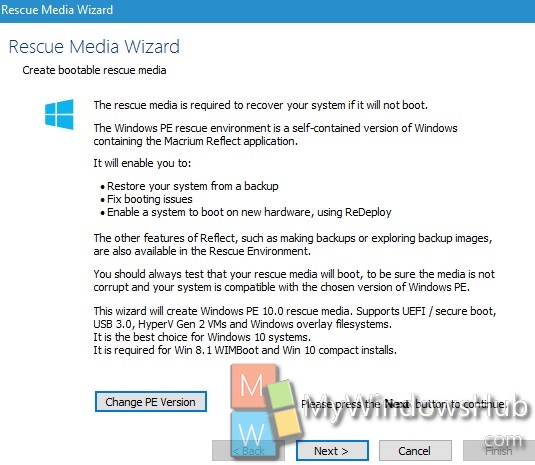
4. The wizard will ask for your permission before downloading a file from Microsoft. Allow it.
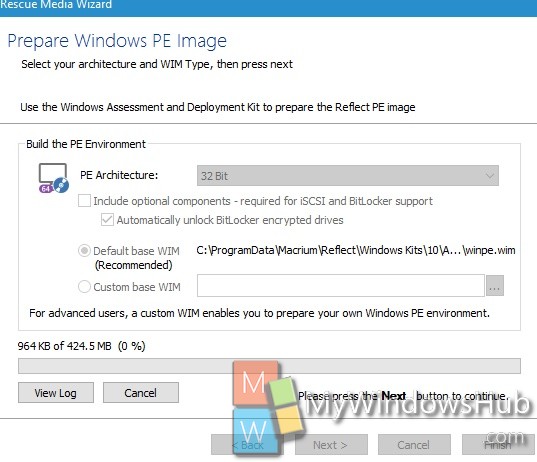
5. Downloading the file from Microsoft will take a long time but for these types of processes, you need to have patience.
6. Insert A DVD/USB to create Rescue media. Click on Finish.
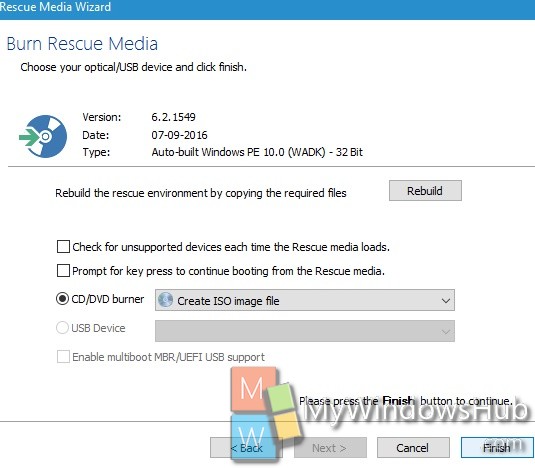
7. You will be notified when Rescue Media is created.
III. Creating Full Backup Image
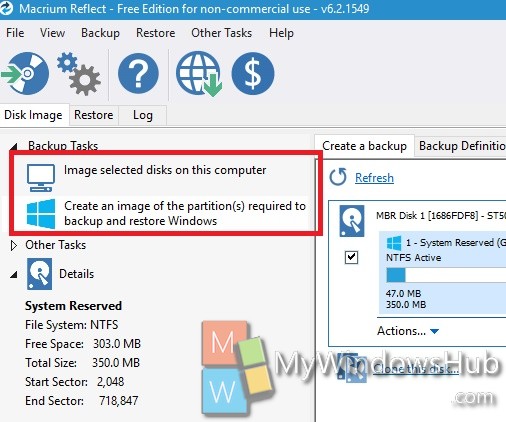
1. You just know that by default, Macrium Reflect opens showing Backup (Home edition) or Disk Image (Free edition) tab. In the right panel, all connected disks will pop up with selection boxes for each disk or partition.
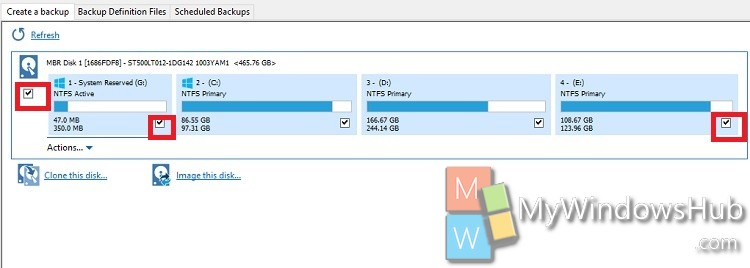
2. Now, navigate to the left panel. If you want to image all selected disks and partitions or only the disks and partitions required to restore Windows, select accordingly. The latter would only select system reserved and C: partitions on a legacy BIOS / MBR system, or all EFI system partitions and C: partition on a UEFI / GPT system.
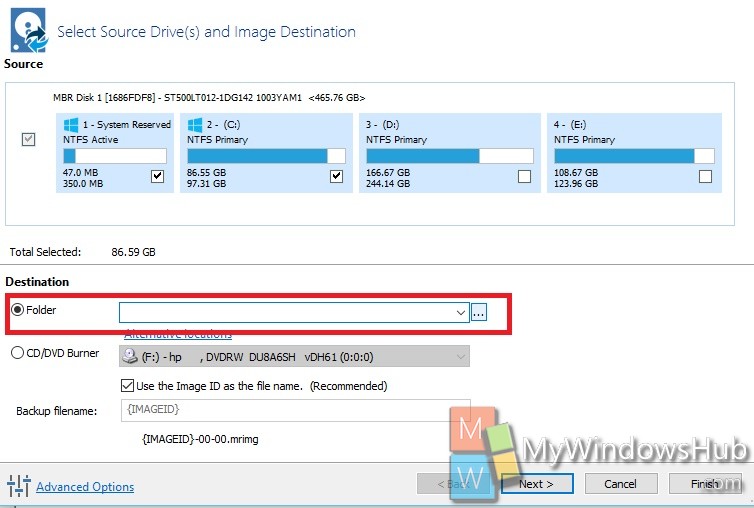
3. Select a destination folder.
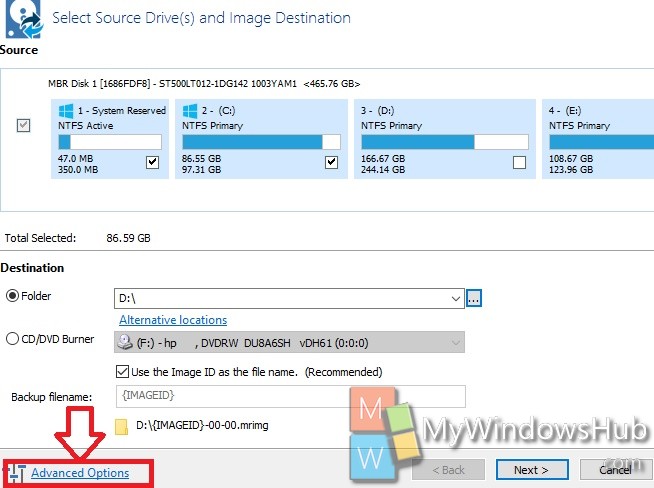
4. Next, click on Advanced Options.
5. Select compression level, which is recommended Medium.
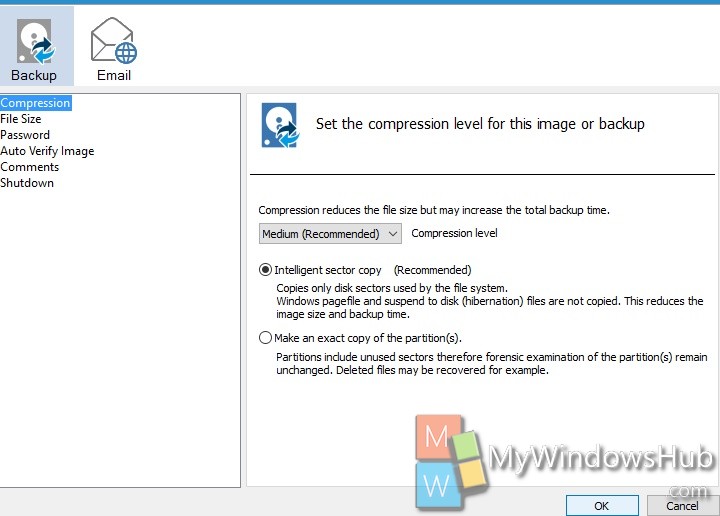
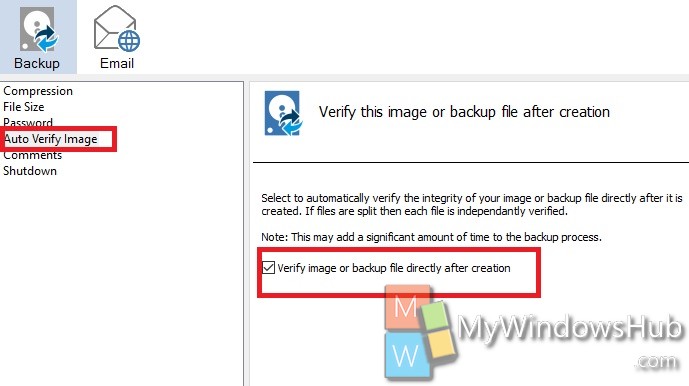
6. In the left panel, there is a menu called Auto Verify Image. Select it. In the right panel, click on the checkbox Verify image, as shown in the screenshot below. Click OK. You can add comment like Full backup or differential backup by the comment menu in the left pane.
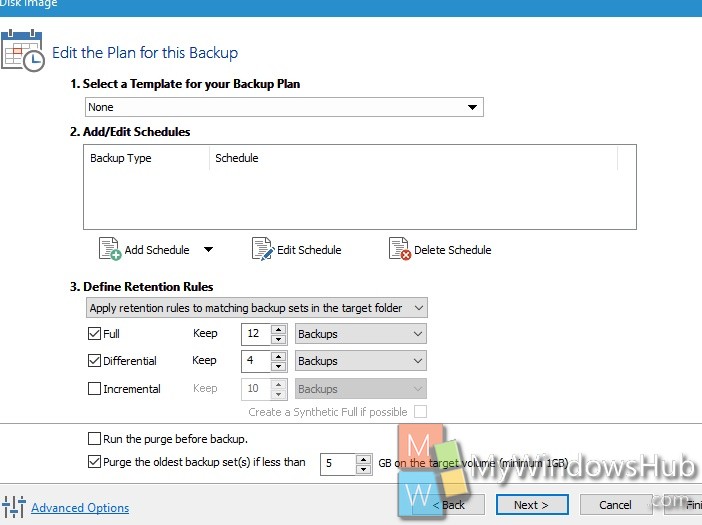
7. Make any edit if you want. The full and differential backup are available but incremental backup is not there for free version.
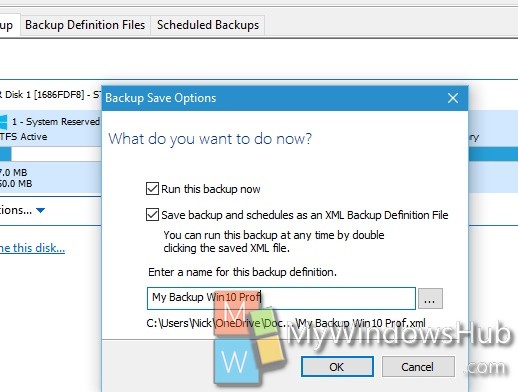
8. Click Finish. Name the backup.
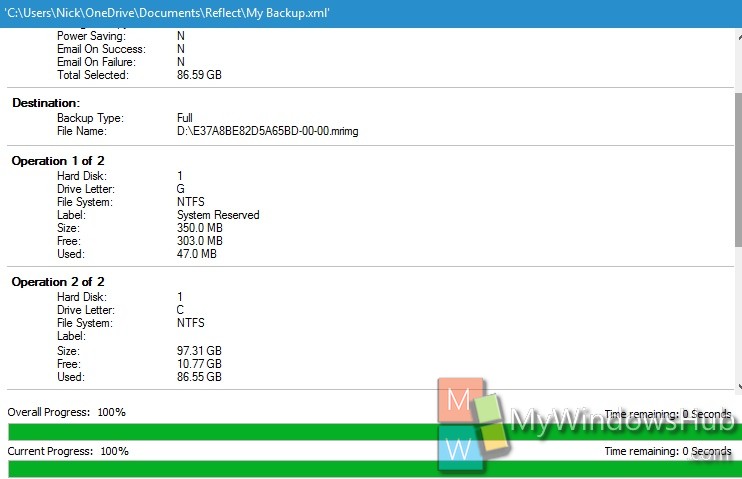
9. Backup created.
IV. Restoring System Backup
You have the independence to choose between full system backup or differential backup.
Restoring a full backup– Restores only the full backup, not differential or incremental images created after it.
Restoring a differential backup– Restores only the last full backup and changes saved in selected differential backup.
Restoring an incremental backup will restore set of backups (full, differential, incremental) up to selected incremental backup.
2. You can restore an image backup from Desktop, but it is always recommended to restore only when PC is booted with Macrium Rescue device you created in Step II. So use WinPE environment for restoring backup image.
3. Macrium’s WinPE environment looks a bit different from that when Reflect is run from Windows desktop. Select Restore tab and either browse to the image you want to restore, or select one from right pane.
4. Start Restore.
5. Once done click Finish.
6. You will be warned that drives will be overwritten. Click Continue.
7. Click reboot button to start your PC after restoring is completed.
V. Service, update & upgrade a Macrium Image
Macrium viBoot is a new application from Macrium Software which is a part of Upgrade section. This application allows users to mount a Macrium system image (full, differential or incremental) as a virtual machine to extract files from it.
That’s all. Since, I have used the free version, I couldn’t show the steps for incremental backup.


Hi, Really a nice tutorial. But i want a clarification on point no 7 and other things, before i start image backup.
Is the full backup means that the entire selected drives including the default selected c and reserved drives? on a particular time?
What is 12 backups shown in the diagram in point no.7 full backup?
Should i need to check verify in advanced option? Will it not take time ? pl explain
Can i prepare restore disk after the back up , as separately in usb? Does the USB has to be made bootable before using macrium reflect free?
Can i expect answers from you on these. I have not used this before, and so I ask.
If i select all the drives, will it copy the application and other data files as in the pc at the time of take of back up. please