

At times when DNS servers do not run at high speeds owing it to your browsers looking up the IP address of every web site you visit, you would want it to run faster.
The work of DNS servers involves mapping of the IP addresses of the domain name you search for. When you search for a particular domain name in the browser, your PC links it with the DNS which in turn looks up for it in the list of IP addresses for that domain name. Once a match is found, your PC displays the site you have been looking for. The worry is that, sometimes, providers’ DNS Servers can be slow in performance. However, this can be handled when you use OpenDNS or Google DNS. GoogleDNS and OpenDNS maintain their own public DNS. These are free to use and are a lot faster and reliable. All you have to do is, enable them on your system.
This feature is available for Windows 7 and higher. Follow the steps to get the work done easily.
Steps To Switch To OpenDNS Or Google DNS To Speed Up Web Browsing
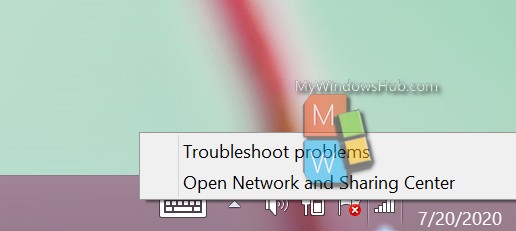
Go to the rightmost corner of your desktop on the taskbar and right click on the network status icon. It will display options as “Troubleshoot problems” and “Open the Network and Sharing Center” on the context menu. You have to choose the latter.
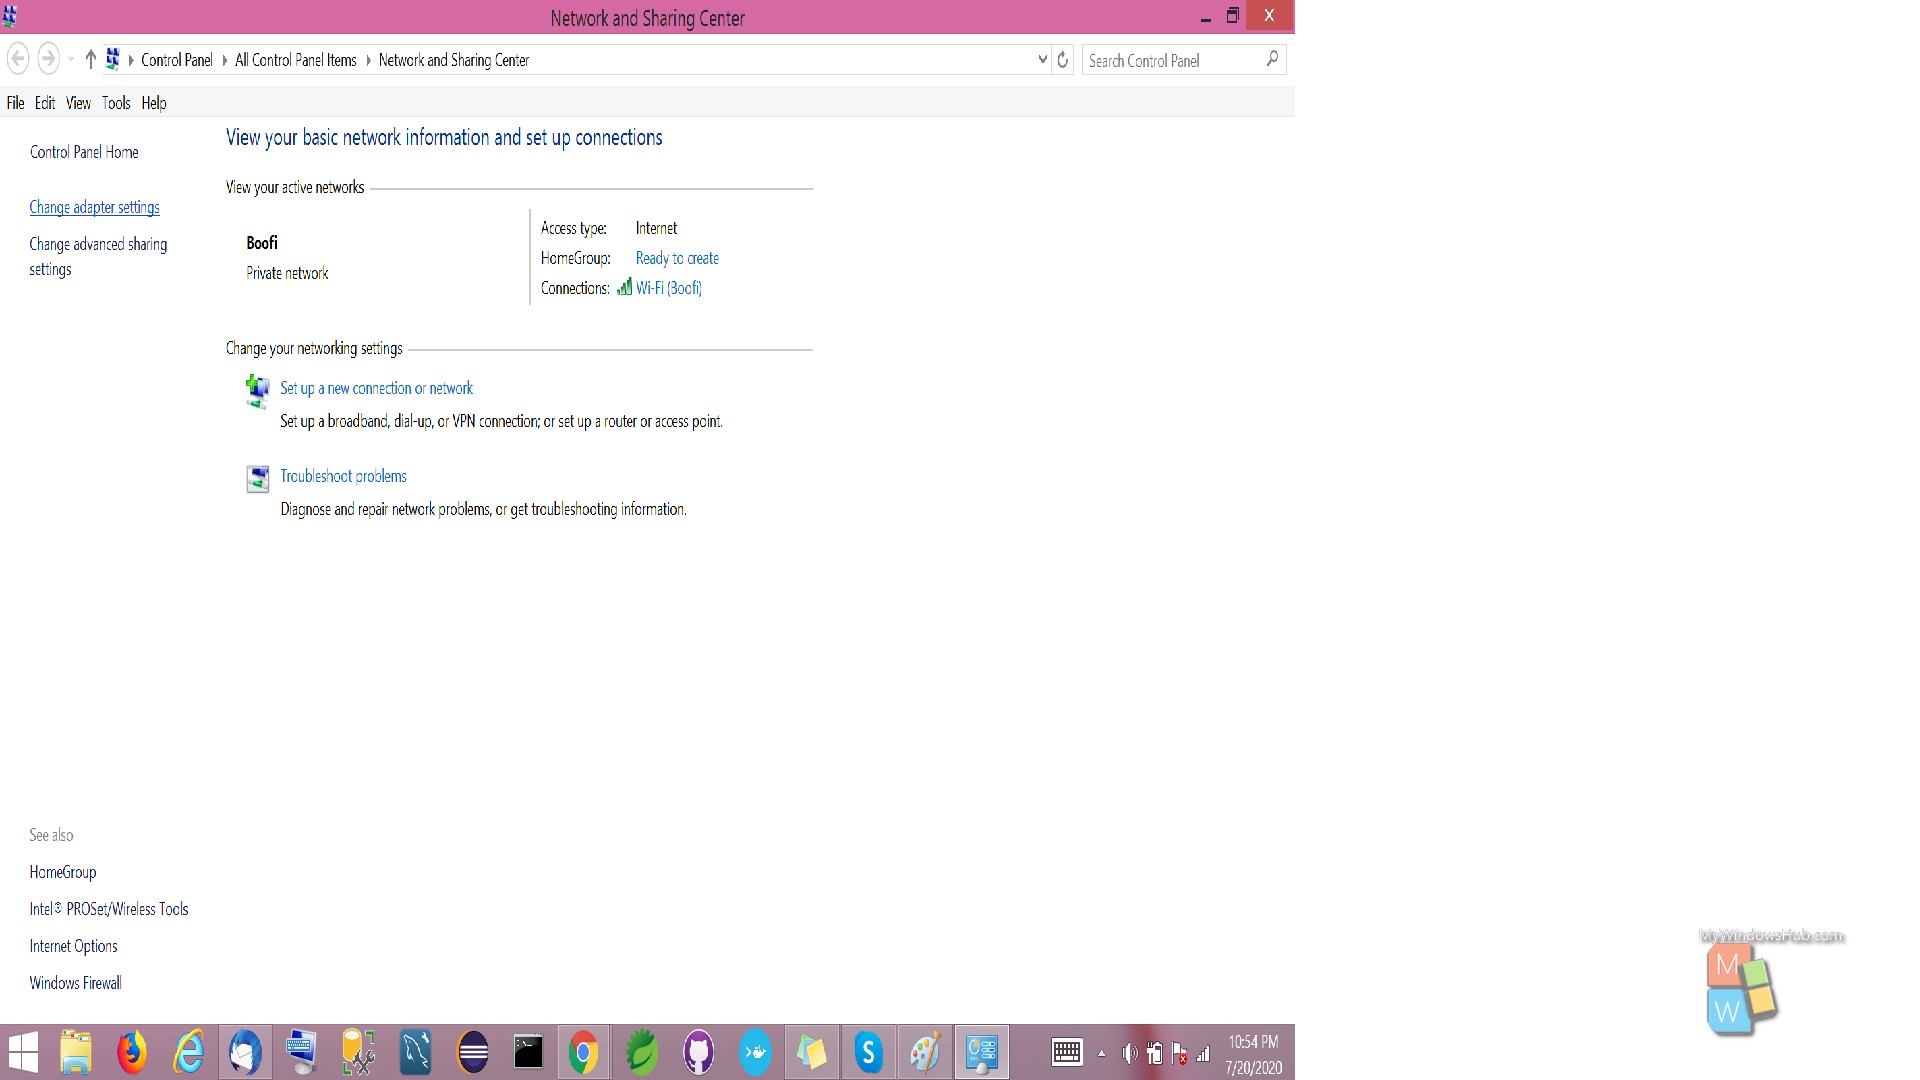
It will take you to the “Network and Sharing Center”. On the left window, you will see a few options. Choose the “Change adapter settings” option.
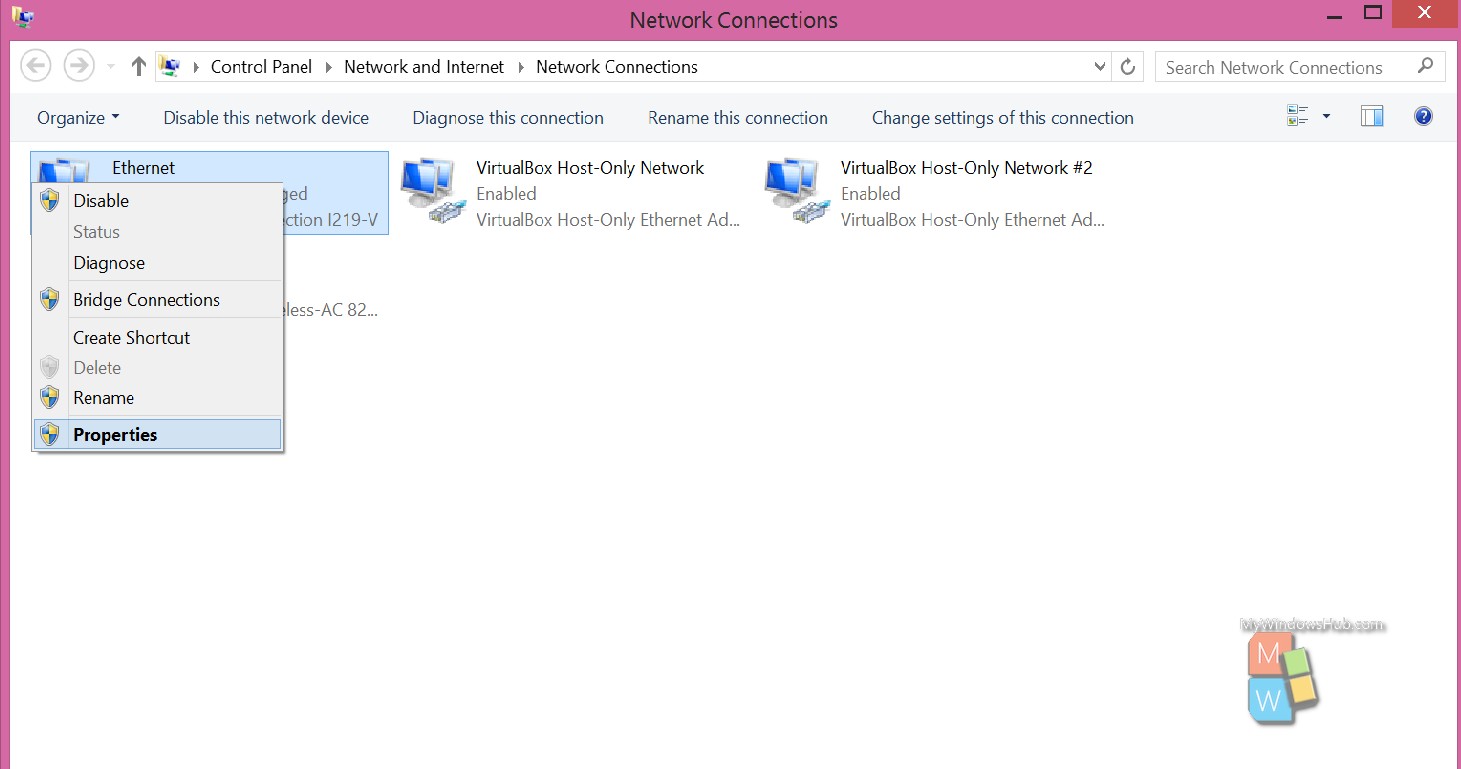
This will tell you to “Network Connections” that displays all the connections. Right click on the connection you wish to change the DNS settings for. From the menu, choose “Properties”.
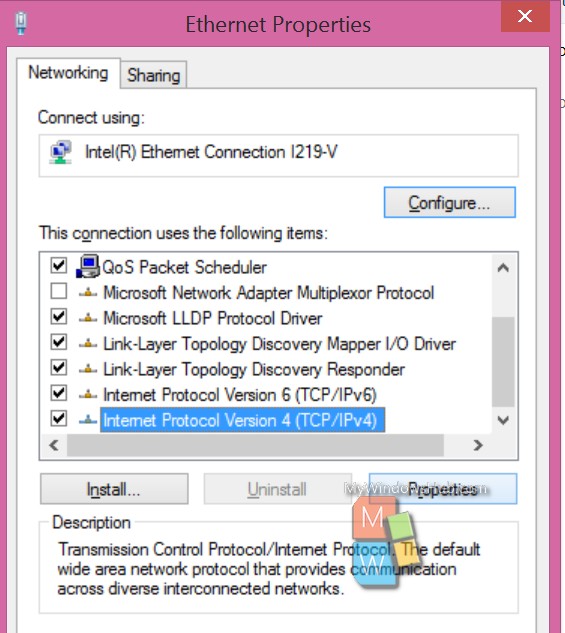
Once the Properties window opens, scroll to find “Internet Protocol Version 4 (TCP / IPv4)” on the list and select the same. Next, click on the Properties button mentioned below the list.
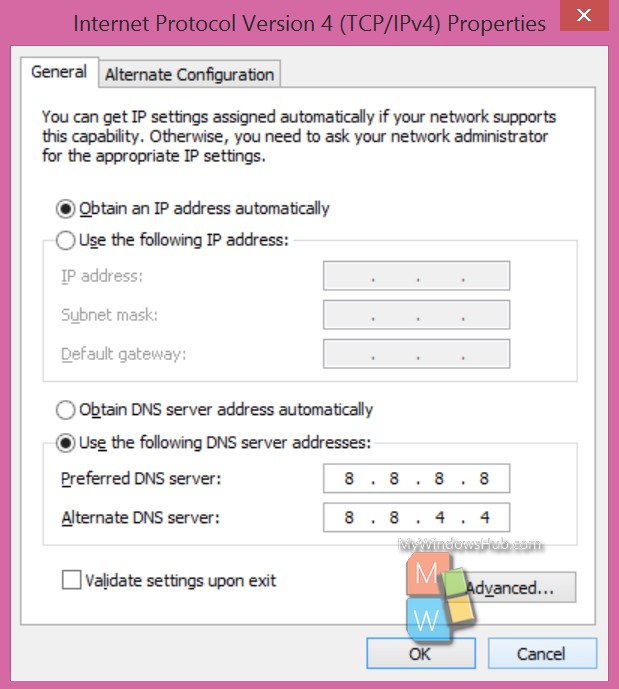
The “Internet Protocol Version 4 (TCP / IPv4) Properties” window shows the DNS settings in the bottom pane. Choose the “Use the following DNS server addresses” option instead of the default.
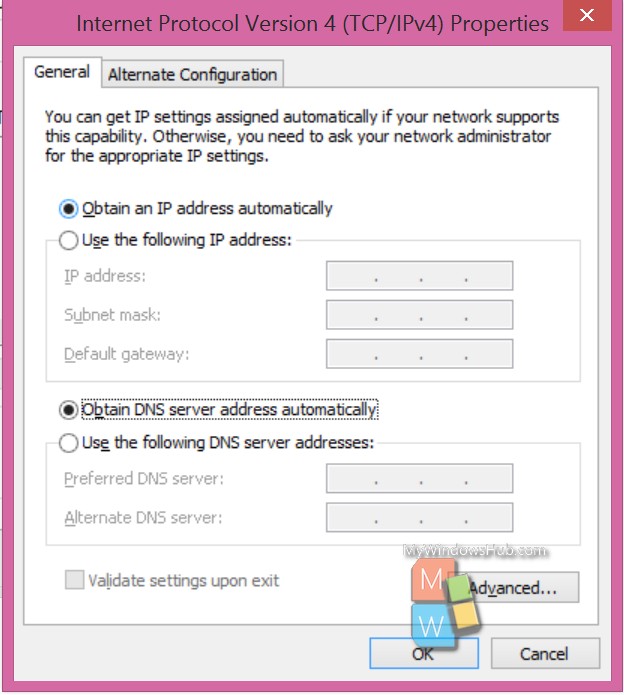
Next, type in the IP addresses for the preferred-alternate DNS servers you wish to use. Check for the details below:
Google DNS
Preferred: 8.8.8.8
Alternate: 8.8.4.4
OpenDNS
Preferred: 208.67.222.222
Alternate: 208.67.220.220
Choose any DNS server you want to use and type in the respective IP addresses.
Next, just go ahead and click okay. Your work is done!
From here onwards you will be using Google DNS . With Google DNS you will get faster and more reliable experience. The difference might not be steep, but you will surely have a better and smoother experience.
About Ankita Mohanty
Ankita Mohanty is a Software Engineer who has the passion for content creation, tech and travel. She believes in that there's nothing in this world that's unachievable when you work hard for it.