

Your Windows PC or laptop has a default name. You can change that name anytime. The process is very simple. In this article, I will show you how to rename your Windows 11 PC.
Steps To Rename Your Windows 11 PC
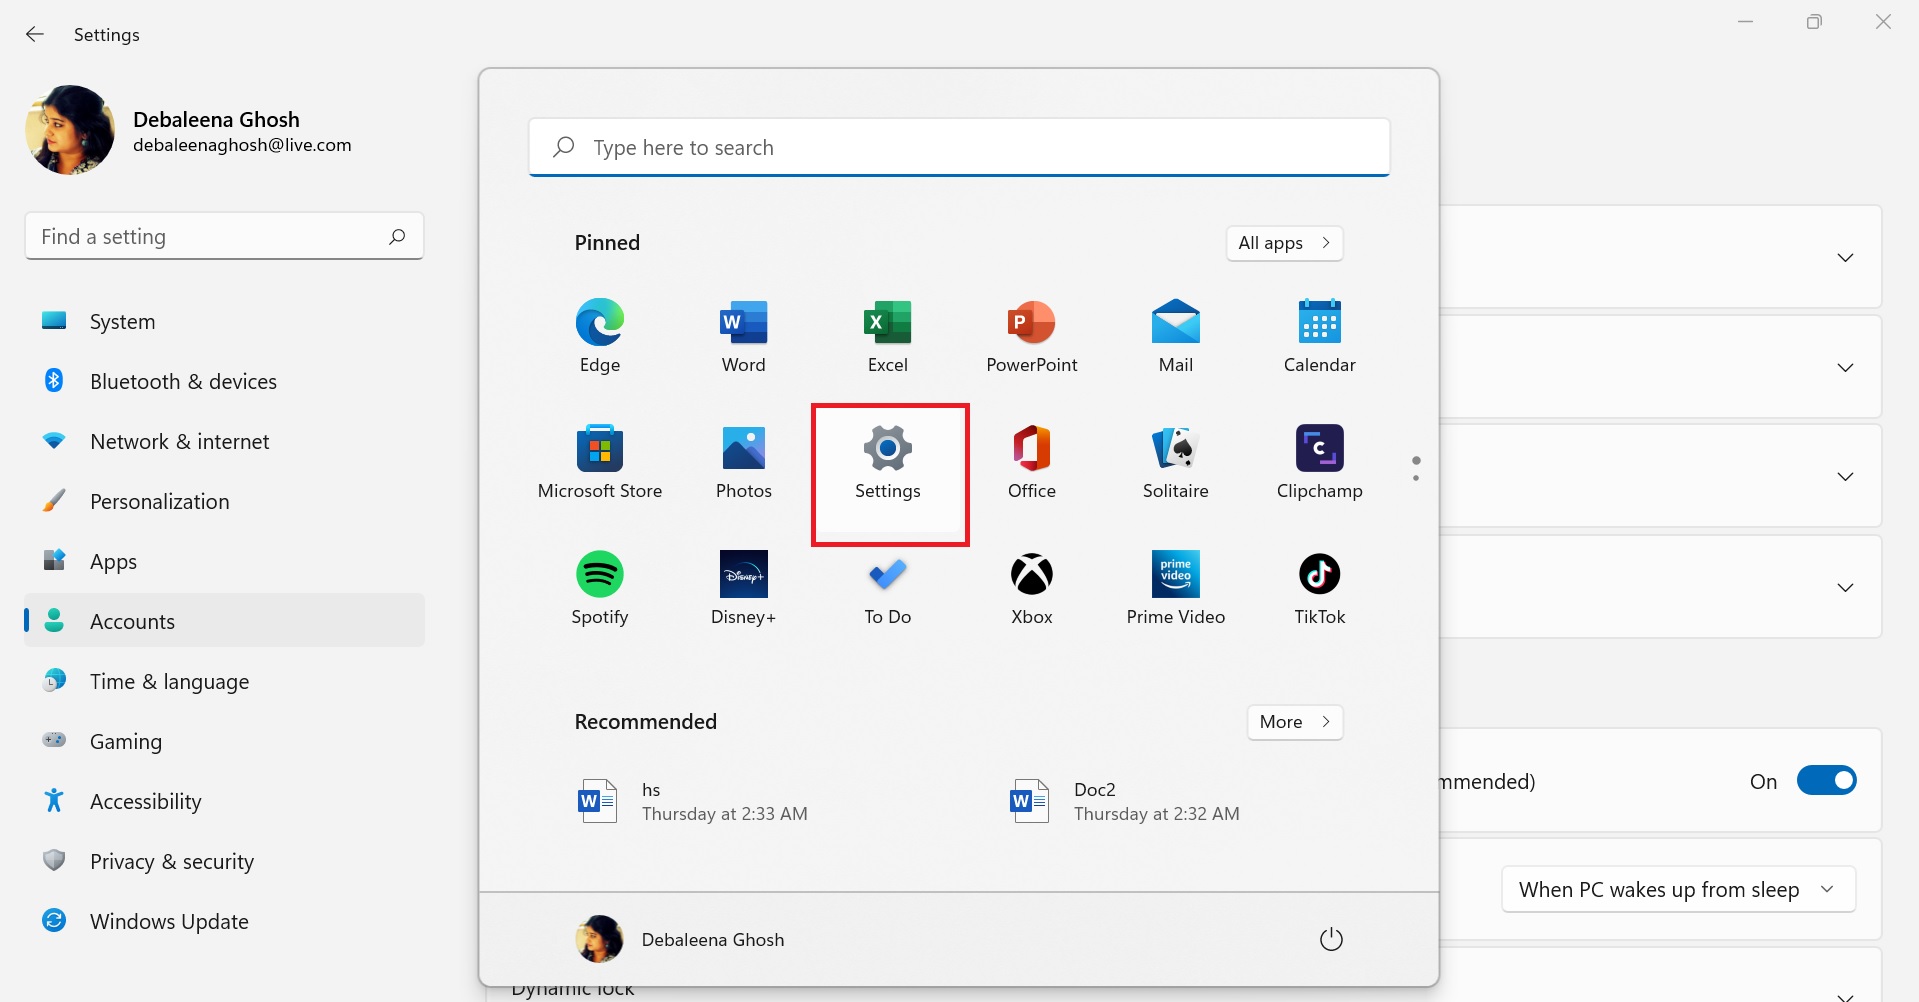
1. Tap on the Windows icon from the taskbar, and go to Settings.
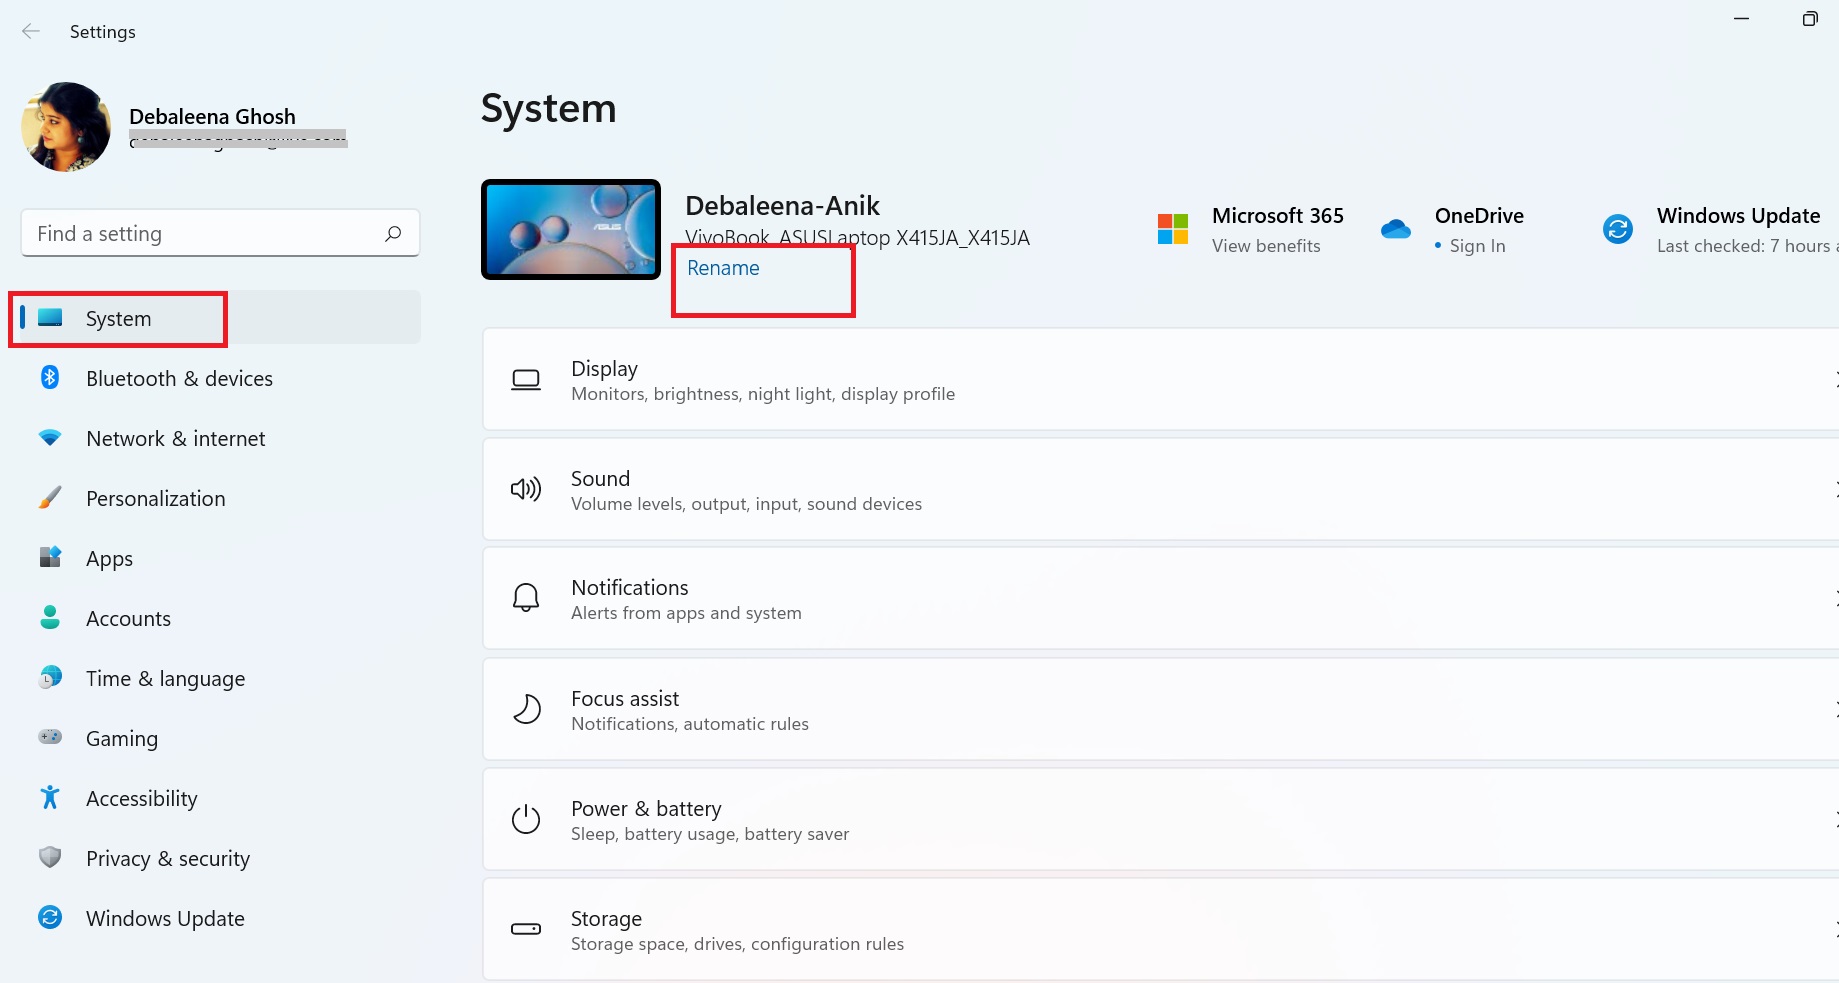
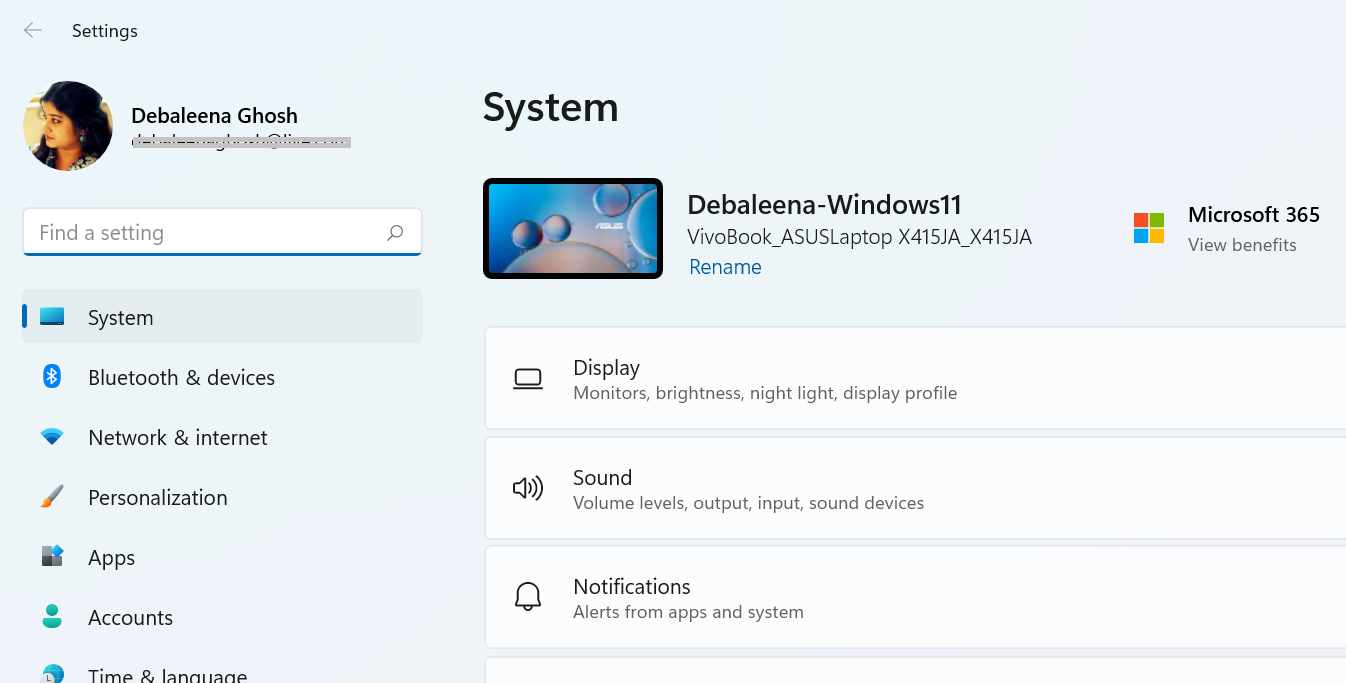
2. In the left panel, click on System, and then go to the right panel and check your PC name. Under the name, there is an option called Rename. Click on it.
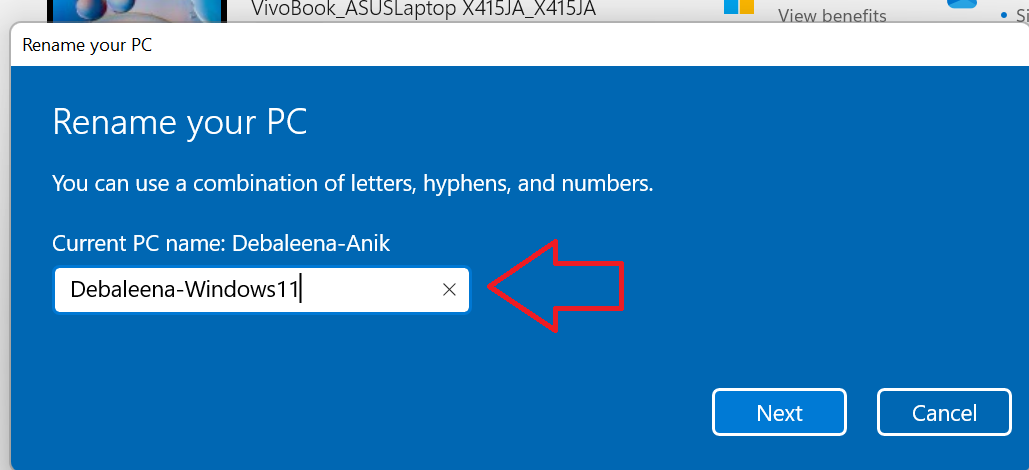
3. Now, type your preferred PC name and click on Next.
4. The name is changed. You can restart to see the change.
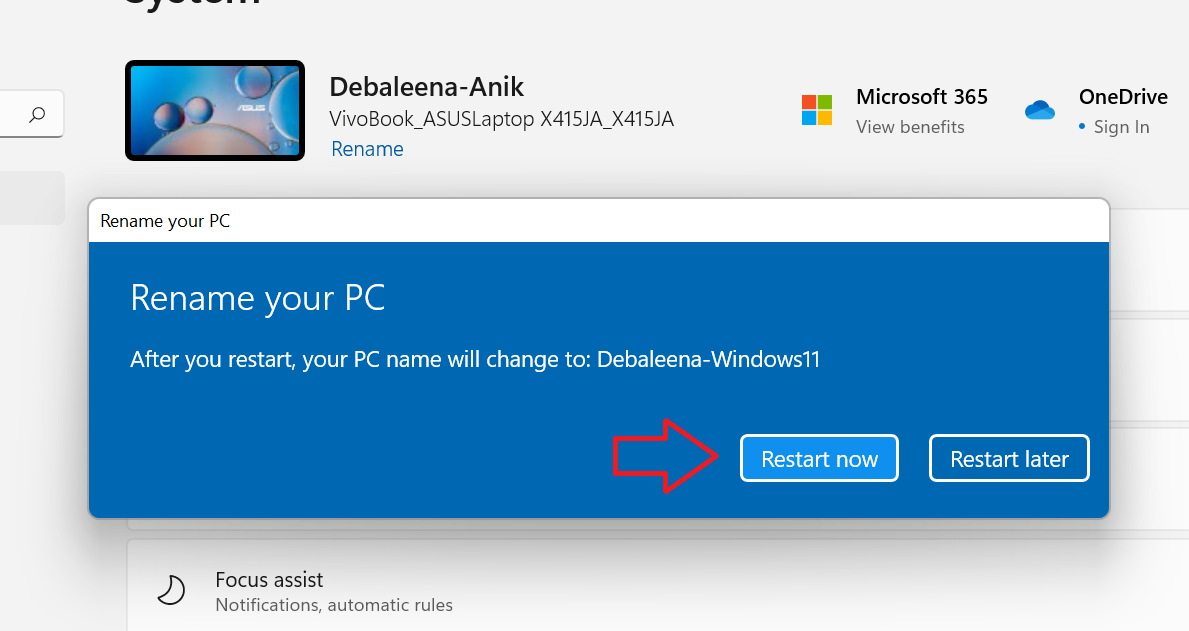
5. After restart, you can find the updated PC name.
That’s all!