In our previous article, we have explained what is wsappx and why it is consuming so much resources in the background while using the Windows Store. In this article, we shall be discussing a few of the techniques to fix this issue, that eventually leads to substantial performance improvement.
Steps To Fix The Performance Issue With Wsappx On Windows 10
#1 Disable the Windows Store:
Windows Store is the prime reason for wsappx high CPU and disk usage issues. You can disable it either from the Local Group Policy or Registry editor.
#1.1 Using Local Group Policy:
- Press Windows + R to open the Run dialog.
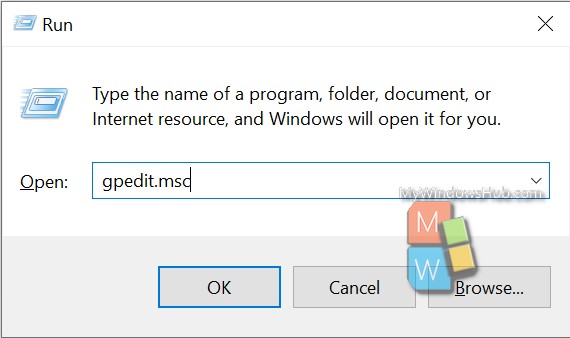
- Type “gpedit.msc” and hit enter to open local group policy.
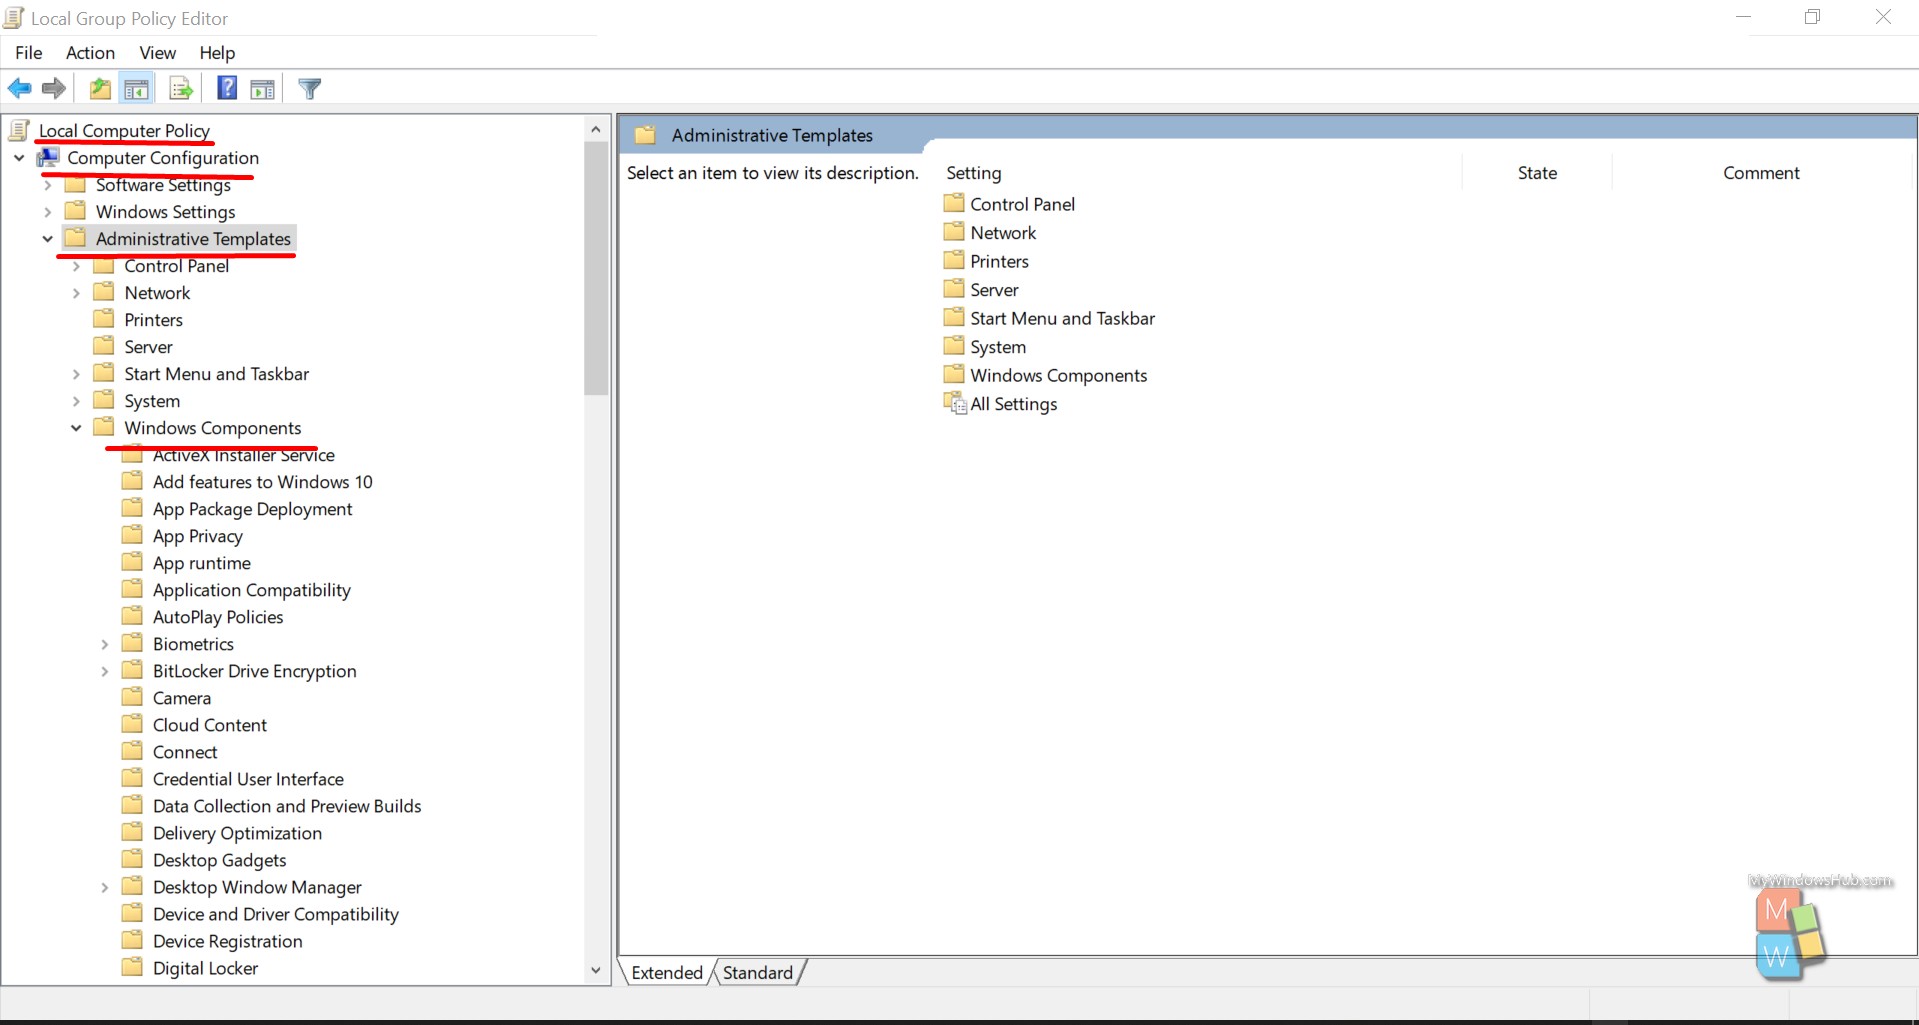
- Open Local Computer Policy and go to the Computer Configuration section.
- Click on the “Administrative Templates” and expand the “Windows Configuration” menu.
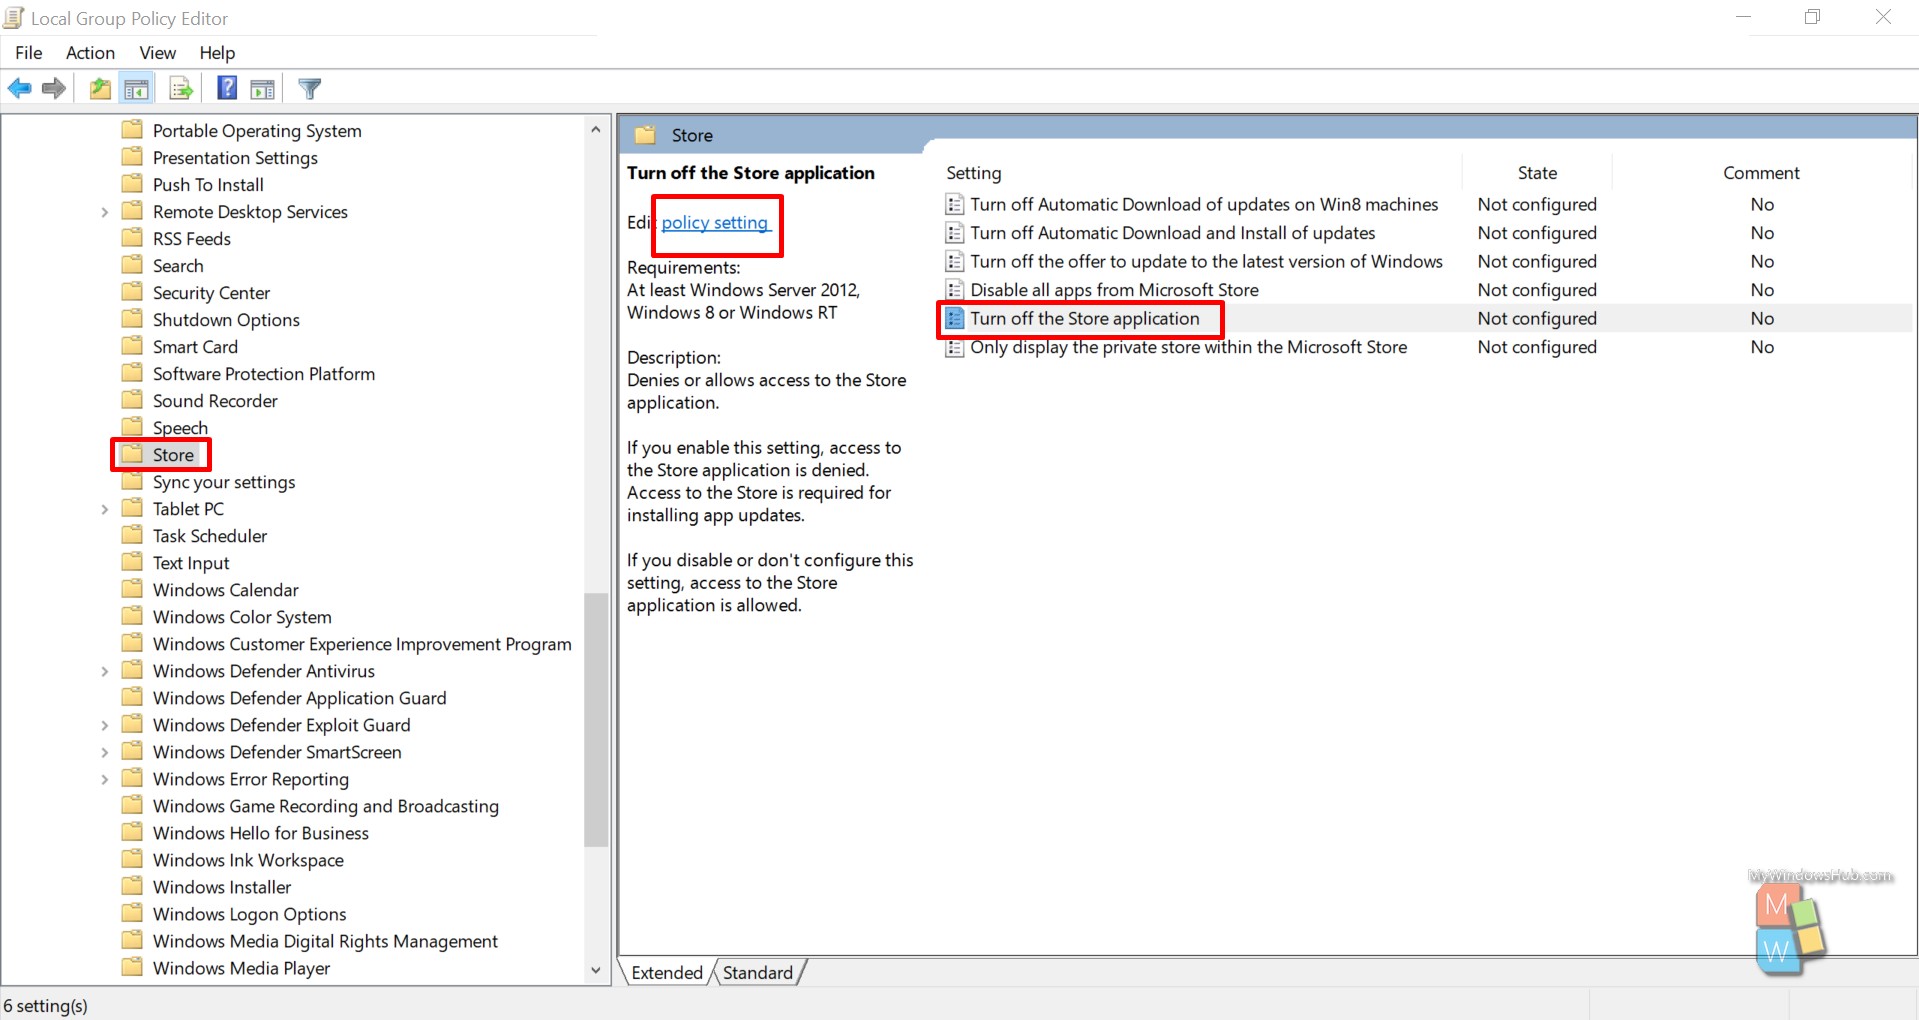
- Expand the “Store” menu and click “Turn off the Store application” and click on the “Edit Policy setting.”
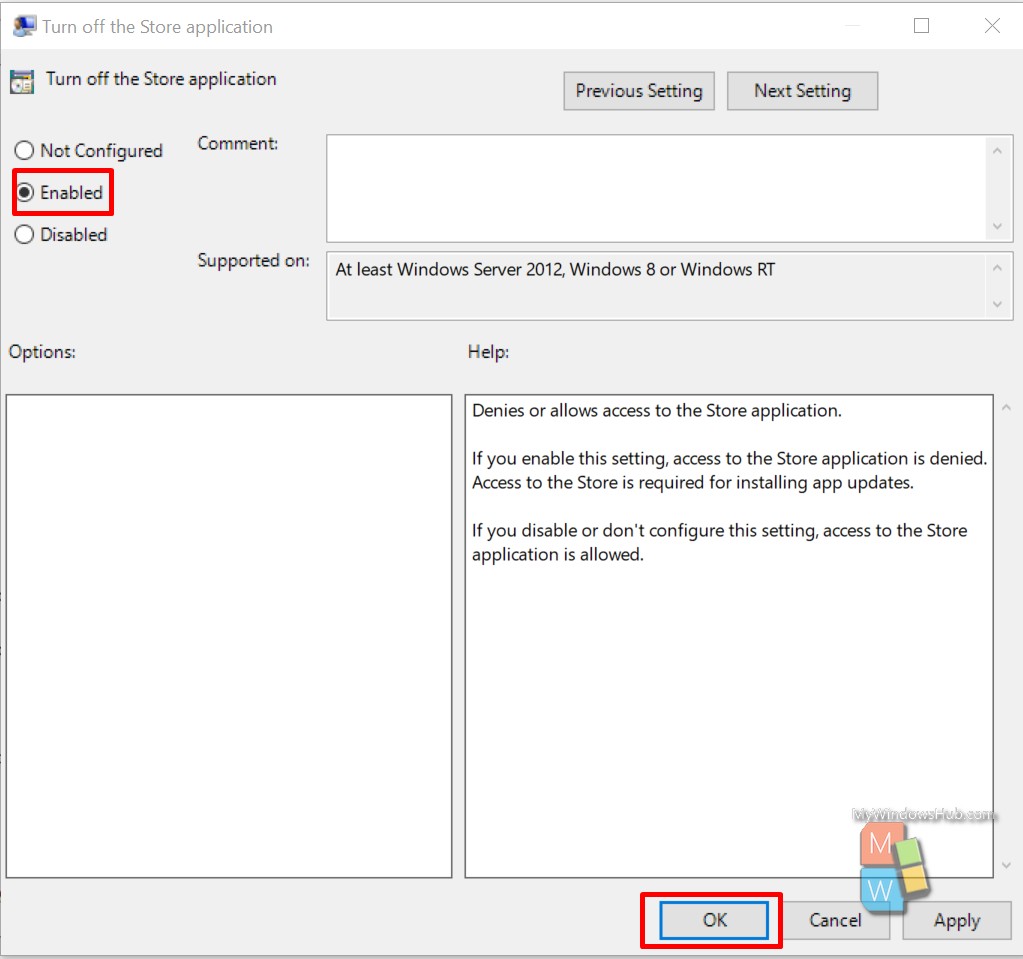
- Check the “Enabled” checkbox and click the OK button to save the changes.
After saving the changes, restart your system and check the Task Manager, whether the high CPU, disk usage problem is fixed. If it doesn’t work for you, please follow the second approach, i.e., disabling the Windows Store using the registry editor.
#1.2 Using Registry Editor:
- Press Windows + R to open the Run dialog.
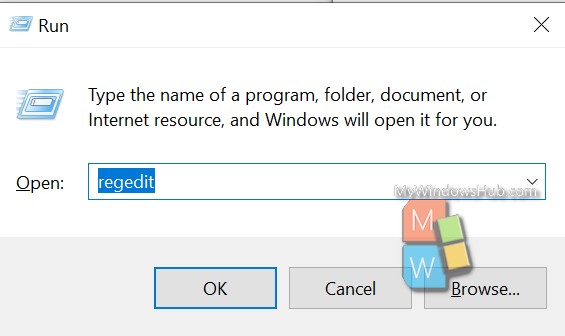
- Type “regedit” and hit enter to open the Registry editor.
- Navigate to the below-mentioned path,
HKEY_LOCAL_MACHINE\SOFTWARE\Policies\Microsoft\WindowsStore
Note: If the WindowsStore key is not present, then create it.
Please create a new DWORD value named DisableStoreApps and set it to value 1.
- You can download and execute the registry file to perform the above operation without even opening the registry editor,
Enable Windows Store:
Disable Windows Store:
Based on your Windows version, the above approach might not work, so you might need to block the Windows Store app completely through the firewall.
#2 Increase the Virtual Memory:
You can somehow reduce the strain on the physical resources by extending the virtual memory of your system.
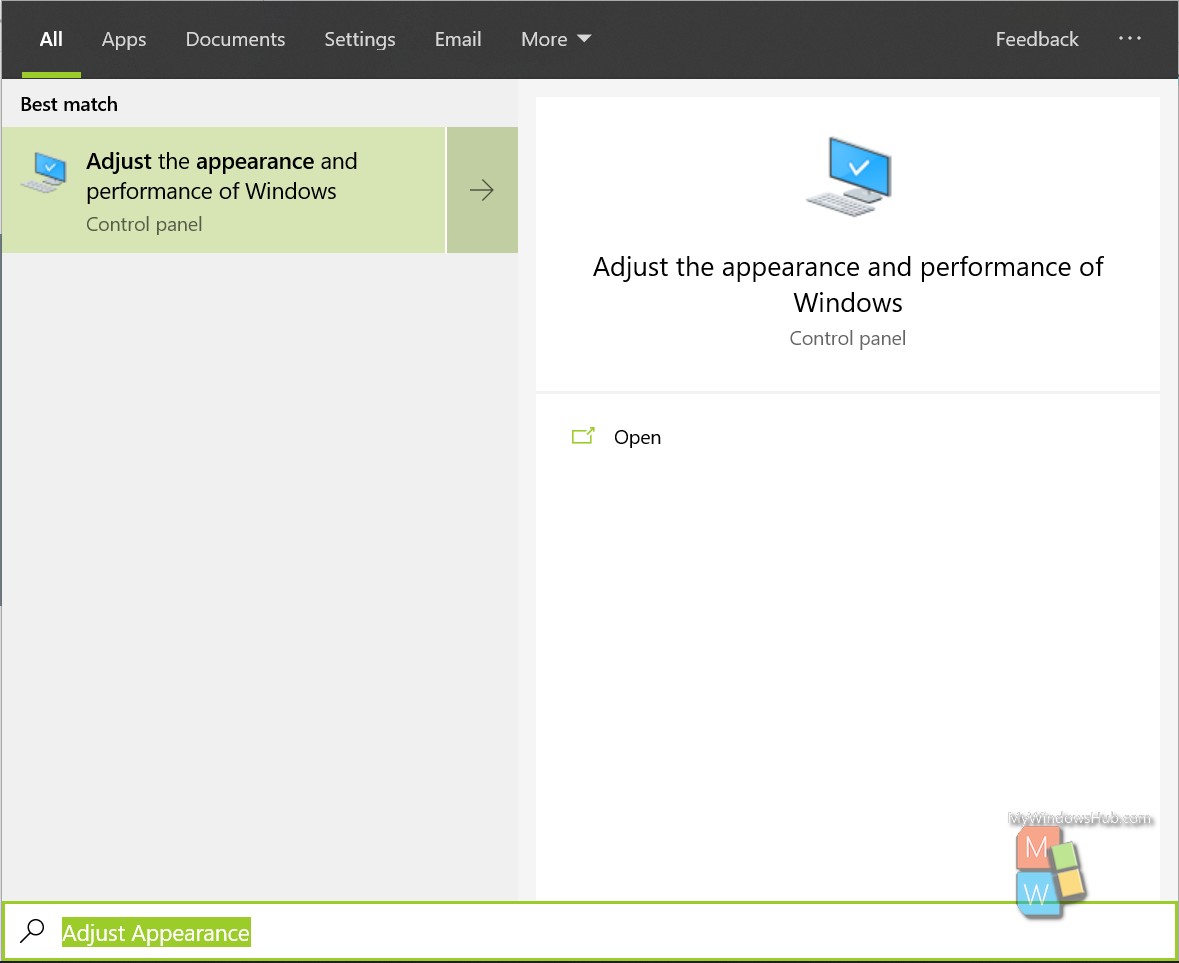
- Type “Adjust Appearance” in search and hit enter.
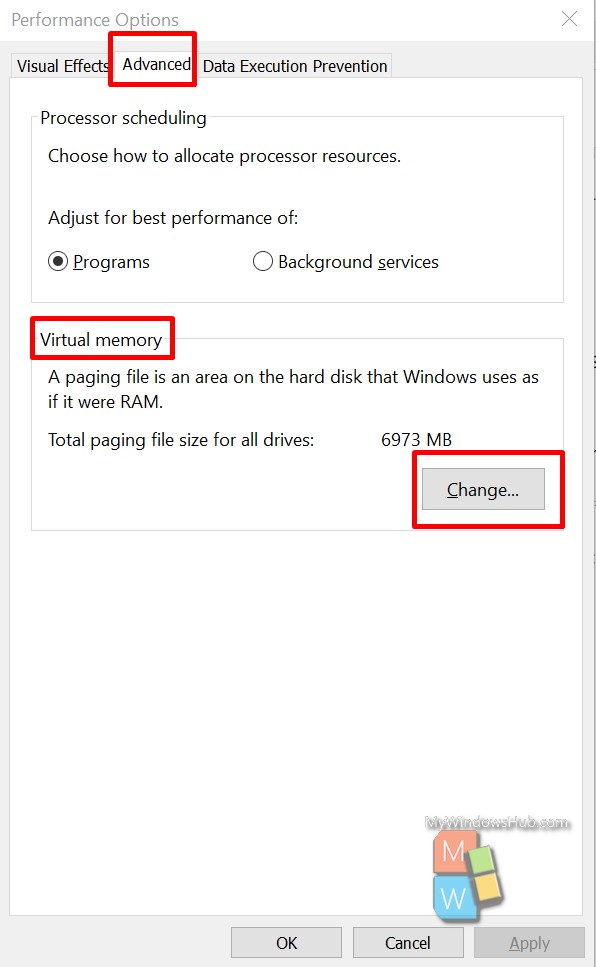
- Go to the “Advanced” section and click on the “Change” button under the virtual memory section.
- Uncheck the checkbox “Automatically manage paging file size for all drives,” then select the OS drive and click the “Custom Size” button.
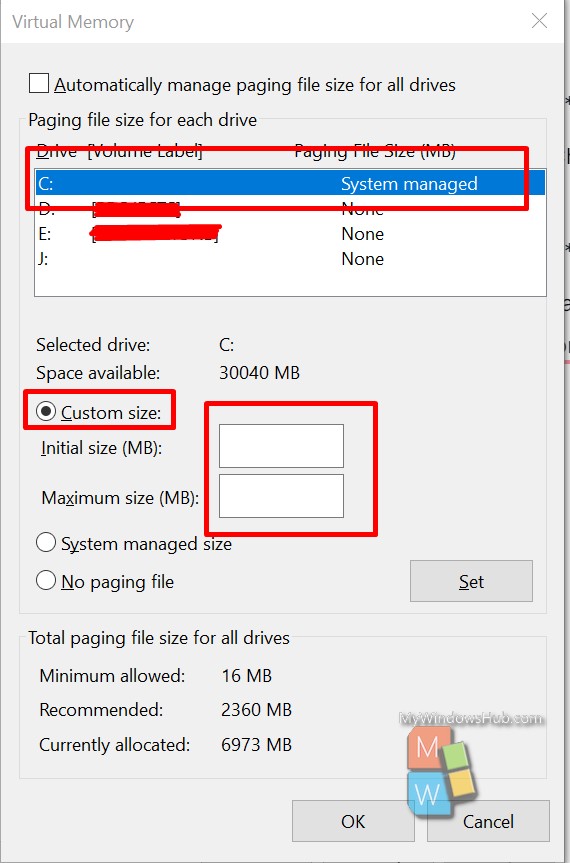
Set the initial and maximum size in MB and hit OK to save the changes.
Restart your system and monitor the Task Manager if this issue got resolved. Still, facing problems with wsappx? Let’s go through a few other techniques to fix it.
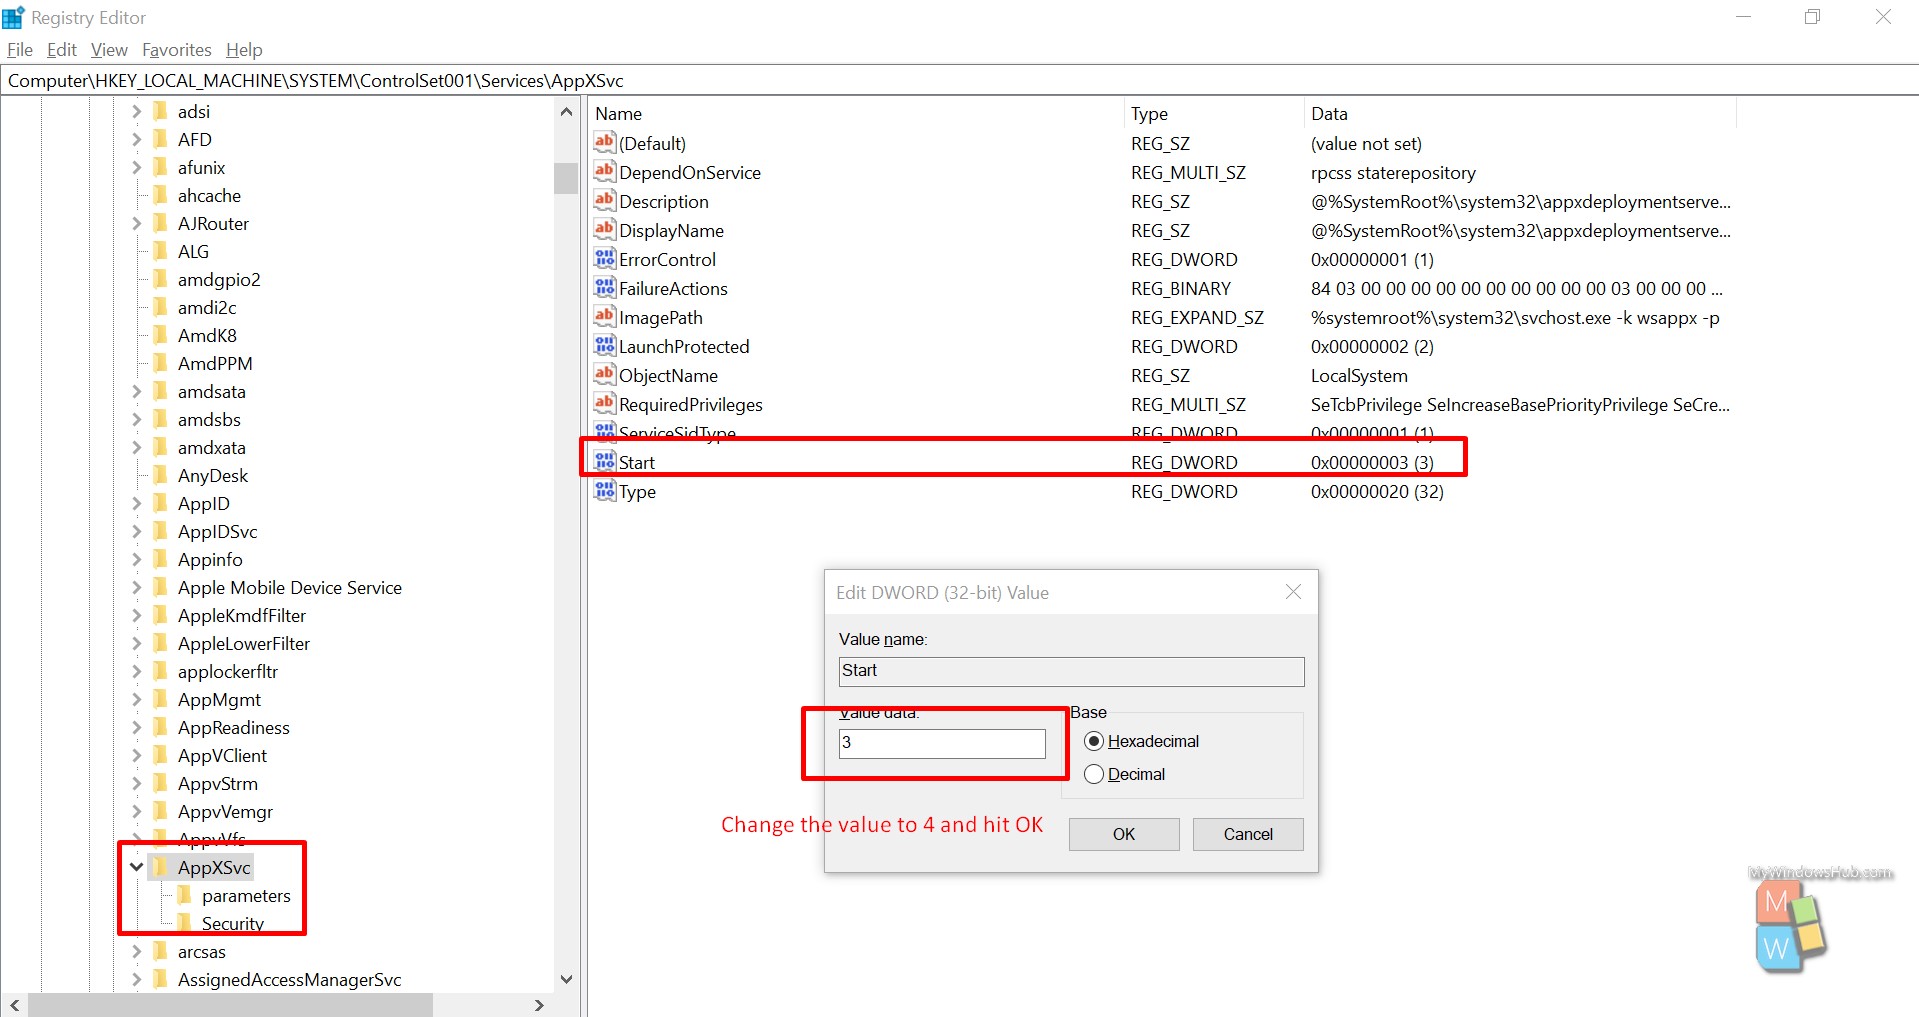
#3 Disable AppXSvc service:
We did a little research on this; we found that we can tackle this situation by merely disabling the AppX service from the registry editor, provided you are not using the Windows Store actively to install apps.
- Press Windows + R to open the Run dialog.
- Type “regedit” and hit enter to open the Registry editor.
- Navigate to the below-mentioned path,
HKEY_LOCAL_MACHINE\SYSTEM\ControlSet001\Services\AppXSvc
- In the right-hand panel, change the value of the variable “Start” to 4.
Conclusion
In this article, we have discussed a few of the well-known ways to fix the wsappx high resource consumption issue. The bottom line is the wsappx process gets created while using the Windows Store only; you can reduce the strain on your CPU and other hardware resources by disabling it.


