Windows Remediation Service is an update from Windows for specific build versions to smoothly handle the Windows update process. When the service is running in the background, your system won’t go into sleep mode and continuously consume hardware resources to ease the overall windows update process. In a few of the Windows Build, you can find the remediation service because of KB4023057 Windows update package.
Although this program was designed to improve the Windows update experience, many user have reported issues about “sedlauncher.exe” and how to fix high CPU usage. Even some of the users reported that after the KB4023057 update, their entire CPU of their computer was consumed for a long time. In this article, we will be walking you through different ways to stop this process and service to reduce strain on your hardware resources.
How can I fix sedlauncher.exe high CPU usage?
1. Stop and Disable “Windows Remediation Service”:
- Press “Win + R” keys on your keyboard to open the run dialog box.
- Type “services.msc” and press enter to open the services window.
- Scroll down the list and search for the “Windows Remediation Service.”
- Double click the service to open the properties window.
- Under the General tab, click the Startup type drop-down and select “Disabled.”
- Click the “OK” button and check if the issue still persists.
2. Remove “Windows Remediation Service” completely:
- Press “Win + I” keys to open the Windows settings screen.
- Click the Apps section.
- Inside the Apps and Features list, search for ‘Windows Setup Remediations (x64) (KB4023057)’ or ‘Update for Windows 10 for x64-based Systems (KB4023057)’.
- Click the program and then click the uninstall button to remove it.
- If the issue persists, then please go through the following way.
3. Disable REMPL task:
- Press “Win + R” keys on your keyboard to open the run dialog box.
- Type “taskschd.msc” and press enter to open the task scheduler window.
- Inside the Task Scheduler window, click the arrow beside the “Task Scheduler Library” to expand the drop-down.
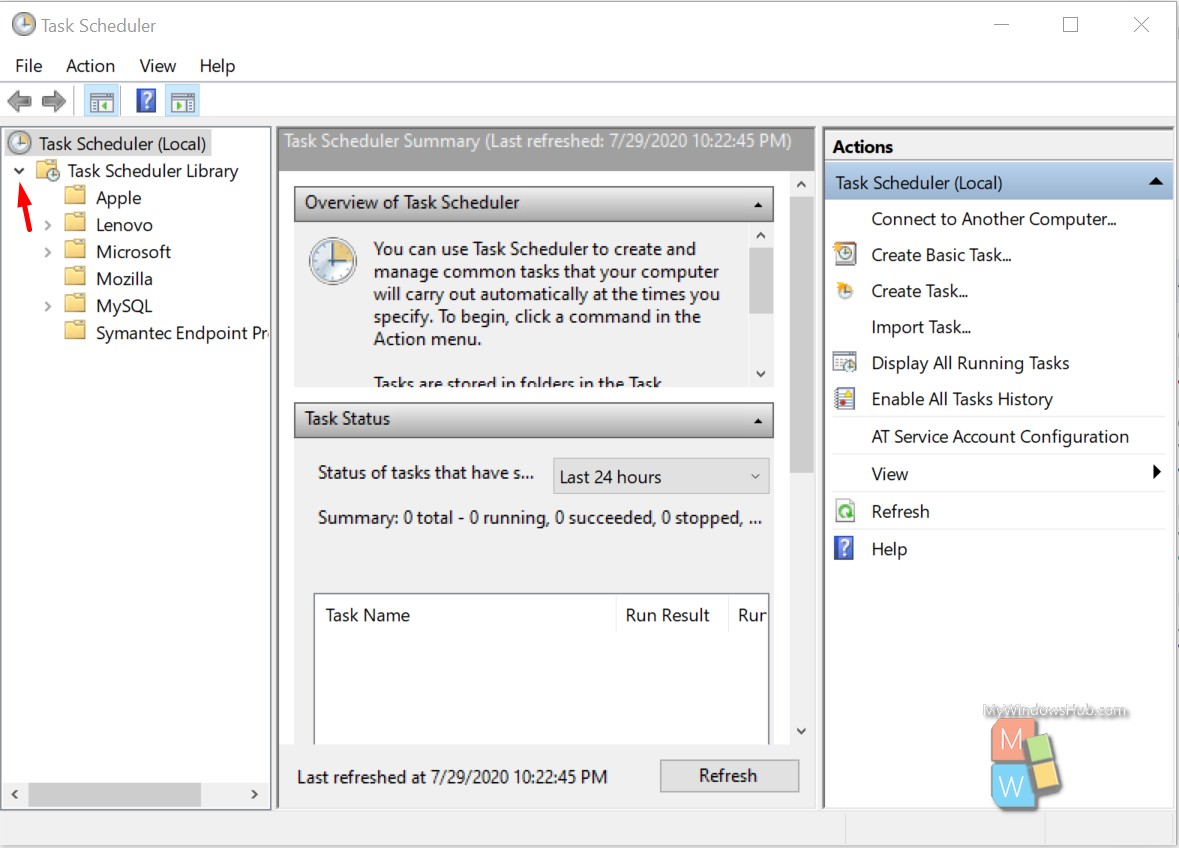
- Navigate to the ‘Microsoft -> Windows -> rempl’ folder.
- On the right-hand side, you shall be able to see a “shell” task.
- Select the task and press the delete button to remove the scheduled task from your system.
- Restart your system and check if the issue persists. If it does, then please go through the following way.
4. Block Windows Remediation service using the firewall:
- Open the search bar and type “Windows Defender Firewall,” then open it.
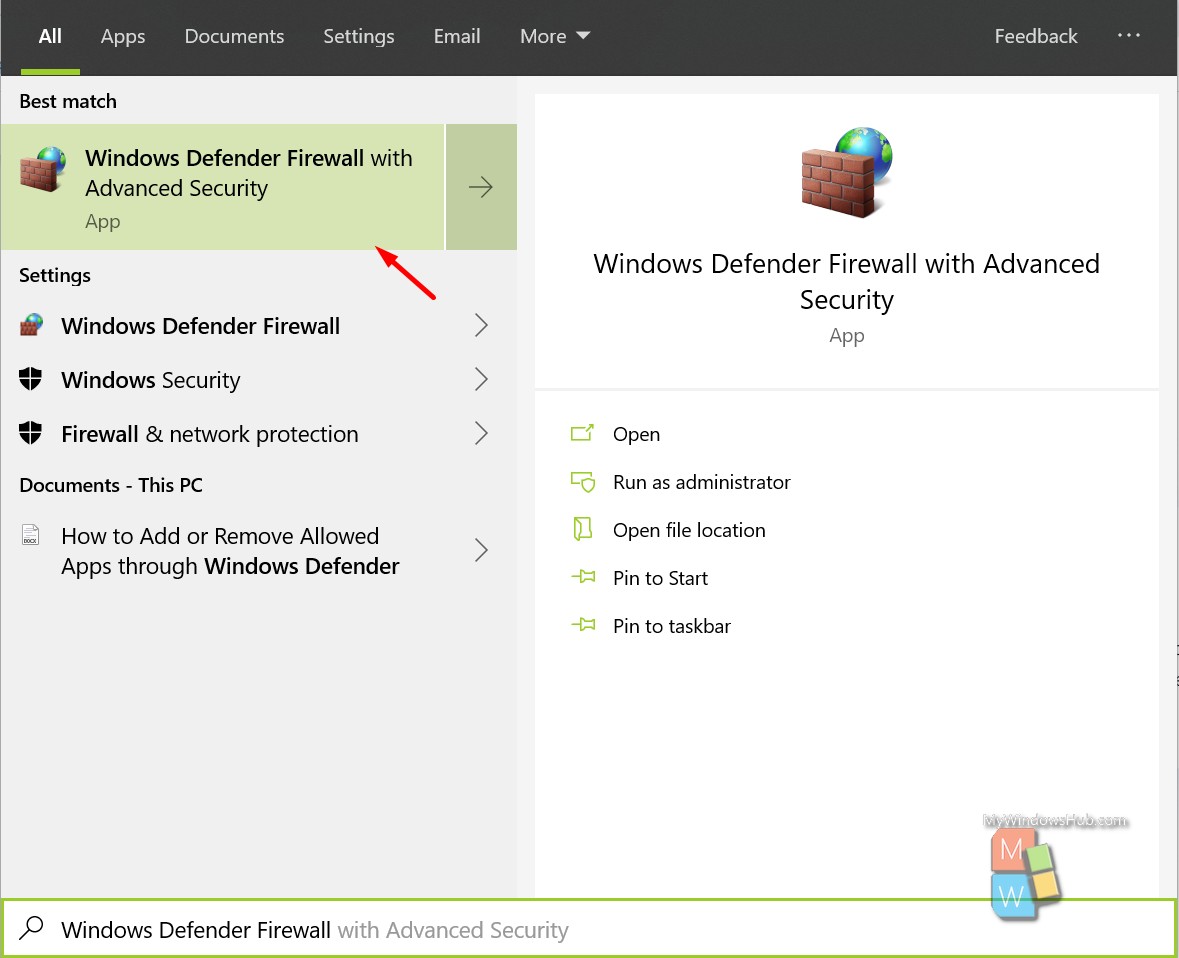
- Select the Advanced Settings from the left-side menu.
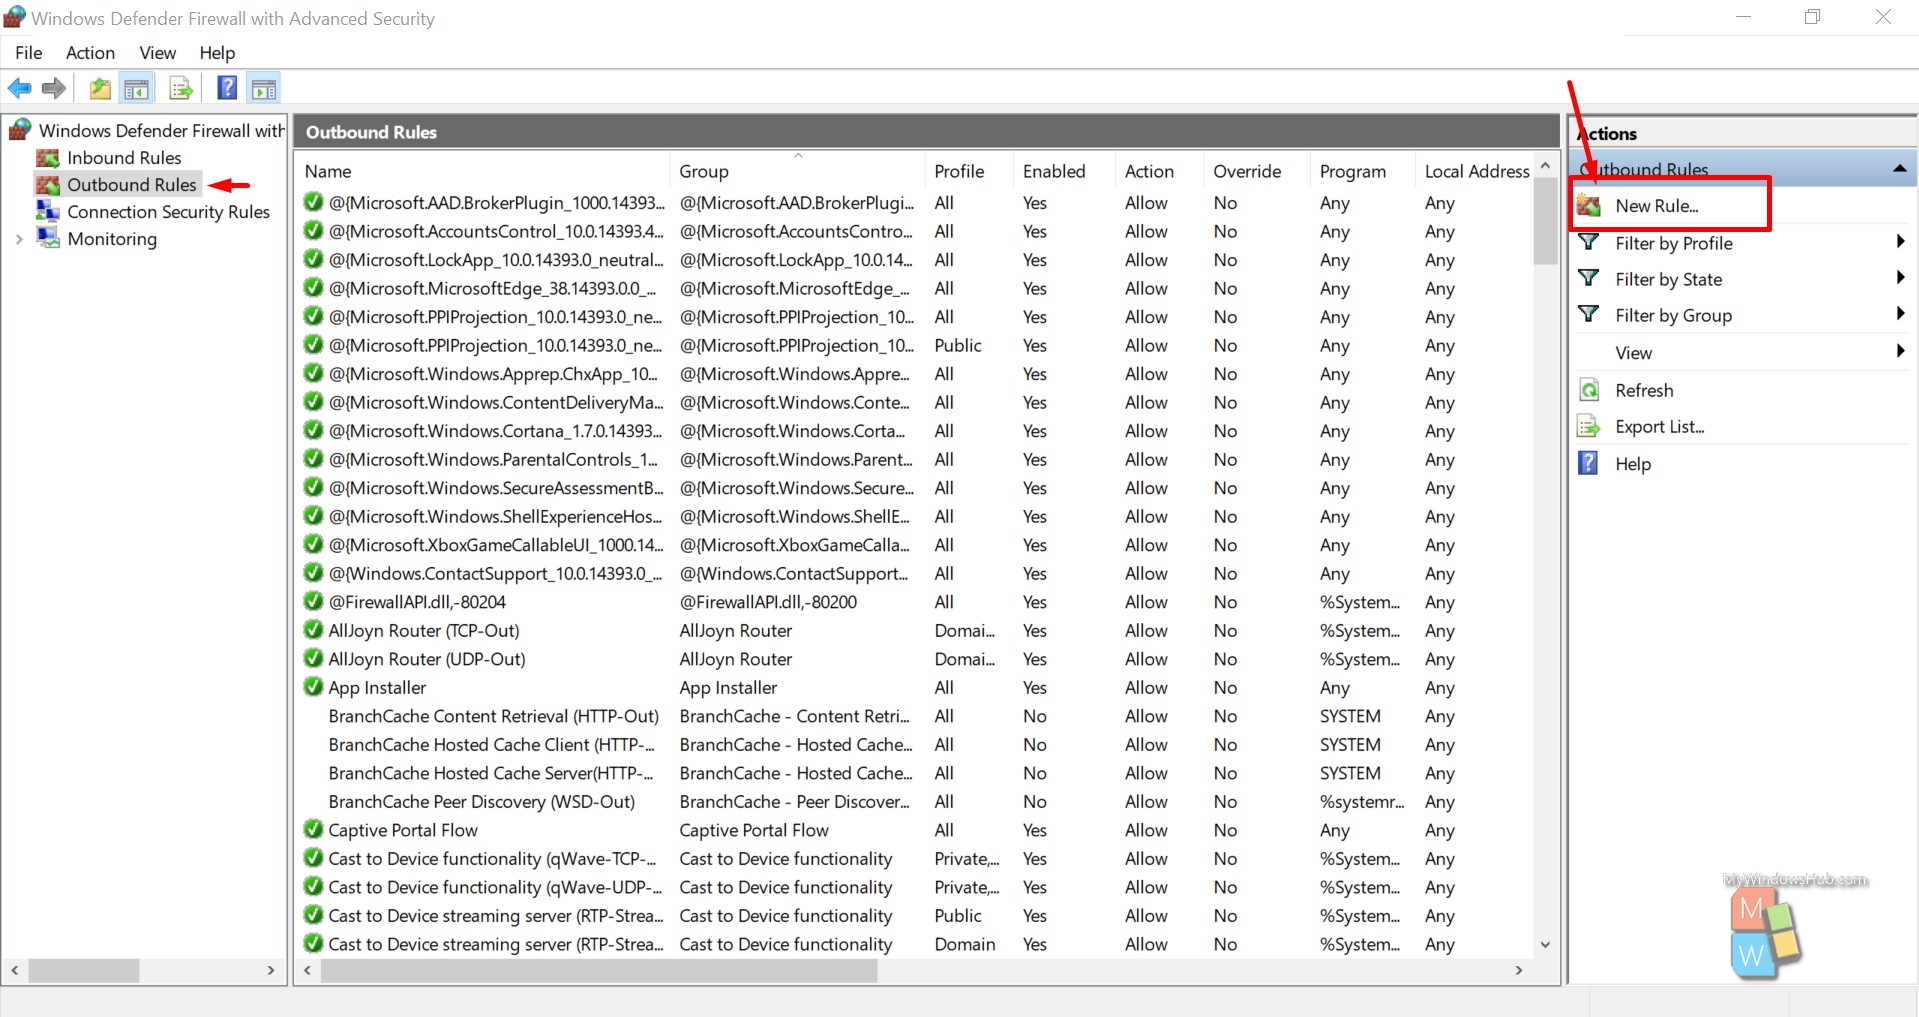
- Select the “Outbound Rules” option.
- Click on the “New Rule..” option in the upper-right corner.
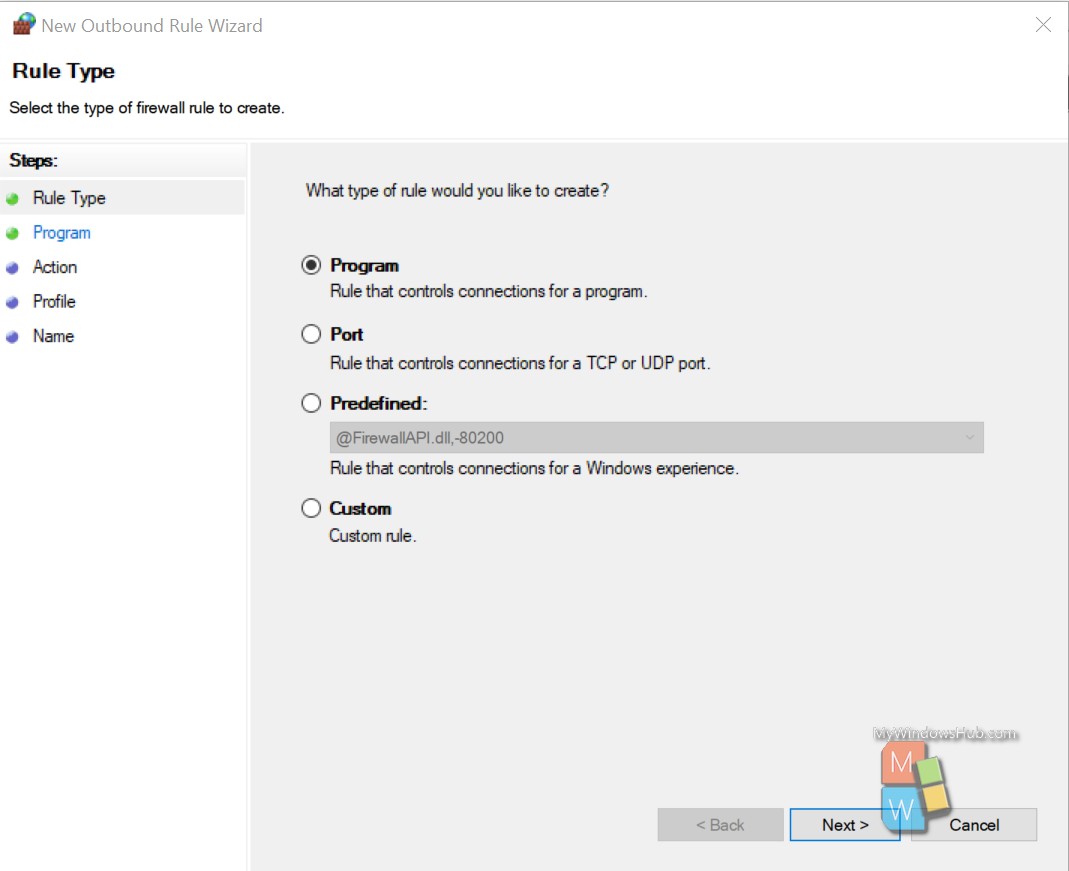
- Select the Program radio button and then click “Next.”
- Now navigate to the directory of the Windows Remediation Service on your hard drive. It is usually in this directory, “C:\Program Files\rempl.”
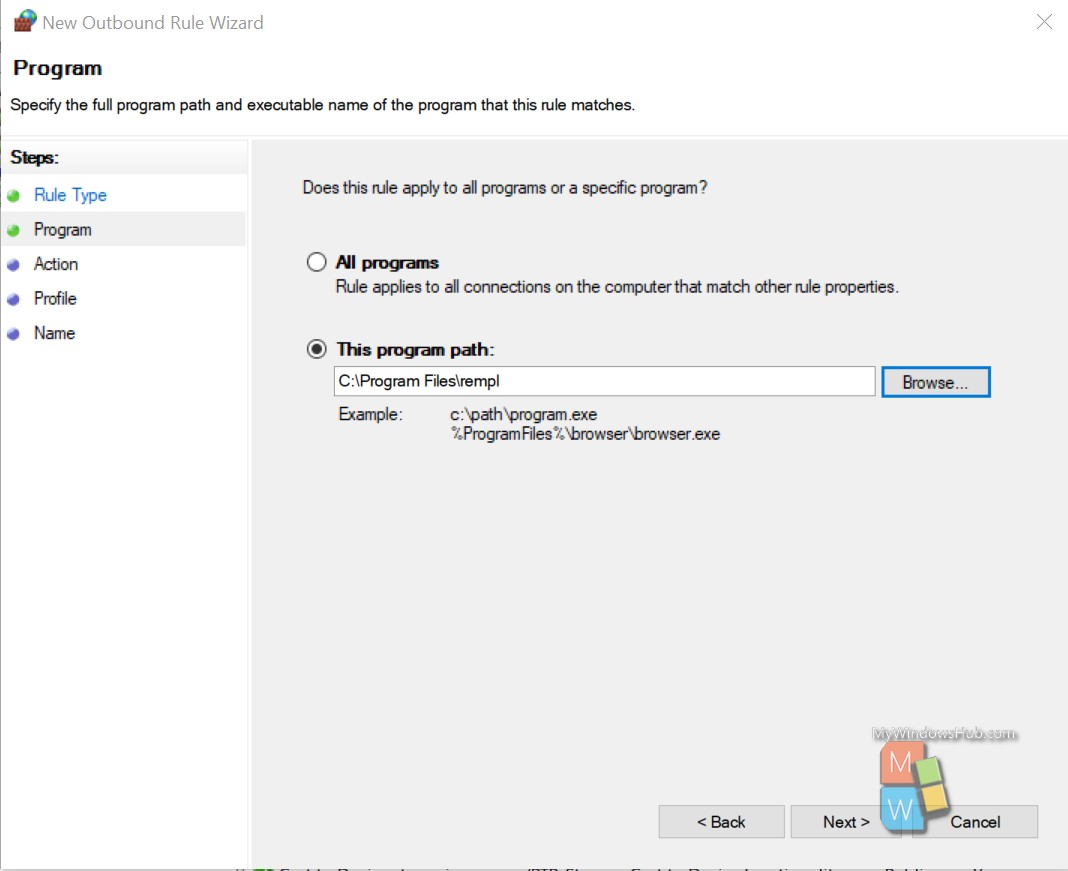
- Select the “sedsvc.exe” file, then click the Next button three times to finish.
- Provide a name to the new rule and click the finish button.
What we did in this step is, we blocked the outbound traffic for the Windows Remediation service in Windows Defender.
Conclusion:
In this article, we have walked you through different ways to deal with the high CPU usage of Windows Remediation service. The bottom line is, sedlauncher.exe comes with the Remediation service to smoothen the Windows update process, and it is safe to disable it to tackle the high CPU issue.

