Have you ever wondered what is Compatibility Telemetry all about? Why is it showing up in the Task manager and consuming too much hardware resources? Many users complained about high CPU and disk usage regarding this service. In this article, we shall be discussing regarding a service that comes with Windows Operating systems, “Compatibility Telemetry,” and techniques to disable it permanently if needed.
Let us understand what Compatibility Telemetry is and why it is an important service in Windows 10,
- Compatibility Telemetry is a service that comes with Windows 10 that collects technical data on how your device and related softwares are working.
- This service runs in the background and periodically sends data to Microsoft for future improvement and to enhance the overall user experience of the OS. In short, it sends usage and performance data to Microsoft.
Is CompatTelRunner.exe Safe?
- CompatTelRunner.exe is the name of the process that you can find in the Task Manager windows.
- It is safe to have this on your system, and it comes along with your Windows operating system.
- CompatTelRunner.exe is not a virus; rather, it is a part of Compatibility Telemetry service runs in the background to collect and send performance data.
Fix: 1 How to disable Compatibility Telemetry using Group Policy Editor?
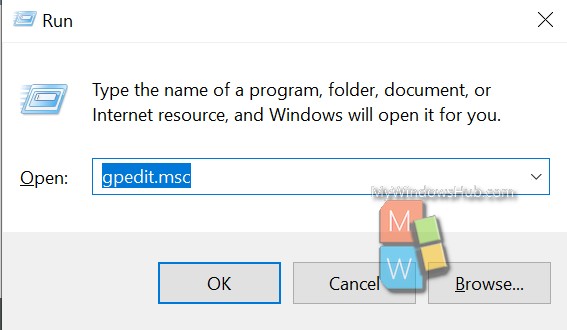
- Press the Windows logo key and ‘R’ to open the Run dialog.
- Type “gpedit.msc” and hit enter to open the Local Group Policy Editor.
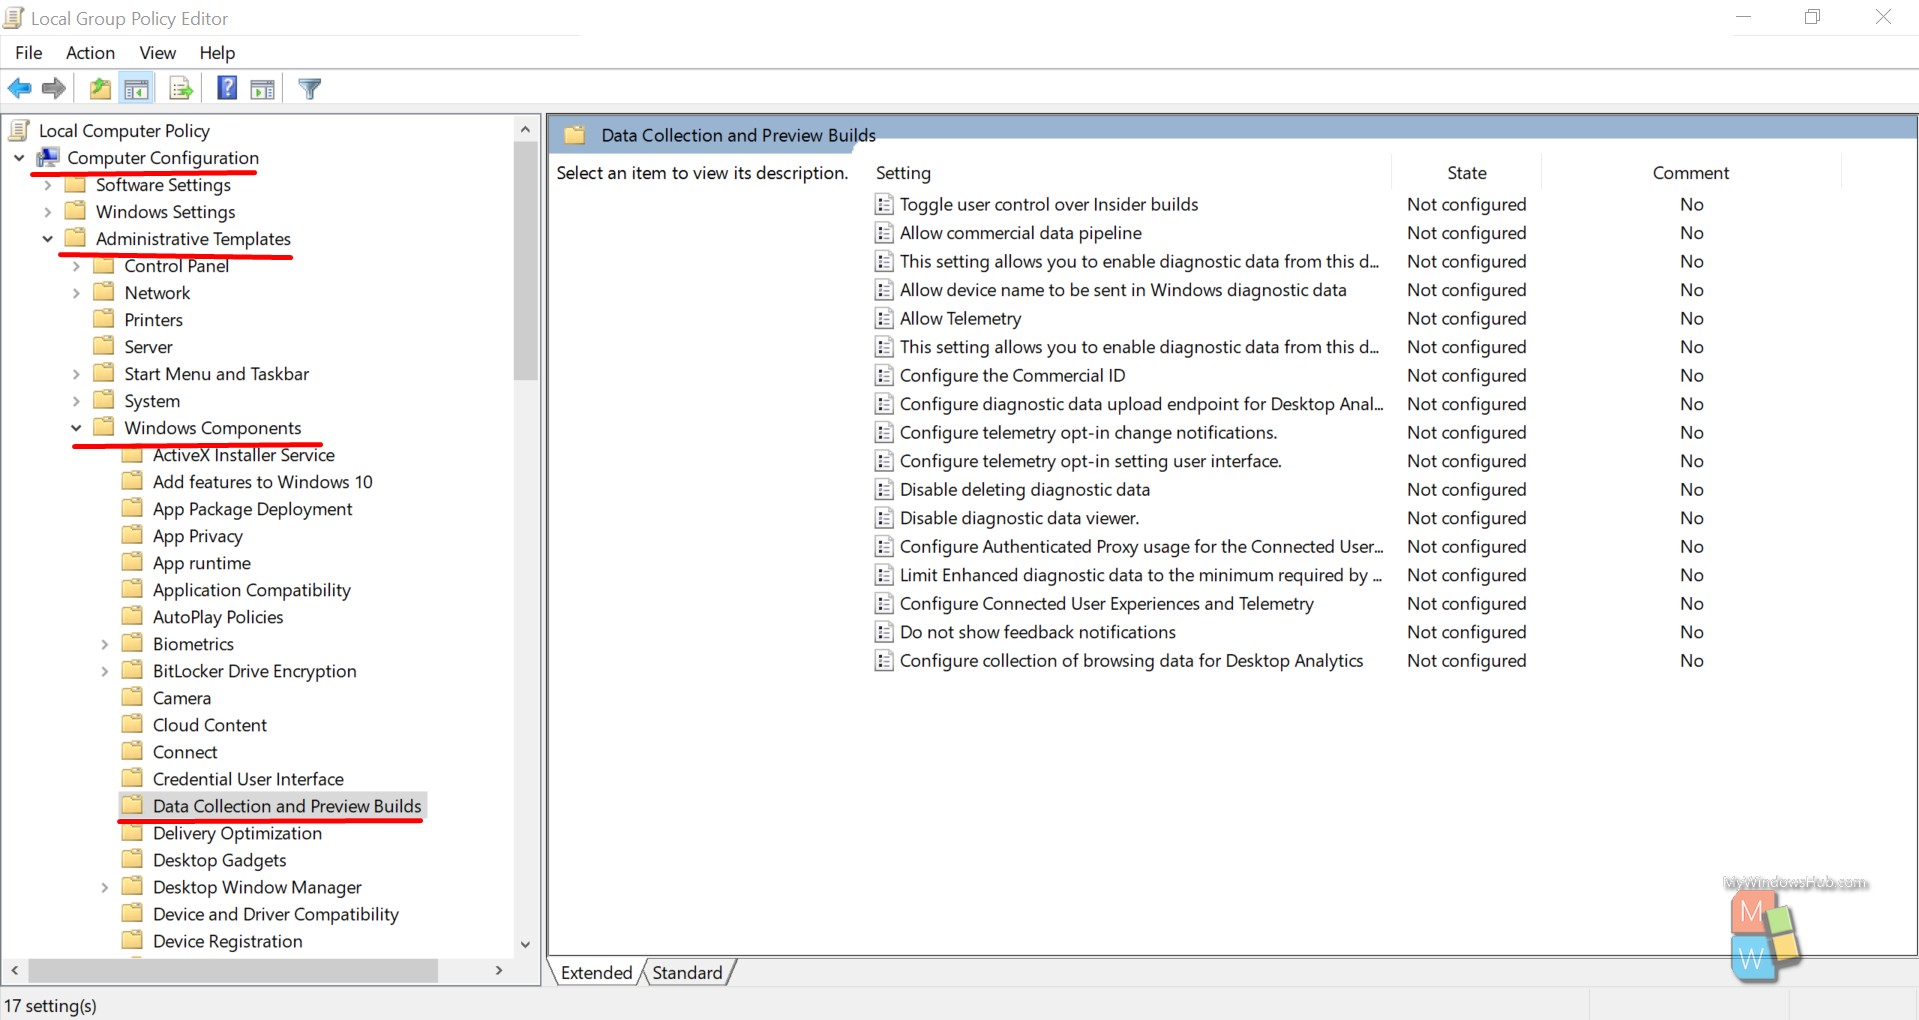
- Navigate to the below-mentioned path,
Computer Configuration > Administrative Templates > Windows Components > Data Collection and Preview Builds
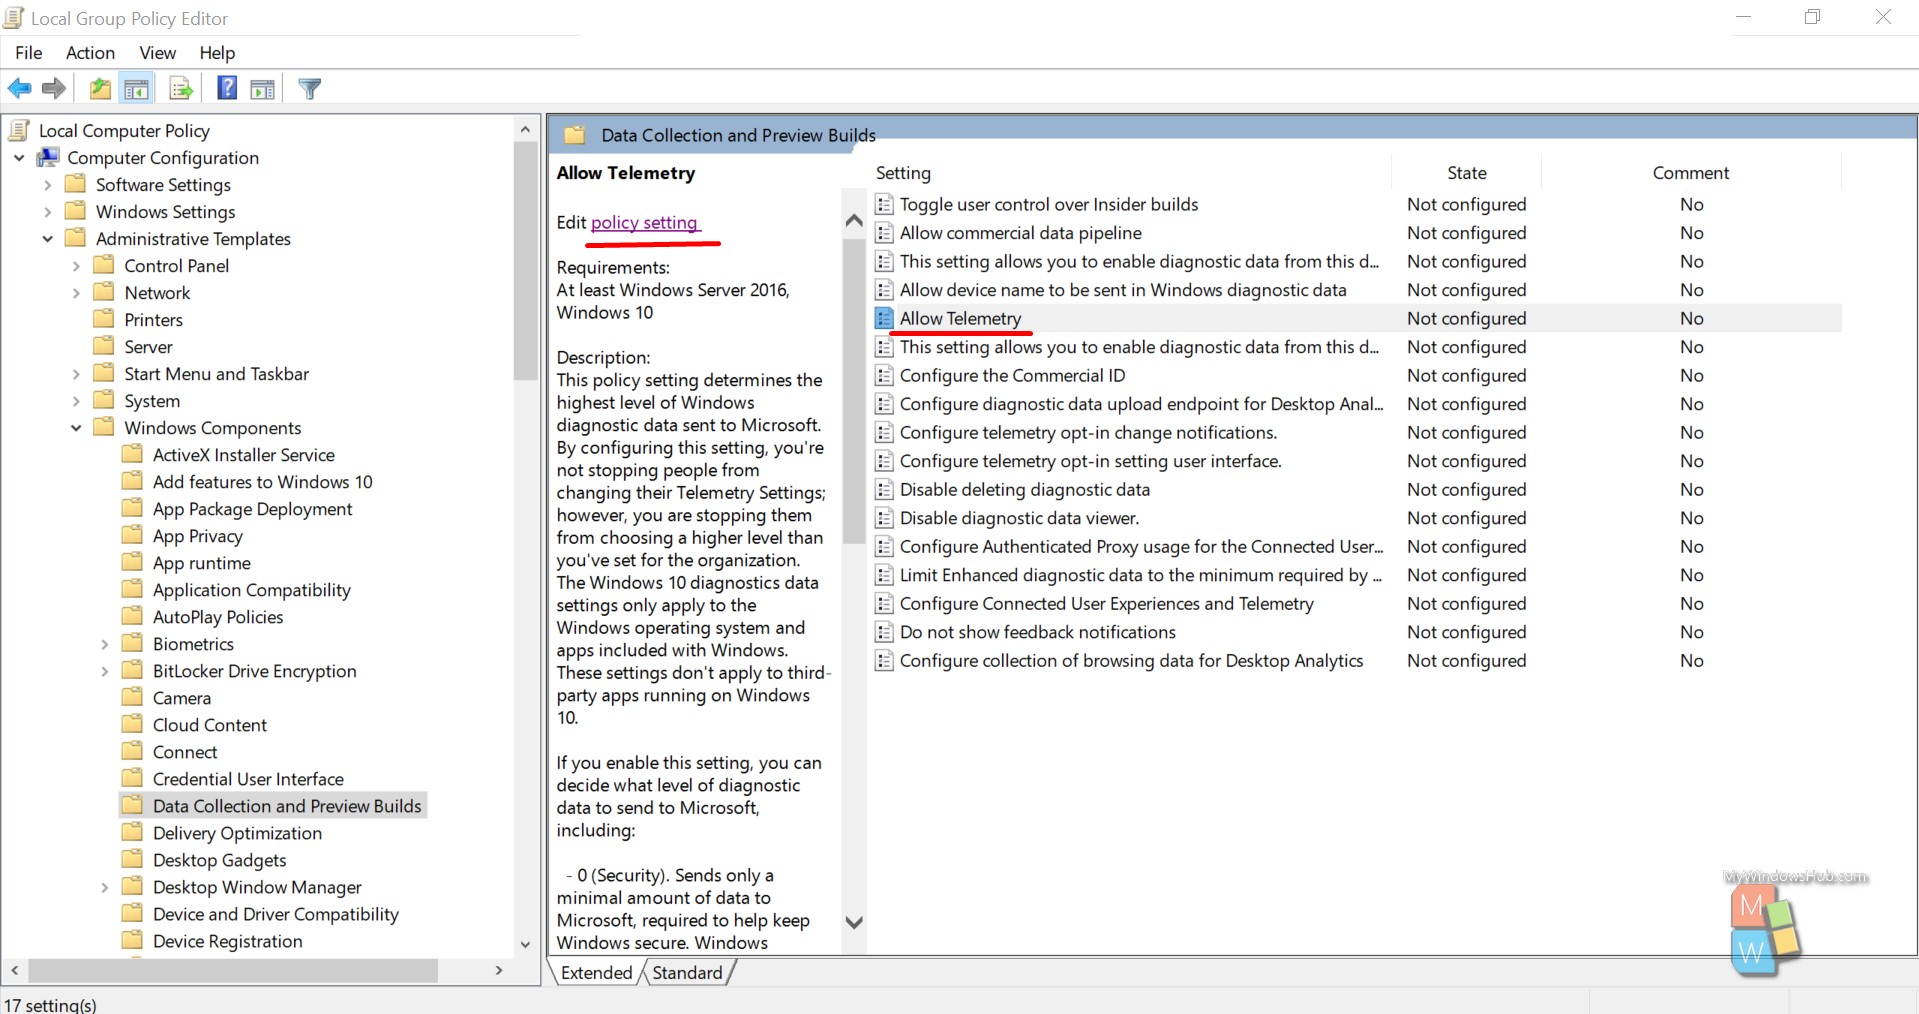
- Select the ‘Allow Telemetry’ option and click on the “edit policy setting.”
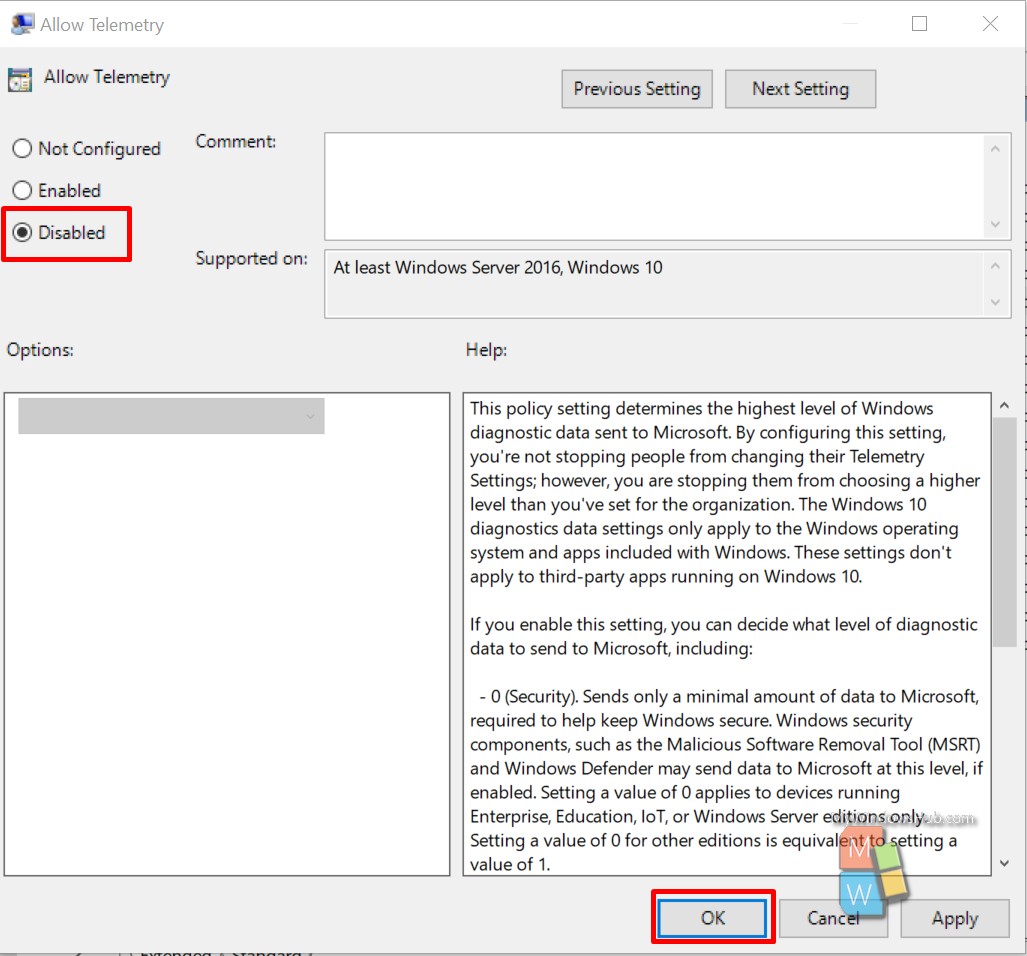
- Select the “Disabled” radio button and click ‘OK’ button to save the changes.
Now you can go to the Task Manager and check whether it works or not.
Fix:2 How to disable Compatibility Telemetry using Registry Editor?
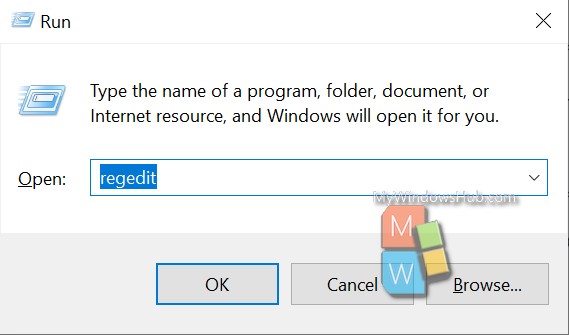
- Press the Windows logo key and ‘R’ to open the Run dialog.
- Type “regedit” and hit enter to open the Local Group Policy Editor.
- Navigate to the below-mentioned path,
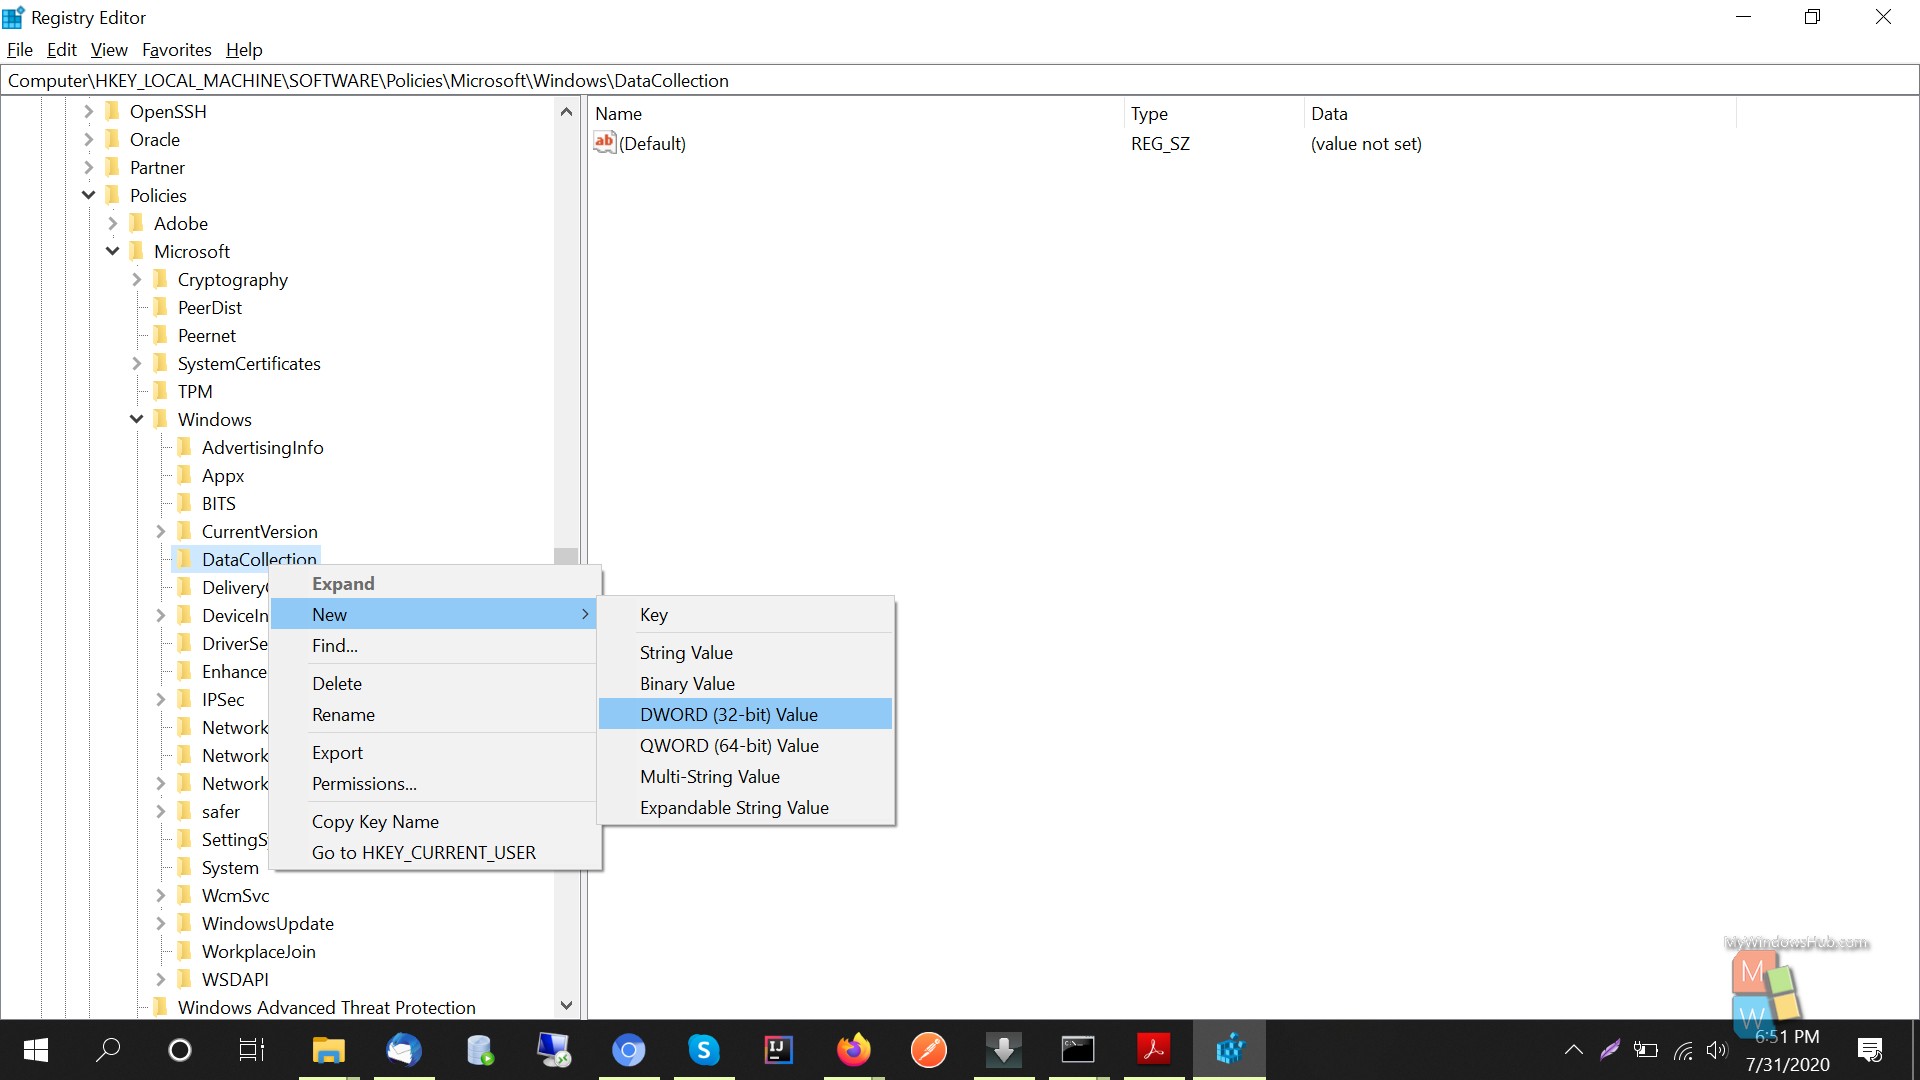
HKEY_LOCAL_MACHINE > SOFTWARE > Policies > Microsoft > Windows > DataCollection
- Right click on the “DataCollection” and create a new DWORD value and name the variable “Allow Telemetry” as mentioned below,
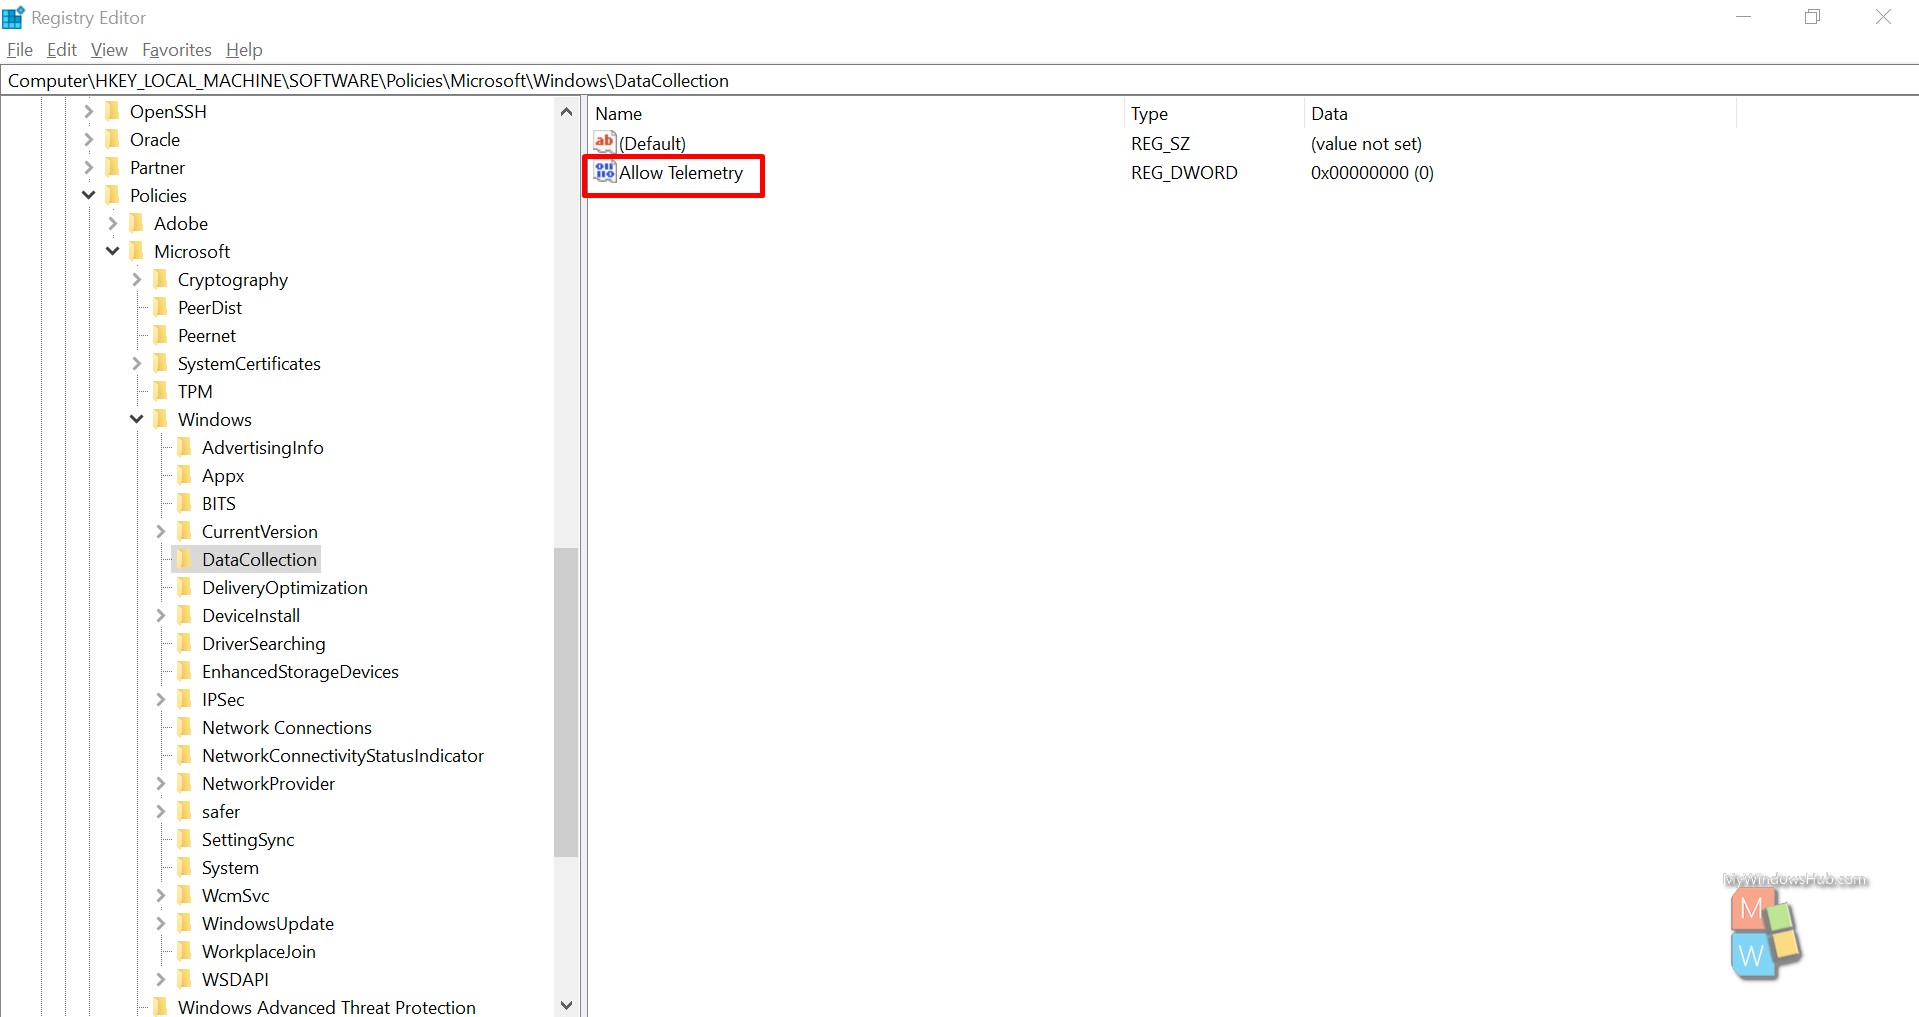
- Double click on the variable “Allow Telemetry”.
- Set the value data to 0(Zero) and then click OK to save the changes.

Now you can go to the Task Manager and check whether it works or not.
Fix: 3 Set the Diagnostic and Usage Data to Basic
You can also change the user data collection preference in Windows 10. But it doesn’t completely disable the Telemetry service; rather, it would reduce the overall data collection and slowdown the high CPU usage issue.
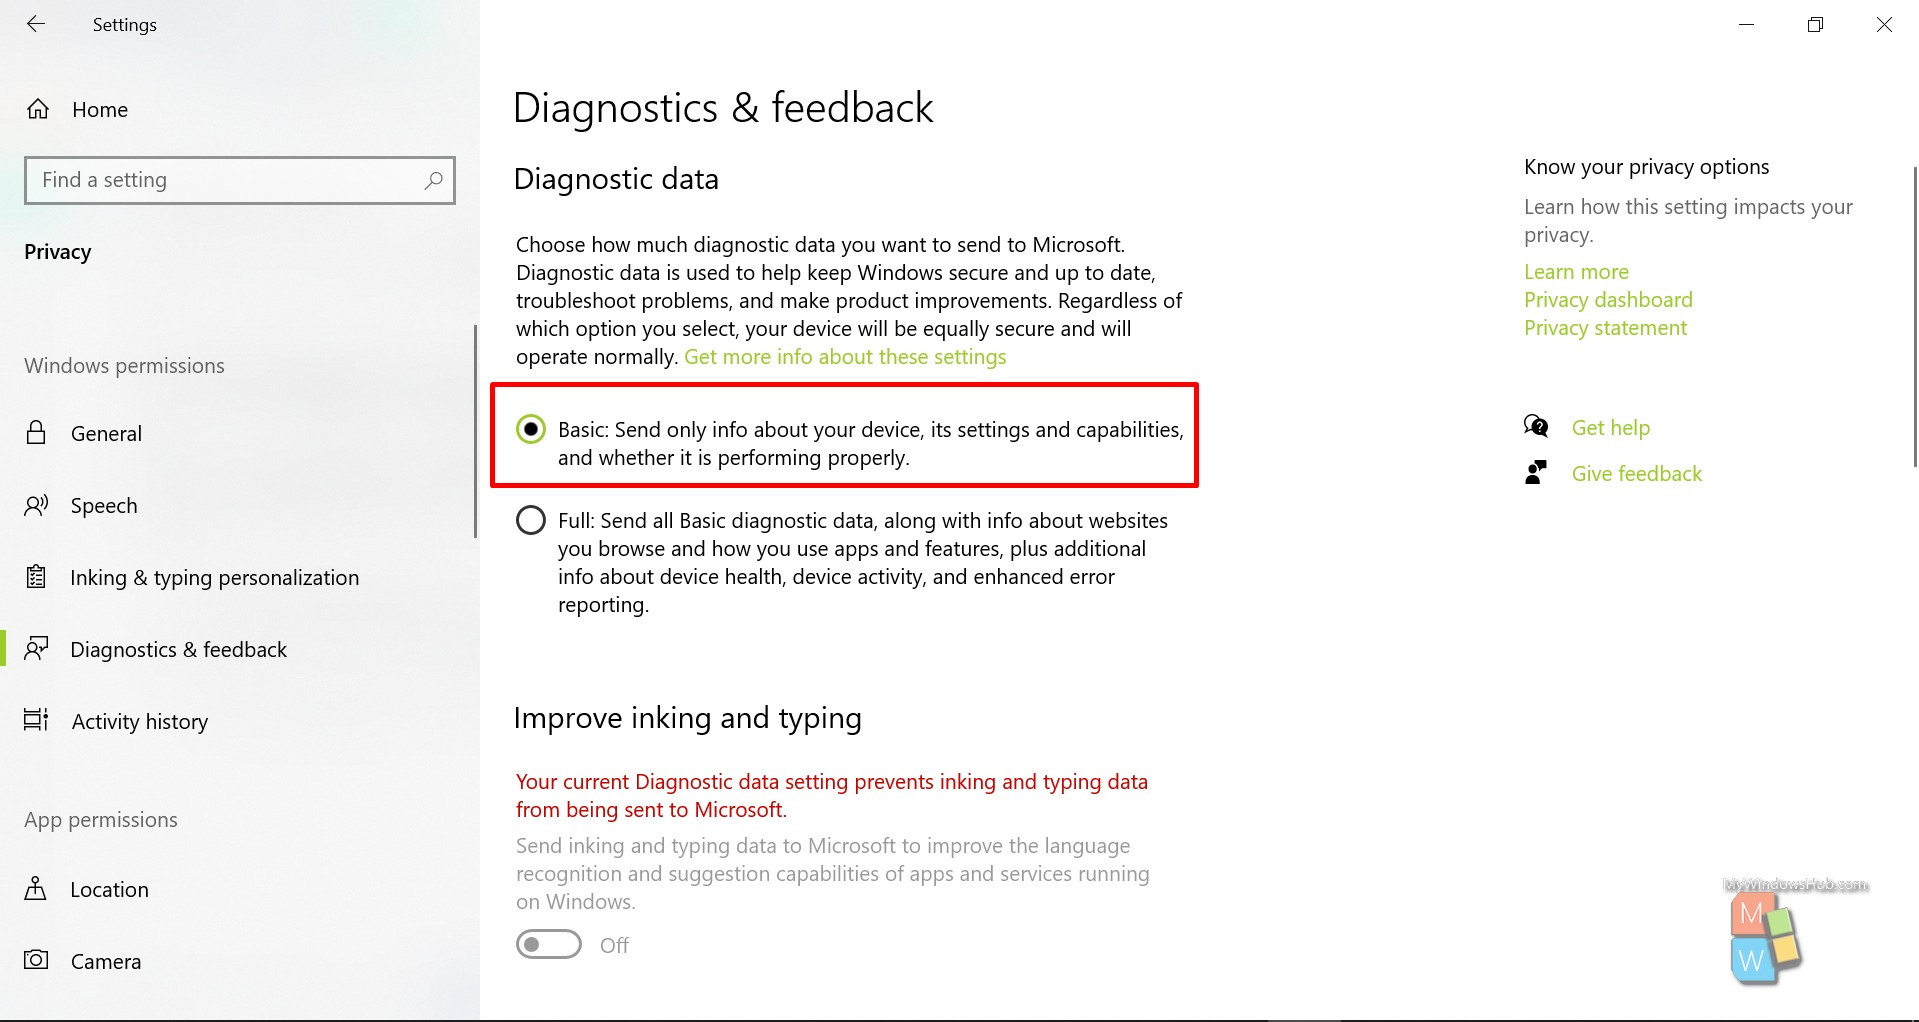
- Open the Settings app and click the Privacy option.
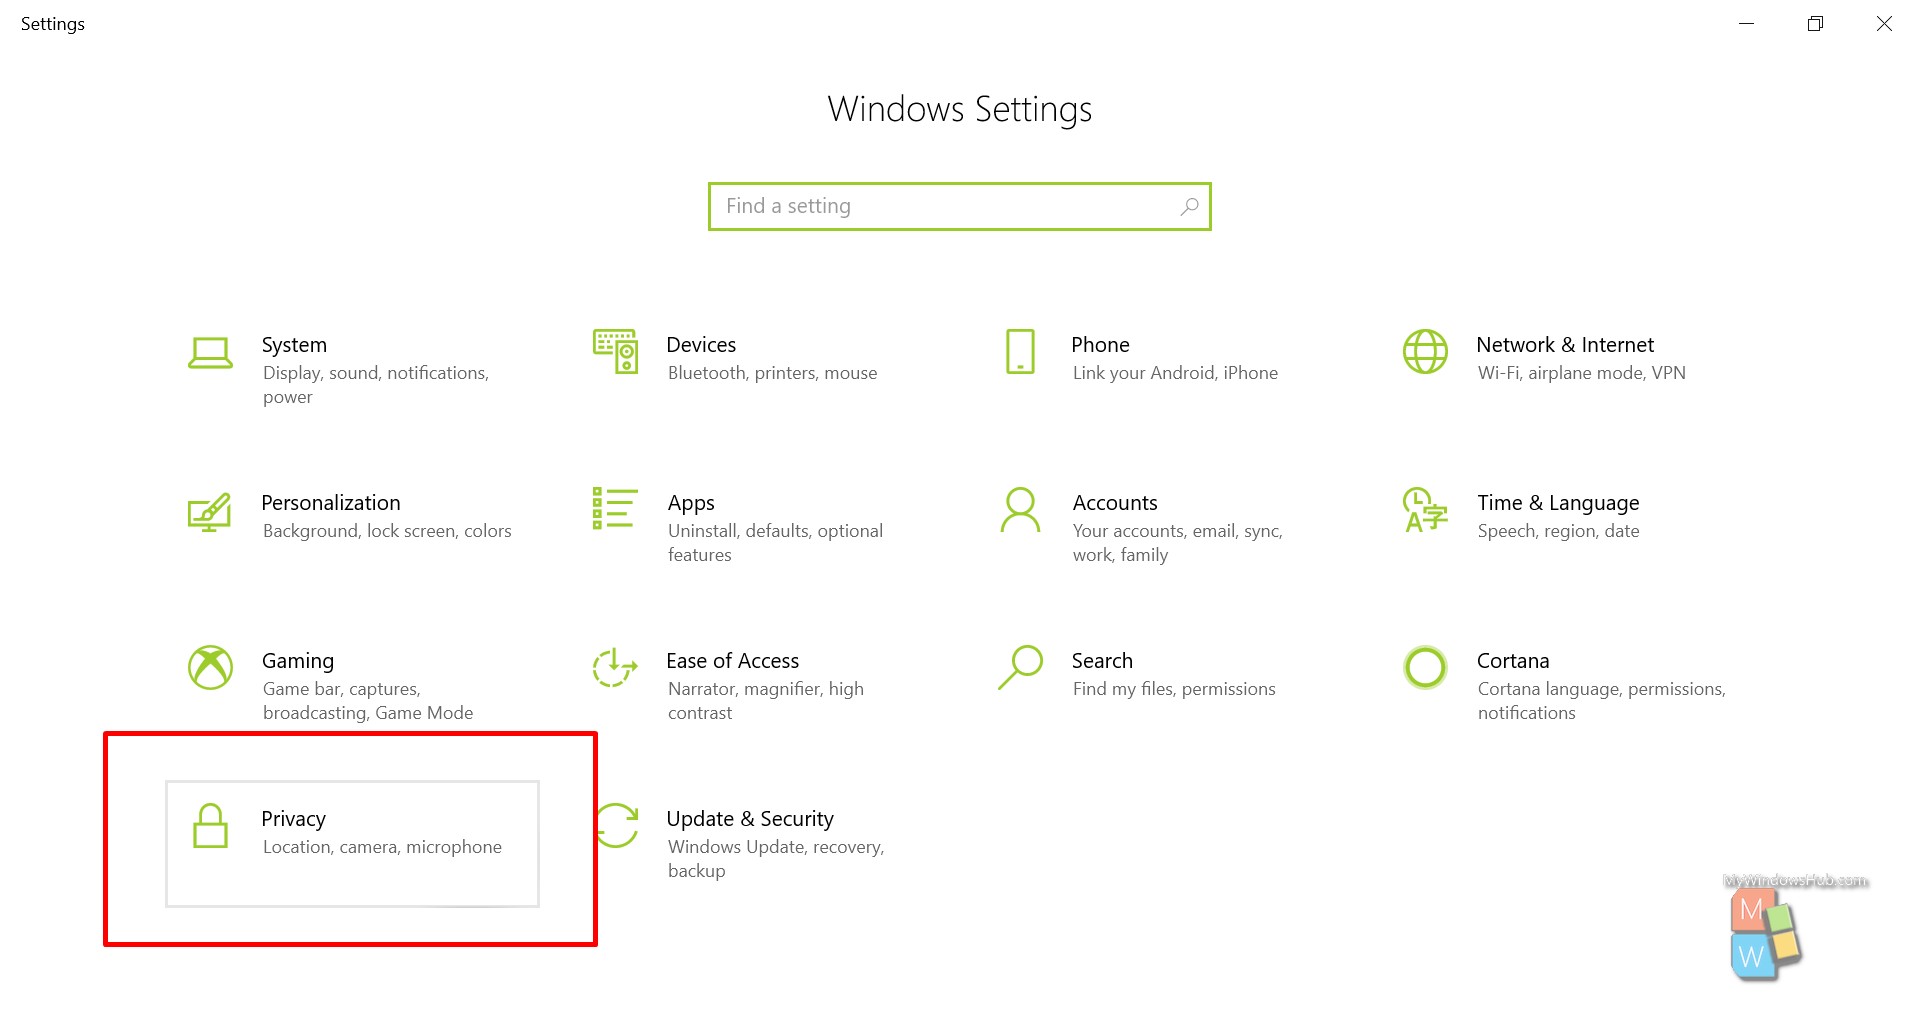
- Click “Diagnostics & feedback” option from the left panel.
- Now select the “Basic” checkbox to limit the data collection operation.
Fix: 4 How to disable Compatibility Telemetry permanently using task scheduler?
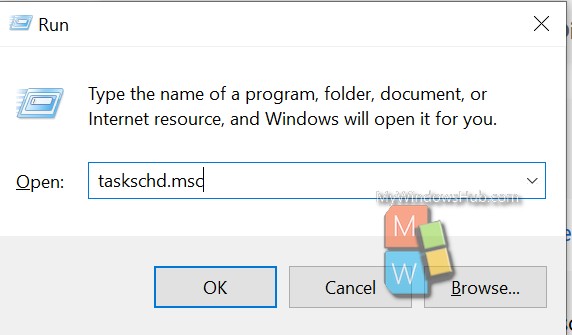
- Press the Windows logo key and ‘R’ to open the Run dialog.
- Type “taskschd.msc” and hit enter to open the Task Scheduler.
- On the Task Scheduler Winodw, navigate to the below mentioned path:
Task Scheduler Library\Microsoft\Windows\Application Experience
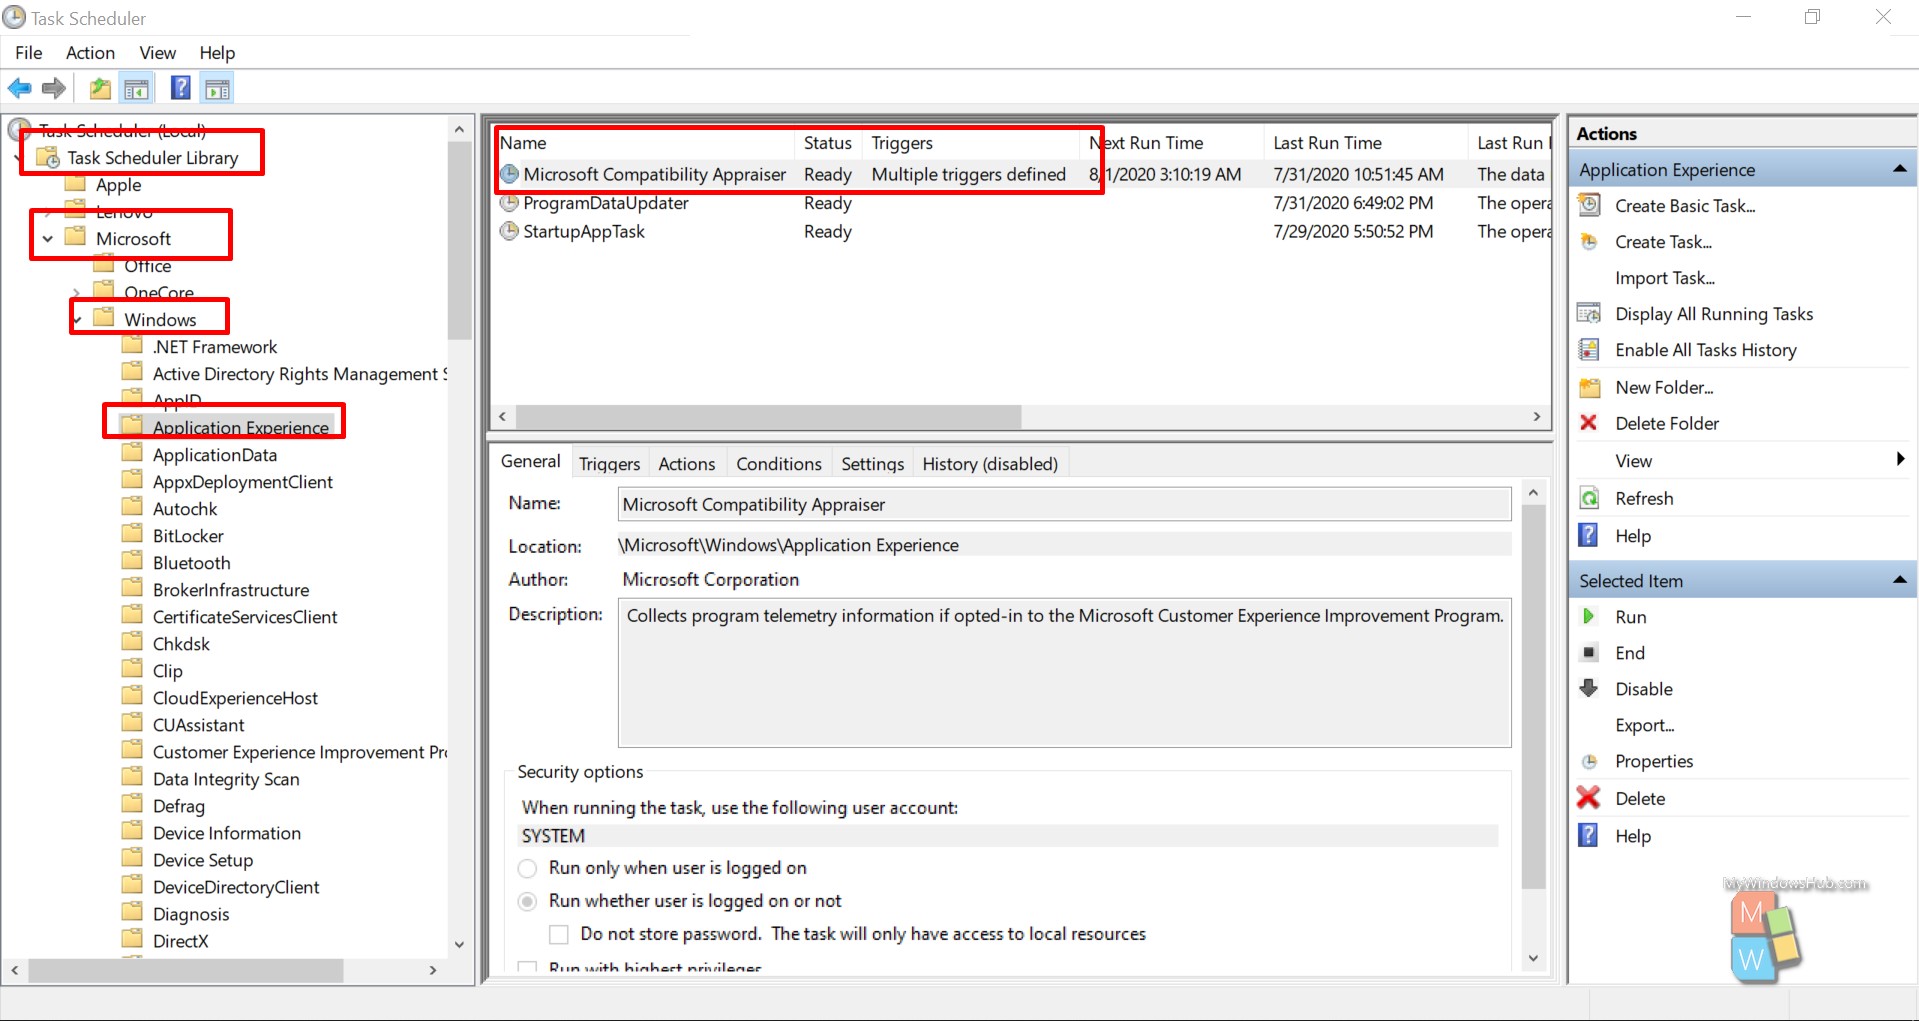
- Right-click on “Microsoft Compatibility Appraiser” and select disable.
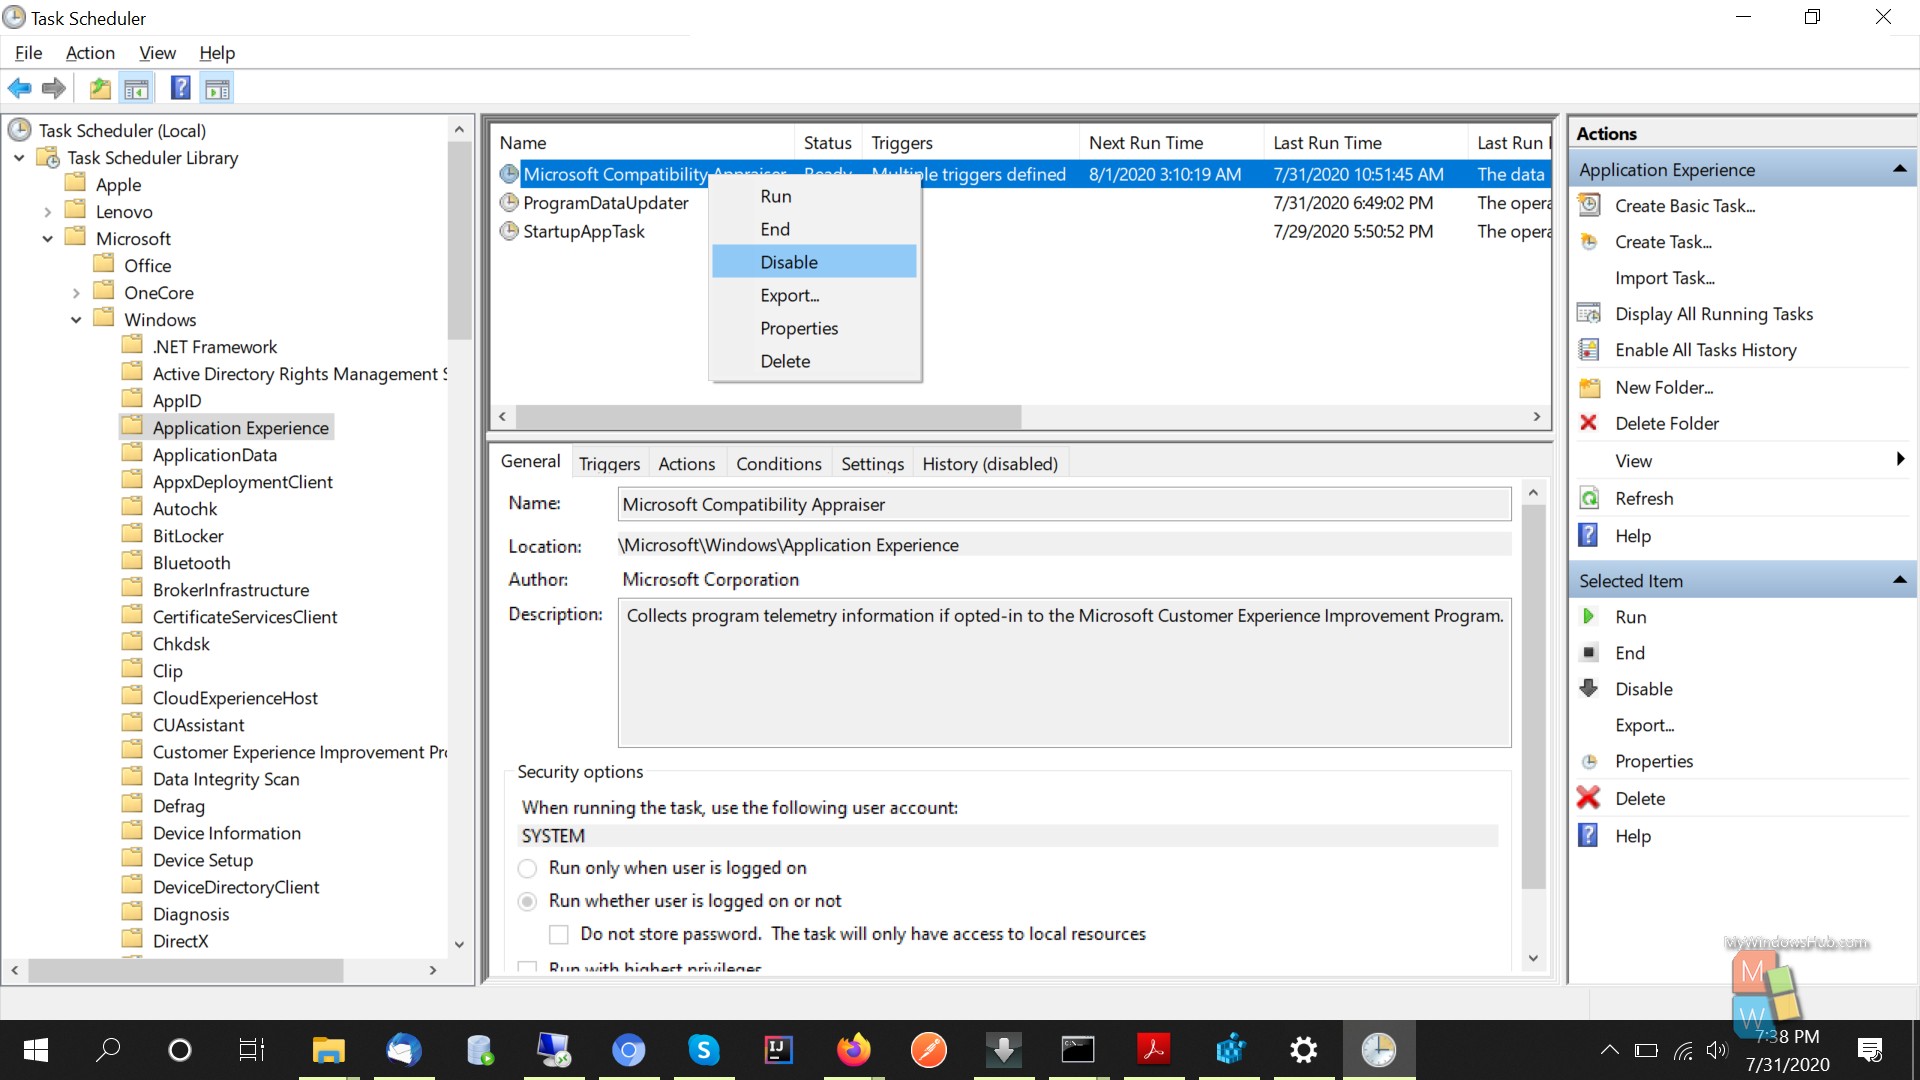
Please check your task manager to check if the issue still persits.
Conclusion:
In this article, we have discussed a few techniques to disable the Compatibility Telemetry service on your Windows 10 system. Along with this, if you are facing frequent high disk usage issue, then please consider to replace the HDD to SDD or go for a full disk check-up.

