

In this article, you will learn how to enable or disable SMBv1 in Windows 10. The acronym for SMB is Server Message Block. SMB is a file sharing protocol, which facilitates applications on a Windows PC to read and write to files and request servers in a computer network. SMB protocol can be used above the TCP/IP protocol. The SMB protocol also supports applications to access files and resources at a remote server. SMB is use by Software-defined Data Center (SDDC) computing technologies like Storage Replica and storage space direct, etc.
The SMB comes in three versions, SMBv1, SMBv2 and SMBv3. The SMB protocols have a plethora of applications. The SMBv2 protocol was introduced in Windows Vista and Windows Server 2008, while the SMBv3 protocol was introduced in Windows 8 and Windows Server 2012. The SMB 3.0 protocol ameliorates the Information Worker workloads. It reduces application latencies, and provides enhanced protection against eavesdropping attacks. SQL server stores user data base files on SMB file shares. Thus, SMB is supported with SQL Server 2008 R2 for standalone SQL servers. Newer SQL server versions will aid increased support for clustered SQL servers and system databases. Hyper-V can store Virtual hard disk (VHD) files, snapshots, in file shares over the SMB 3.0 protocol.
SMBv1 has been replaced by SMBv2 and SMBv3. SMBv1 is now outdated and thus disabled by default in Windows operating system for security reasons. The protocol is still there, because there are some applications, which have not been updated to SMBv2 or SMBv3. You can check this page on Microsoft’s website to find which applications are still supported by SMBv1. If you are running any of the applications, then enable the service. If you find that an application which has been running with support of SMBv1 has been updated, you can disable the SMBv1 feature on your PC.
Steps To Enable Or Disable SMBv1 In Windows 10 And Windows 8.1 Using Windows Features
- Open Windows Search panel, and type Windows Features and select Windows Features from the search result.
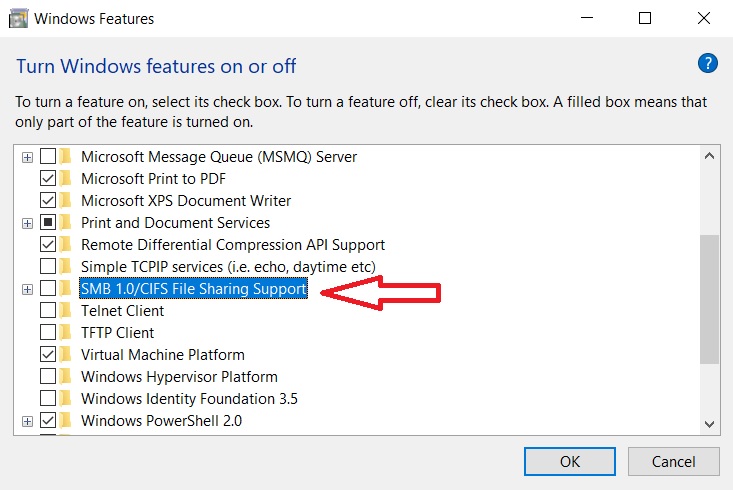
- As Windows Features opens, find out SMB 1.0/CISF File Sharing Support. If you want to enable the service, check the box beside the option, If you want to disable the service, uncheck the box. Click Ok to save the changes.
Steps To Enable Or Disable SMBv1 In Windows 10 And Windows 8.1 Using Windows PowerShell
1. Open Windows 10 Search panel, and type Windows Powershell. Select Windows PowerShell from the search result, right click and select Run As Administrator.
2. To Detect, if your PC can install SMBv1, copy and paste the following command, and then hit the Enter key.
Get-WindowsOptionalFeature -Online -FeatureName SMB1Protocol
3. To Enable SMBv1, copy and paste the following command and hit the Enter key.
Enable-WindowsOptionalFeature -Online -FeatureName SMB1Protocol
4. To Disable SMBv1, copy and paste the following command and hit the Enter key
Disable-WindowsOptionalFeature -Online -FeatureName SMB1Protocol
That’s all!