

Network discovery in Windows 10, helps the OS to detect other devices and computers connected on a network. Network discovery is turned on by default for private networks. For example, when you are connected over your home Wi-Fi, the feature is turned on. You do not have to do anything. But as soon as you enter into the domain of any public network like in a cafe, or restaurant or airport, network discover is turned off for your security. This feature refrains you from getting connected to networks that are not trusted.
Hence, your device becomes hidden and cannot be connected randomly by any public network.
But Windows 10 allows you the freedom to choose if you really want to connect to the public network. If so, then you can manually turn on Network Discovery for your network. Sometimes, certain error can encounter you. This is when you have assigned the wrong network profile. i.e public instead of private. In the following tutorial, you will learn how to enable network discovery in Windows 10.
Steps To Enable Network Discovery For Your Network In Windows 10
1.Open the Start Menu and click on Settings option.
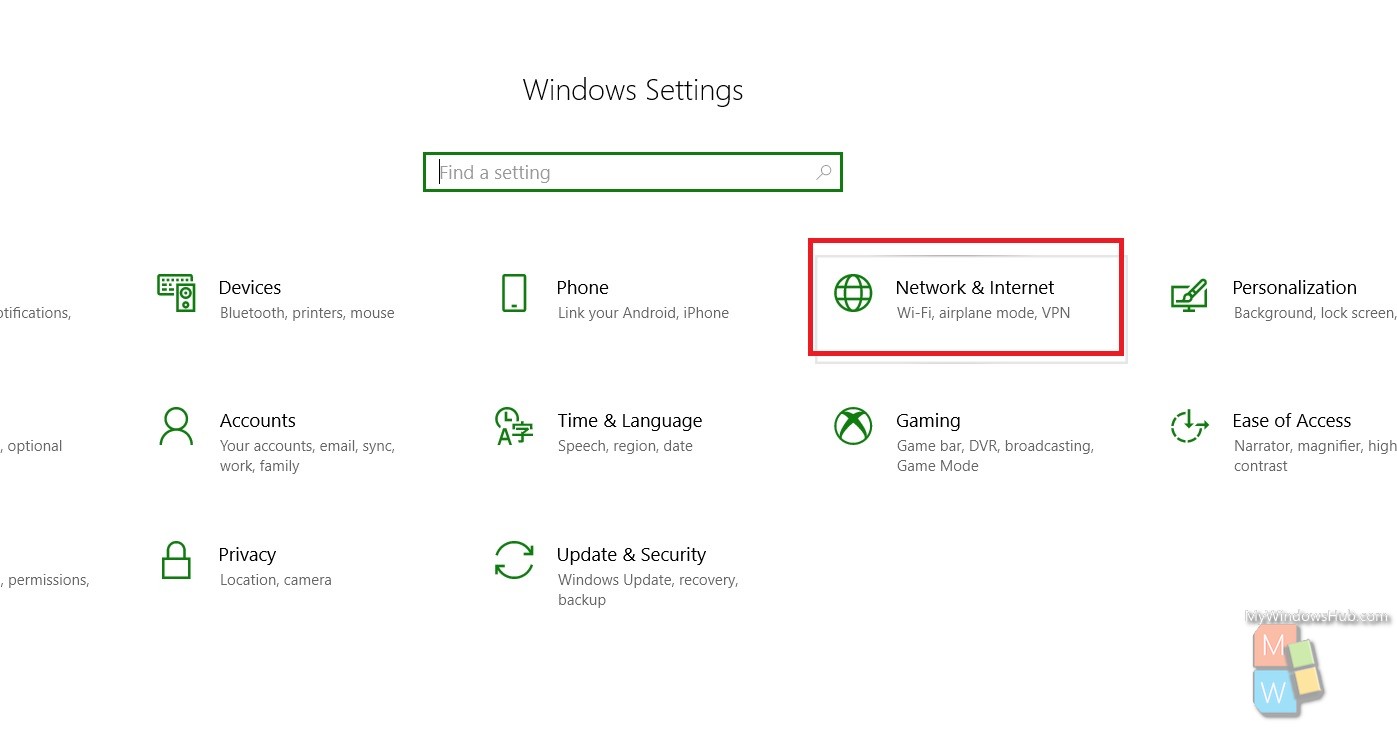
2. As the settings open, go to Network and Internet.
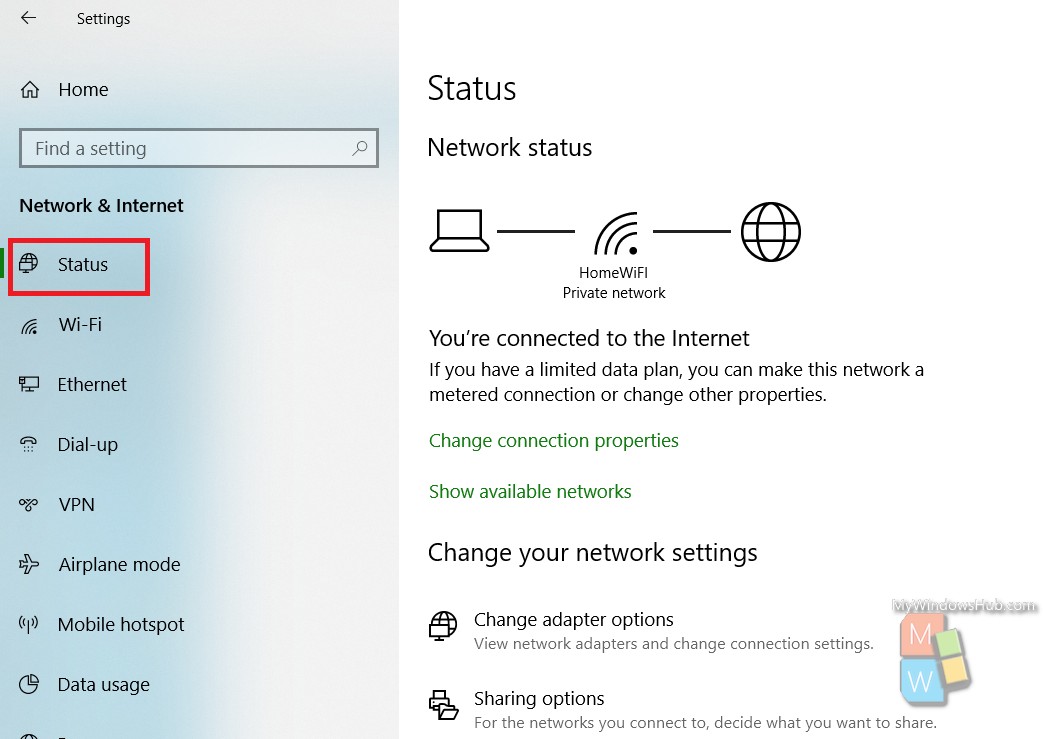
3. In the left panel, select Status
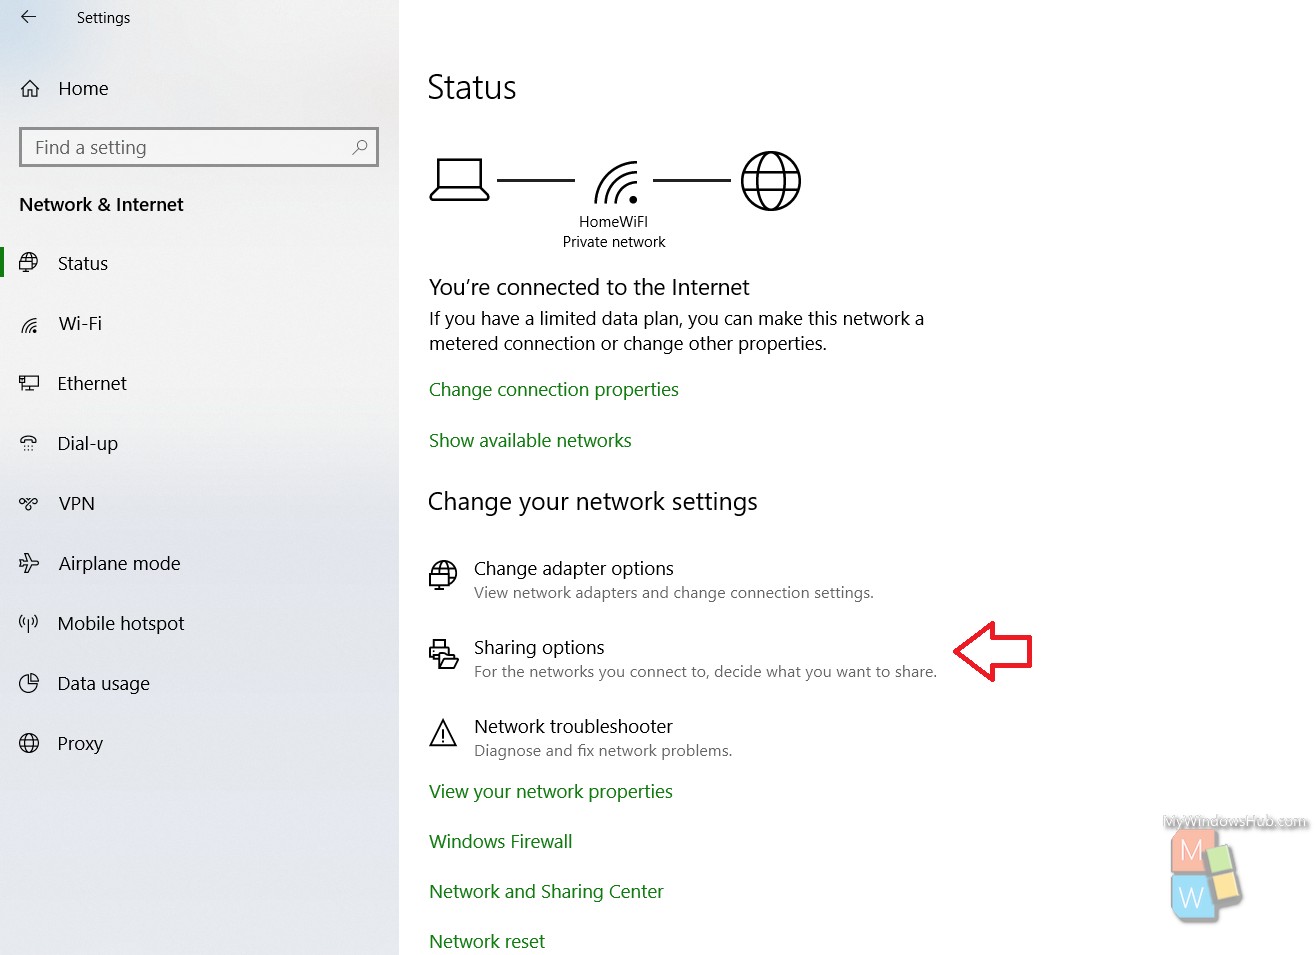
4. In the right panel, you will come across an option called Sharing Options. Tap on it.
5. You will be redirected to Control Panel. By default, the option network Discovery is turned off. To enable it, check the radio button corresponding to the option Turn on Network Discovery.
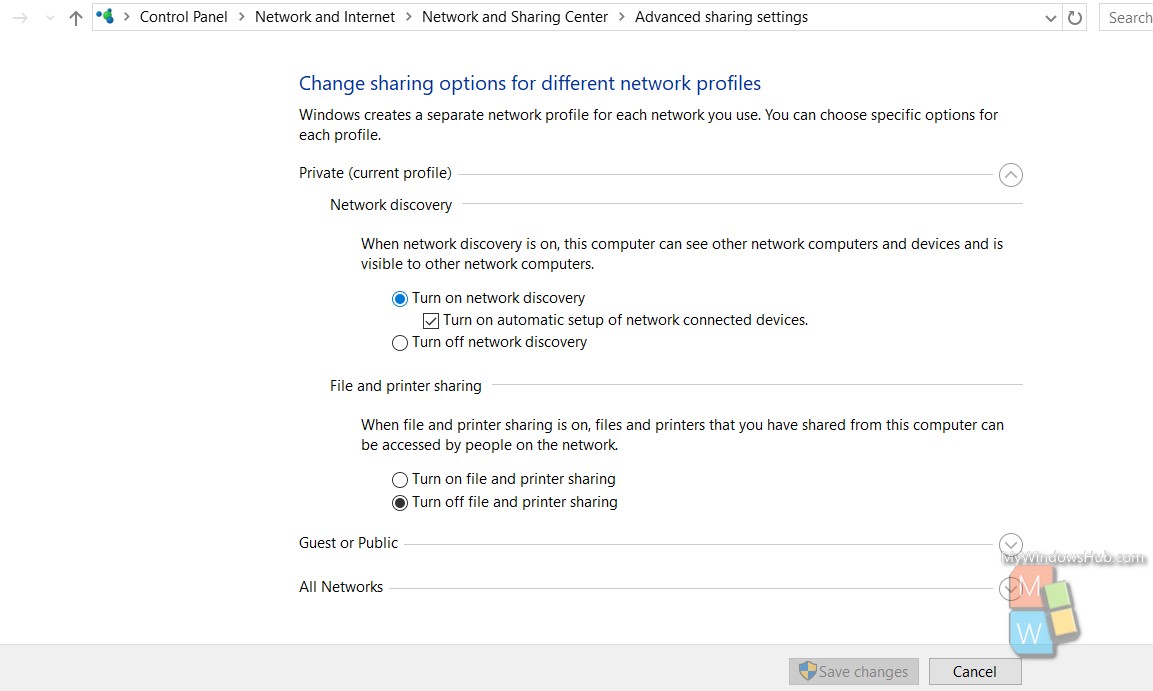
6. Now uncheck the option Turn on automatic setup of network connected device.
7. Click On Save Changes. That’s all!