According to Microsoft, Driver Verifier monitors Windows kernel-mode drivers and graphics drivers to detect illegal function calls or actions that might corrupt the system. Driver Verifier can subject Windows drivers to a variety of stresses and tests to find improper behavior. You can configure which tests to run, which allows you to put a driver through heavy stress loads or through more streamlined testing. You can also run Driver Verifier on multiple drivers simultaneously, or on one driver at a time.
In this tutorial, you will know how to enable and disable driver verifier in Windows 10.
STEP 1: Run Driver Verifier
Method 1: Run Driver Verifier From Search Menu
Opening the driver verifier is very simple. Open Windows Search panel, and type verifier. From the search results, you will get Verifier (Run Command). Select it and hit Enter.

Method 2: Run Driver Verifier From Command Prompt
Open Windows Search, type cmd. Right click on Command Prompt, select Run As Administrator.
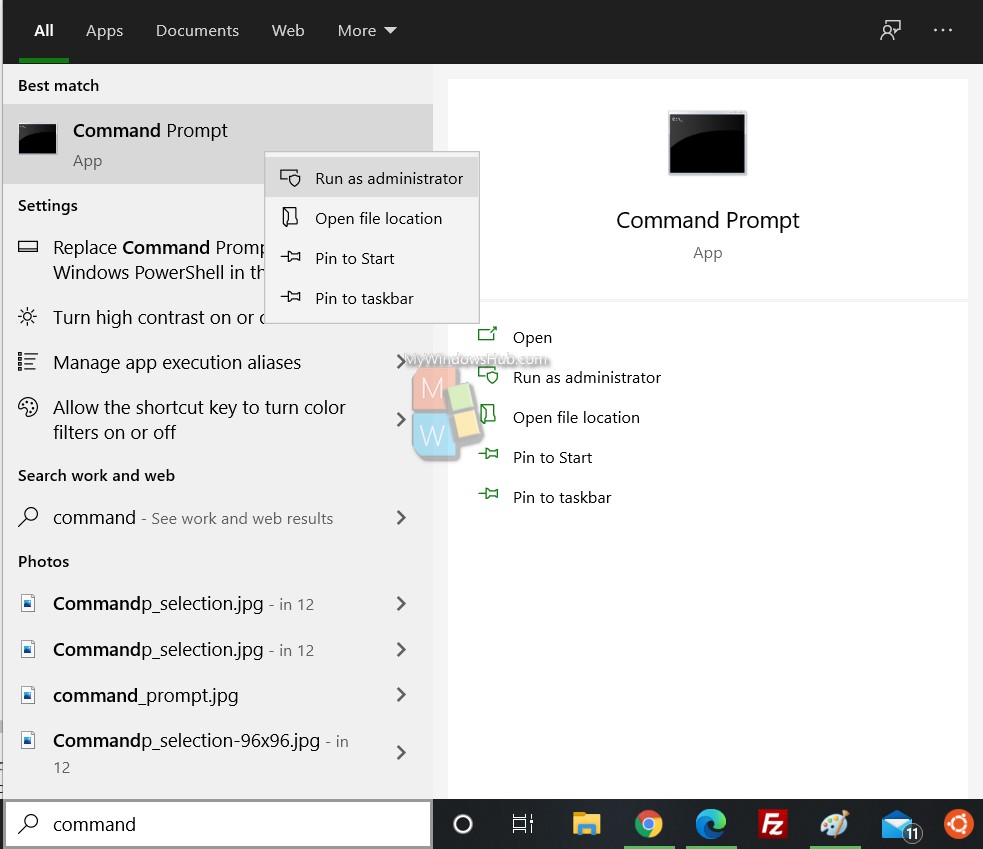
Now type the command verifier and hit Enter
3. Run Driver Verifier From Task Manager
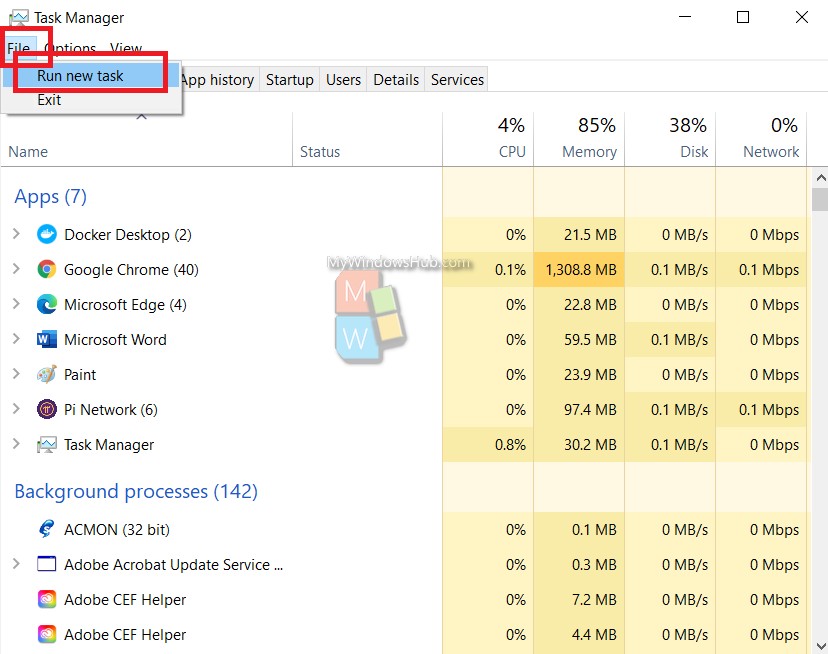
Open Windows Search and type Task Manager. As Task manager opens, go to File and click on Run New Task.
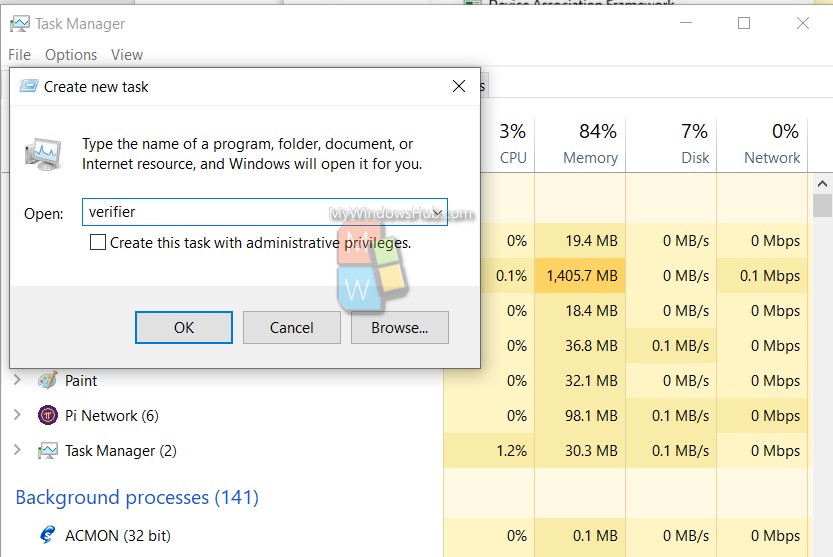
As the New Task box appears, type verifier and hit Enter.
STEP 3: Configure Driver Verifier Settings and Enable
1. After you run the driver verifier, you will be prompted by UAC. Click OK to continue.
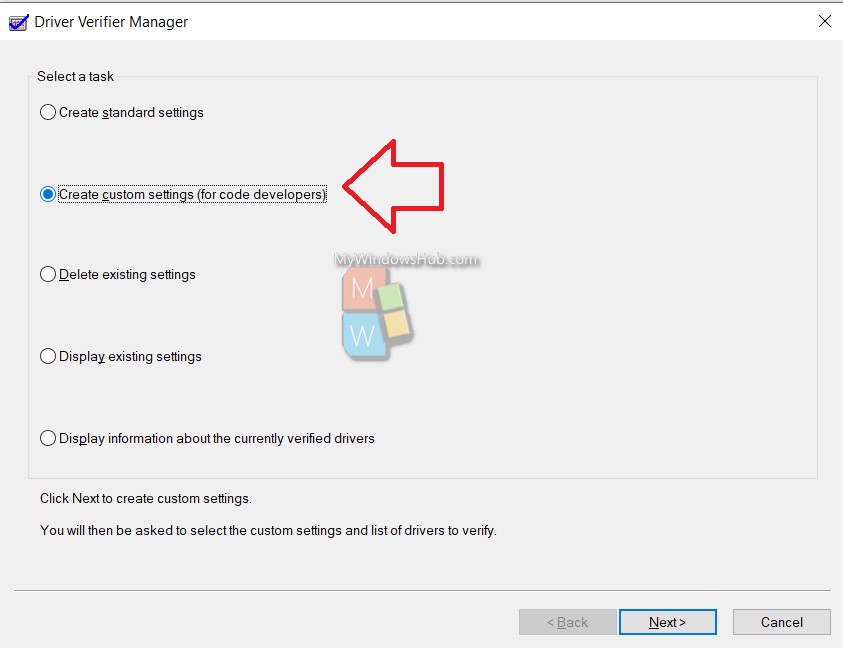
2. As the driver verifier manager opens, check the option Create Custom Settings (for code developers). Click Next.
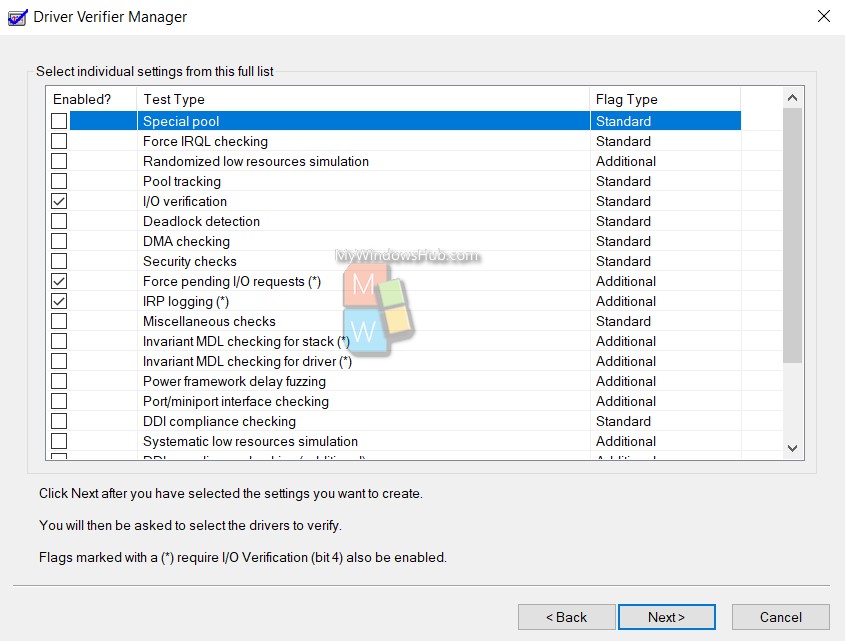
3. Now, check the following options and click Next
- I/O Verification
- Force pending I/O requests
- IRP logging
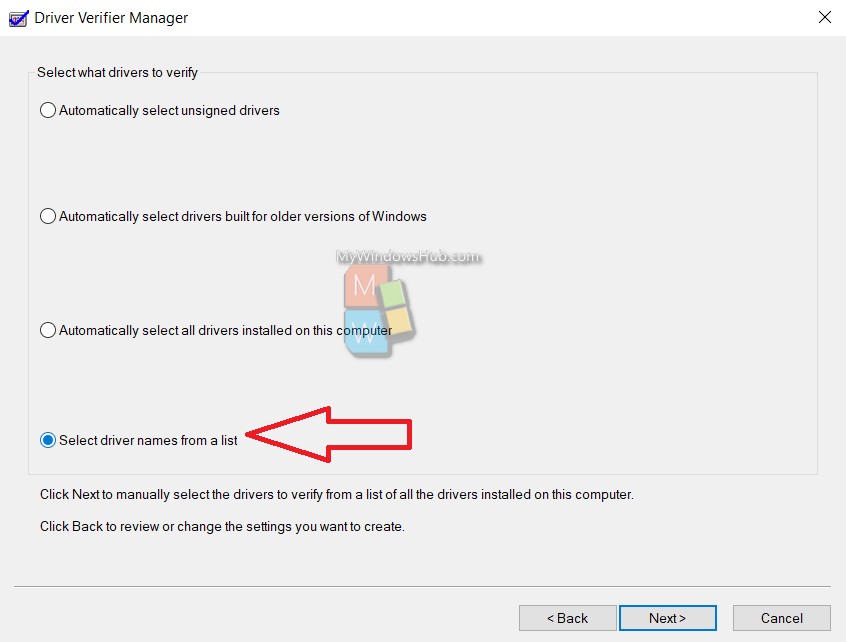
4. Now, select Select driver names from a list then click Next.
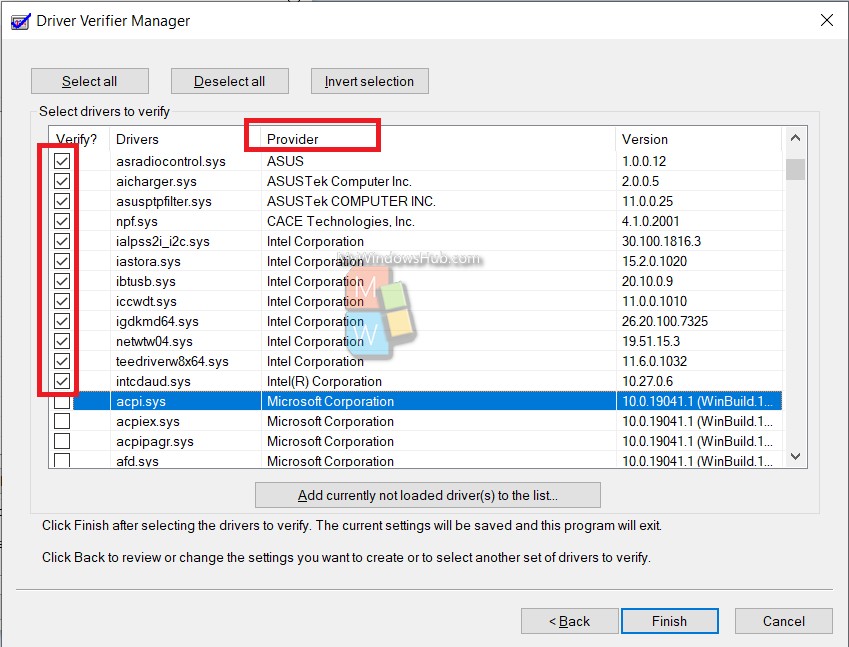
5. Click on the Provider tab as shown below. Check all the non-Microsoft drivers and click Finish.
6. Your PC will restart.
Disable Driver Verifier In Windows 10
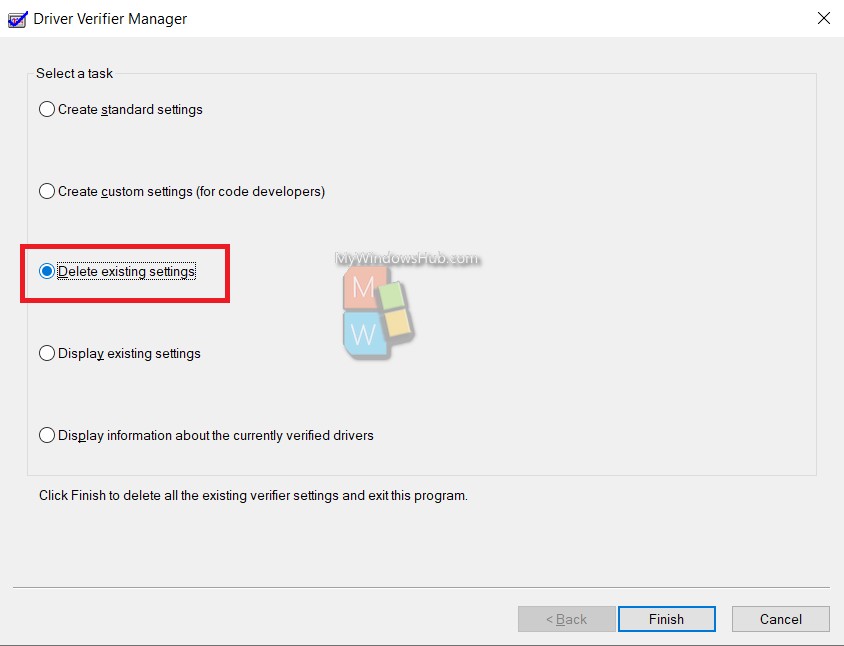
- Launch Driver Verifier as shown above.
- Select Delete existing settings and click on Finish.
That’s all!

