Since the beginning itself, there are numerous differences in opinions between the operating systems’ capabilities and user-friendliness. Windows has always been at the apex of the list for developing user-friendly operating systems. At the same time, Linux is not far behind. Its openness, endless customizations, and highly secured kernel-based operating systems are widely used on web servers by many enterprises and developers. What if I tell you that Microsoft has been working on a dream project “Windows Subsystem For Linux,” aka WSL that allows us to run Linux binaries natively on Windows 10 and the Windows Server range of operating systems.
Recently with Windows 10 May 2020 update release, Microsoft has made the WSL version 2 public. With more than seven lakh git commits, WSL is now more powerful and allows user to compile Android Open Source Project(AOSP) or custom ROMs like LineageOS without any installation of GNU/Linux distributions. You can always check out the WSL2 Microsoft codebase here. LineageOS is the most popular custom ROM for Android with a wide range of features as compared to stock Android.
As a Software Developer, I always found it tough switching between operating systems while working on multiple projects simultaneously. And in my opinion, WSL2 is far better than having a dedicated or dual boot Linux based OS. With WSL2 a windows user can perform below LineageOS tasks without switching to a Linux based distribution,
- GPU-Accelerated text rendering
- Custom key bindings
- Tabbed shells with customized colours
System Requirements
- Windows-10 64-bits (recommended on SSD)
- At least 16GB of RAM
- Lot’s of free disk space (Few developers suggested for more than 340GB of free disk space)
Step #1
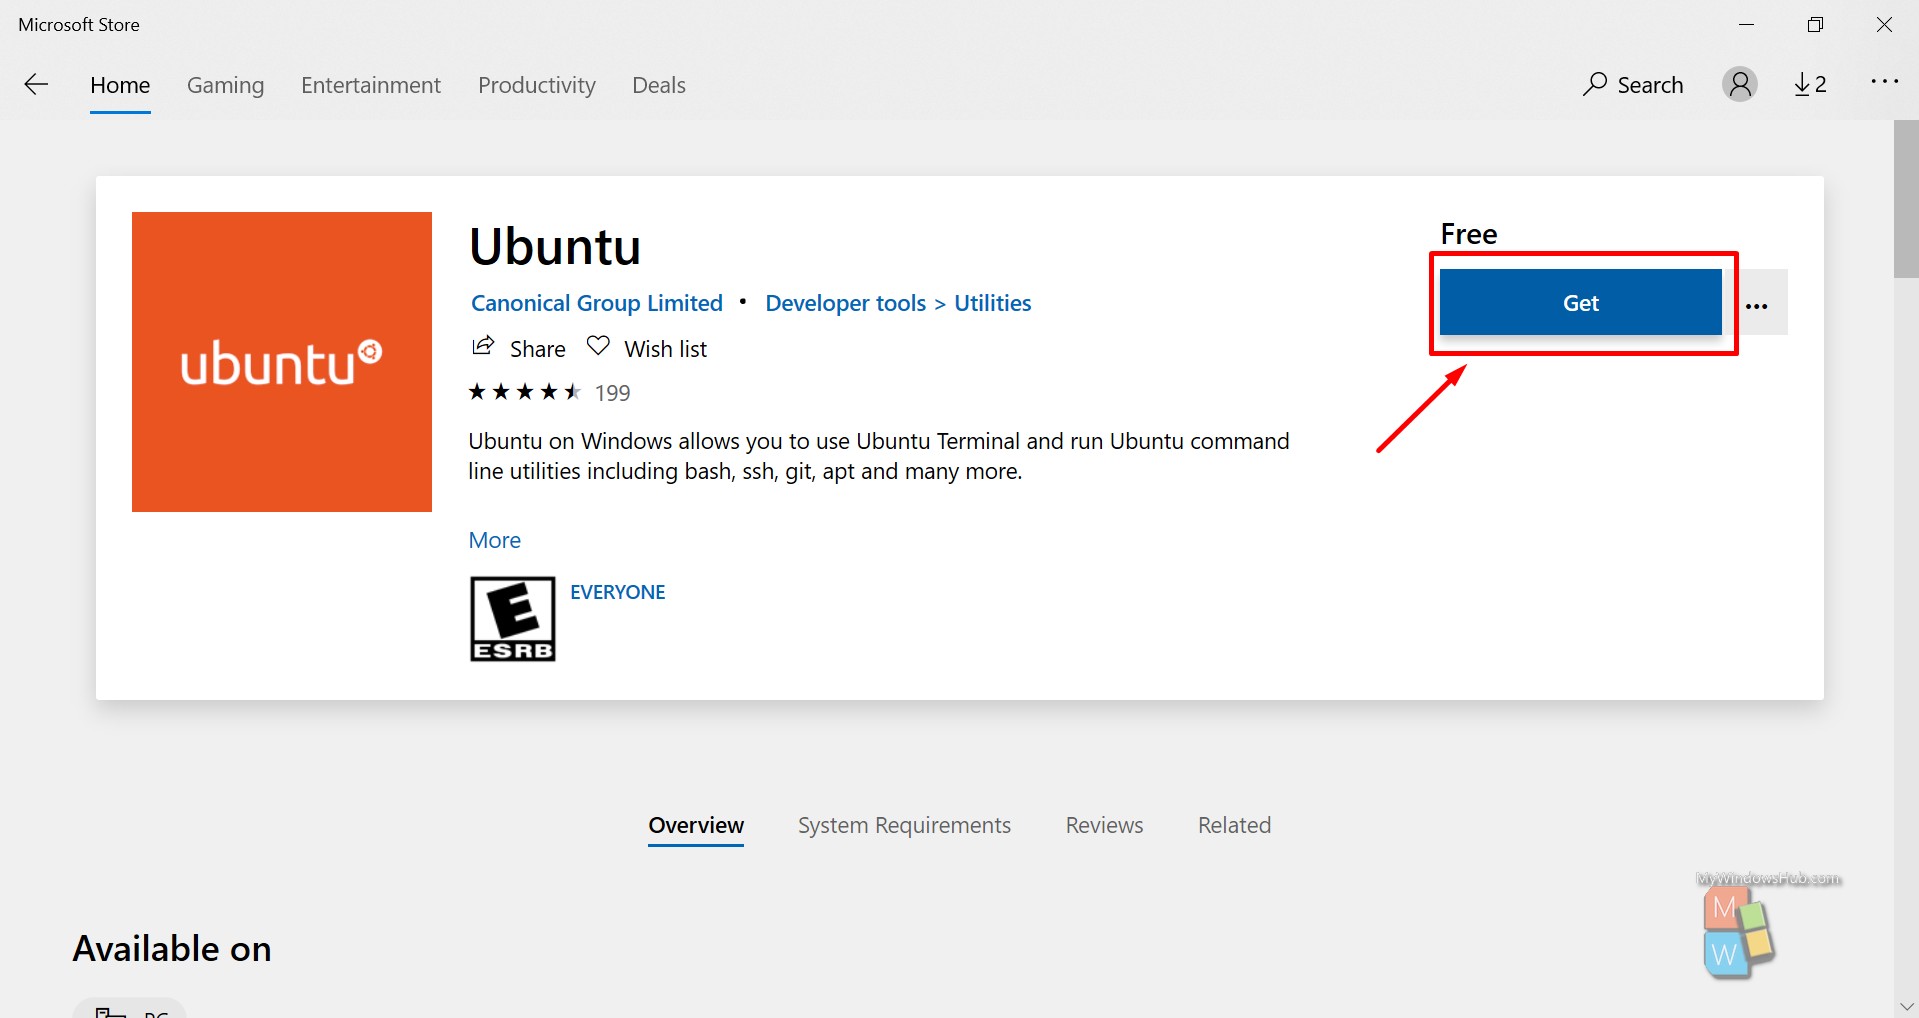
- Open Microsoft Store and search for the keyword “Ubuntu.”
- Click on the “Get” button, as mentioned in the screenshot, to begin the download.
- The download(Approx 430MB) will take a while based on your internet connectivity.
Step #2
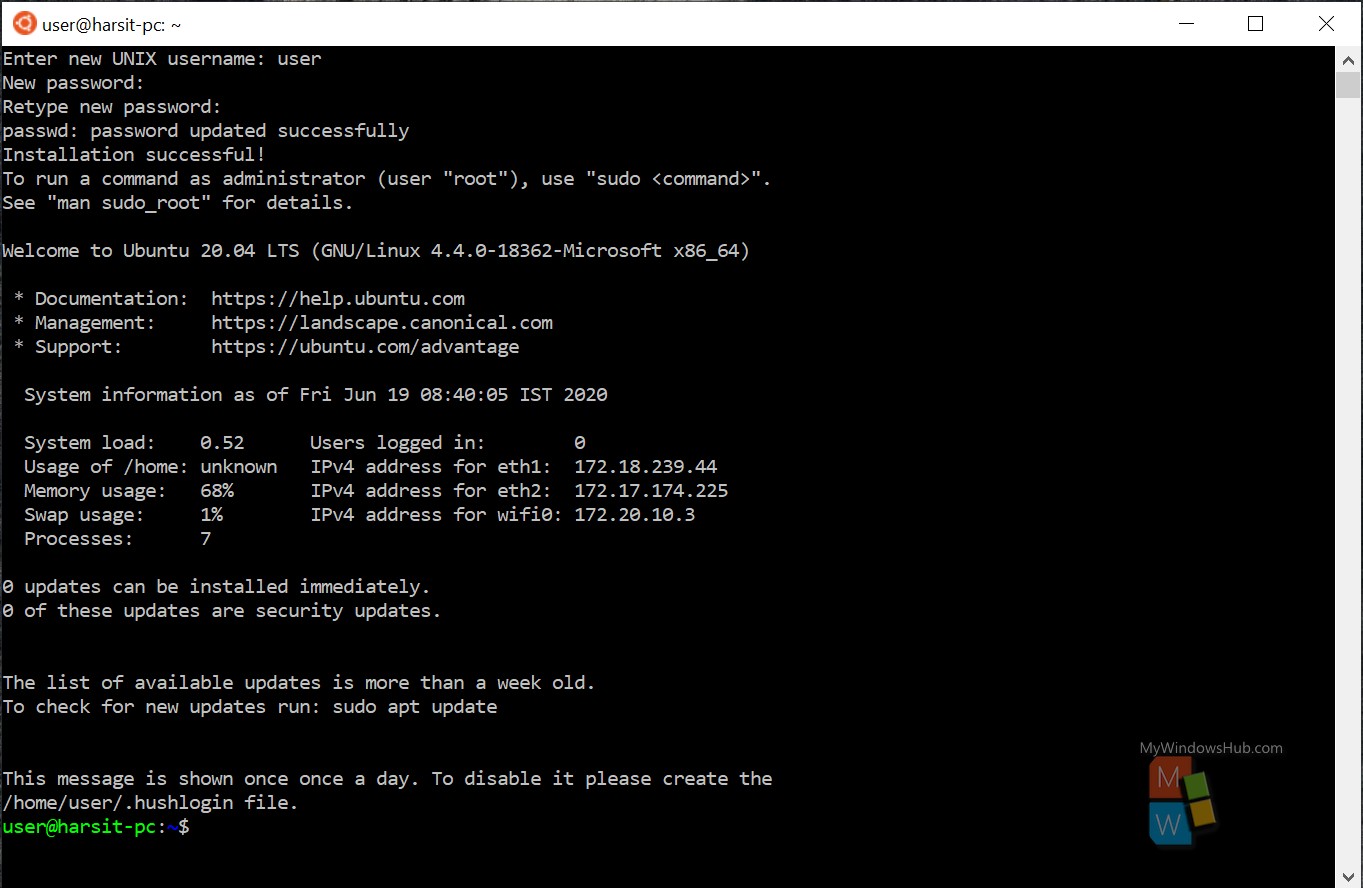
- You need to configure the Linux user before start setting up the custom OS.
- Open the start search bar and type “Ubuntu” and hit enter to open the below dialog.
- The command-line interface will ask you to enter username and password. Once you enter the details, you will see the shell as displayed in the below dialog.
Step #3
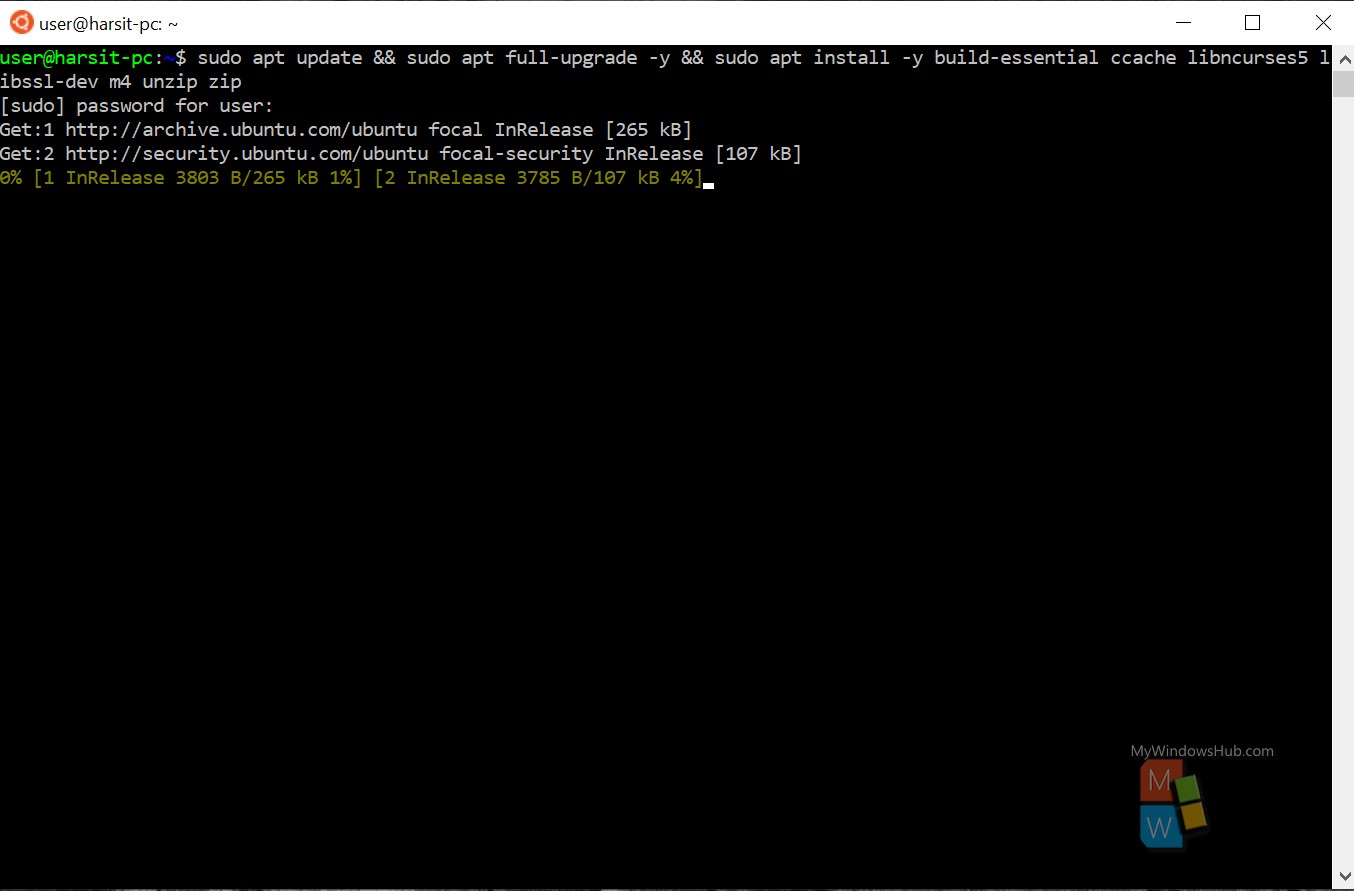
- You need to install the required packages and upgrade the existing packages by executing the below command,
sudo apt update && sudo apt full-upgrade -y && sudo apt install -y build-essential ccache libncurses5 libssl-dev m4 unzip zip
Step #4
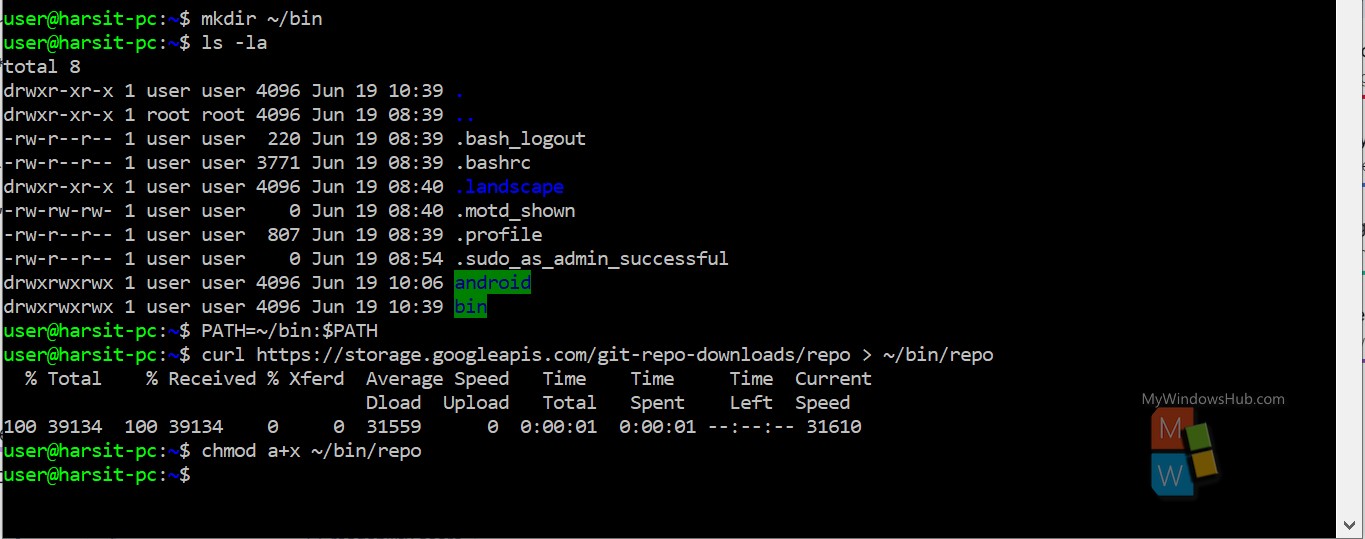
- You need to install the repo tool with special permisiion using the below commands,
- Make a new direcotry -> mkdir ~/bin
- Set the path -> PATH=~/bin:$PATH
- Use CURL to fetch the repo tool -> curl https://storage.googleapis.com/git-repo-downloads/repo > ~/bin/repo
- Grant permission -> chmod a+x ~/bin/repo
- You need to verify the installation of Python by using the below commands,
- To get root user access -> sudo -i or sudo su.
- To check if python is installed or not -> apt-get install python3
- To change the folder name -> sudo ln -s /usr/bin/python3 /usr/bin/python
- To get back to normal user -> exit
Step #5
- You need to create a directory for the source code of LineageOS by executing the below command,
- mkdir -p ~/android/lineage && cd android/lineage
- Now you are inside the android/lineage directory; here you need to execute the below command,
- repo init -u https://github.com/LineageOS/android.git -b lineage-17.1
Step #6
- Set the global config variable for the username and email,
- git config –global user.email “Email address”
- git config –global user.name “Your Name”
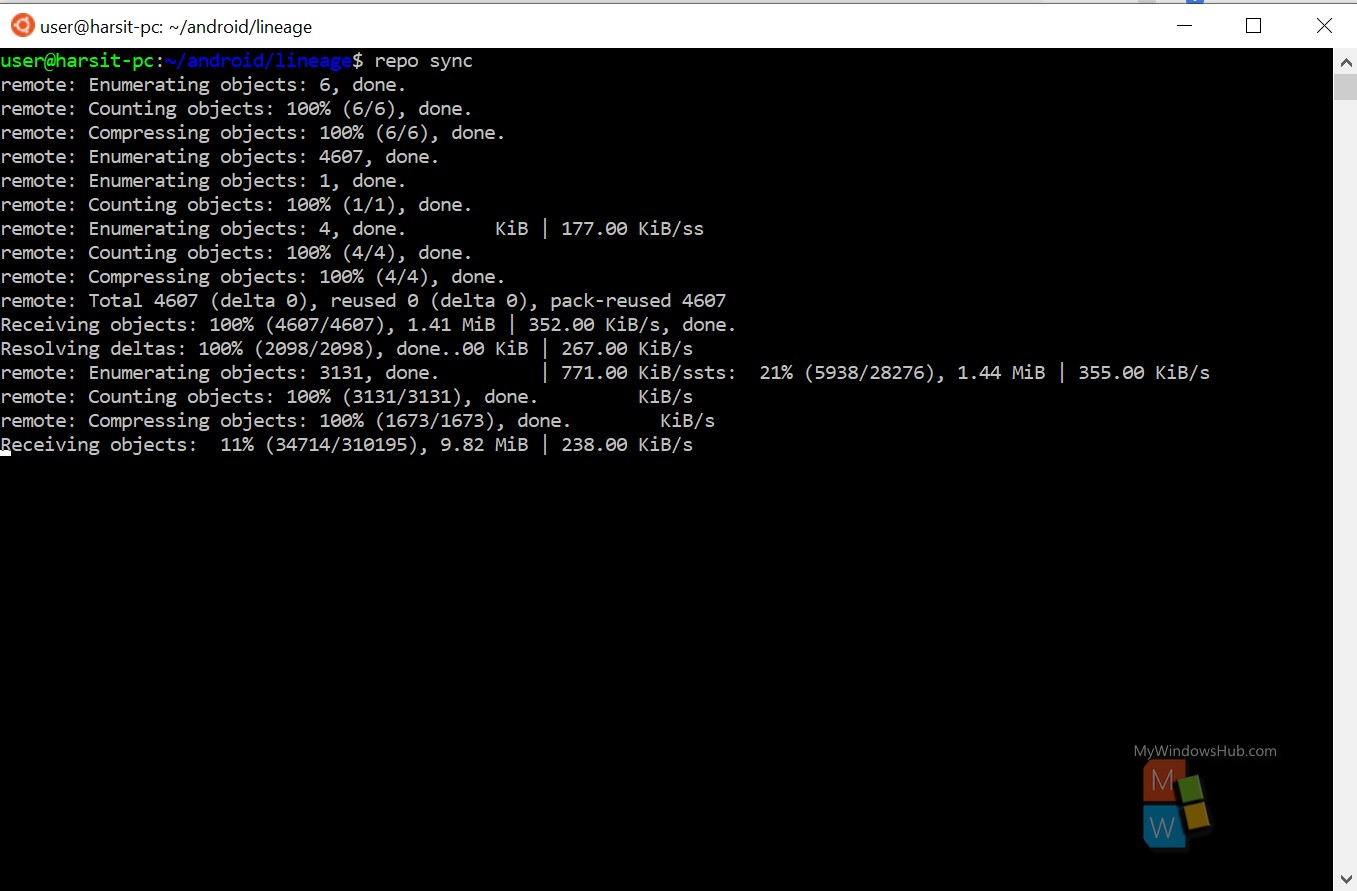
Sync the source using this command, repo sync. It will download the LineageOS git repository, and as we mentioned earlier, you need to have large free disk space for this process.
Step #7
- You can use the caching feature to speed up the build process. This step is recommended for the systems with normal HDD.
- This process involves the usage of ccache as mentioned below,
- Open ~/.bashrc file and append the following to enable caching,
- Export USE_CCACHE=1
- Specify the maximum amount of memory by appending the following,
- Set the cache to 50GB -> Ccache -M 50G
- You can specify the caching limit as per the requirement, for better performance, set it between 80~100GB. In either case, utilizing the ccache can significantly improve the build time.
- Open ~/.bashrc file and append the following to enable caching,
Step #8
- Add below-mentioned snippet to the file .repo/local_manifests/roomservice.xml,
- <project name=”TheMuppets/proprietary_vendor_your device brand” path=”vendor/your device brand” remote=”github” />
- Now pick the following commit by using the below command,
- source build/envsetup.sh && repopick -t wsl-compile
- Now target a specific device by using the following command,
- breakfast your device codename
- Now use 64-bit bison parser to convert LALR grammar to C programs,
- make bison && make ijar
- Set the BISON_EXEC and IJAR_EXEC environment variables to run the adapted ijar,
- export BISON_EXEC=~/android/lineage/out/host/linux-x86/bin/bison
- export IJAR_EXEC=~/android/lineage/out/host/linux-x86/bin/ijar
- Sync the sources again by using the command, repo sync
Step #9
- It’s time to start the build process by executing the following command,
- brunch your_device_codename
- Please note that this is a heavy operation and might use most of the computational resources; as per few reports with high-end hardware, it took around 20 minutes to complete the build process.
Conclusion
In this article, we have discussed a few of the key features introduced with WSL2 and how Microsoft is leaning towards open-source distributions with its recent releases. We eventually went through all the required steps to build LineageOS on Windows 10 using WSL 2.

