

In Windows 10 Home and pro versions, you can enable on screen handwriting panel, just like on screen keyboard. The process of opening the on screen handwriting panel is very easy. You have to right click on the Taskbar and click on Show Touch keyboard panel. When you click on it, the keyboard icon will appear on the taskbar. Click on the taskbar to open it. There will be a settings gear icon at the top left corner of the on screen keyboard. Click on it and choose the handwriting option from the menu. When you write something with your finger, Microsoft’s state of the art handwriting recognition system detects the words and display them in fonts. By default, the font set is Segoe UI. You can change if you wish. The following tutorial will help you learn how to choose your preferred font for Handwriting mode on Windows 10.
Steps To Choose Your Preferred Font For Handwriting Mode On Windows 10
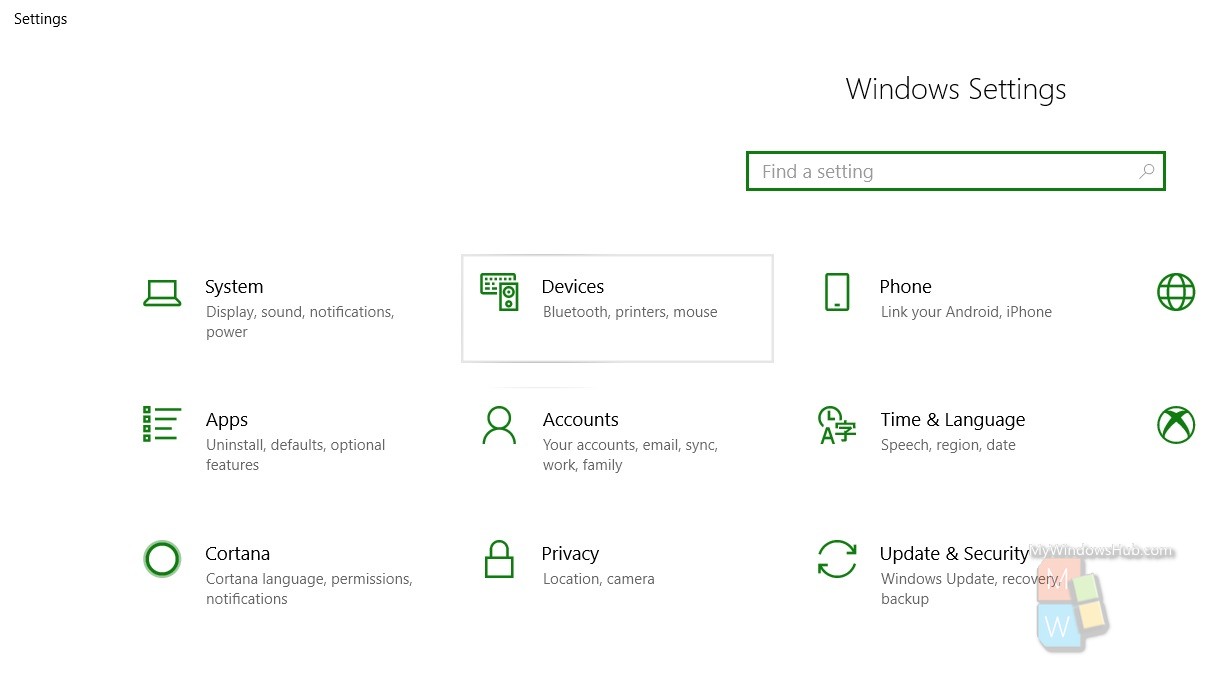
1. Open Start Menu and go to Settings.
2. Click on Devices.
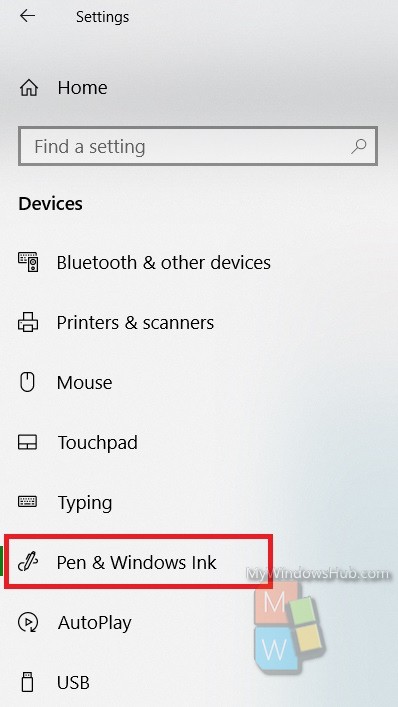
3. In the left panel, click on Pen and Windows Ink.
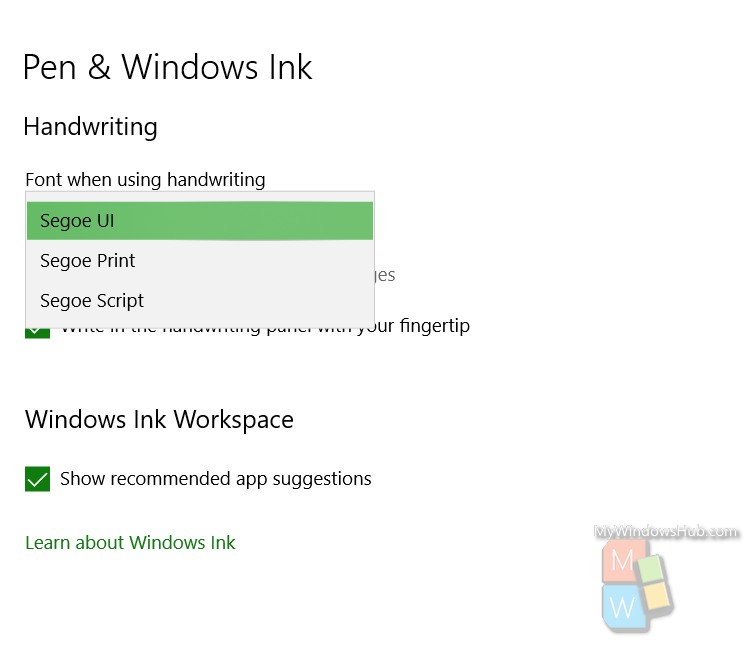
4. In the right panel, there is Handwriting on Windows 10.
5. Under Handwriting, there is an option called Font when using handwriting. Under it, there is a drop down box which contains the list of the fonts that you can set. The options are limited right now. There are three options Segoe UI, Segoe Print and Segoe Script. Choose the one you want to set.
That’s all!