Windows 10 added the Files On-Demand feature back in the last year. The Files On-Demand feature included a new memory saving feature that can send local files to OneDrive. But until now, the feature demanded manual uploading of the files on your OneDrive account. The process was simple. All you had to do is right click on a file stored on your Windows PC and select the option to move the file to OneDrive. The file gets uploaded but leaves a comparatively lower version or say, a placeholder, in the File Explorer. You could simply tap on the file and download it. With the advent of Windows 10 October Update, the process can be automated. That is, Windows 10 can now automatically send the Old files from local drive to OneDrive.
However, you can also change the frequency of clearing the downloads folder files on your Windows 10 PC. Generally it is turned off and not recommended to turn on. If the feature is turned on, then Windows will periodically remove files from the Downloads folder. So, if you are very particular of moving files from the Downloads folder to desired locations, then you can always turn on this feature. The default value is Never but you can choose any value among 1 day, 14 days, 30 days and 60 days respectively.
Steps To Change The Frequency Of Clearing Downloads Folder Files on Windows 10
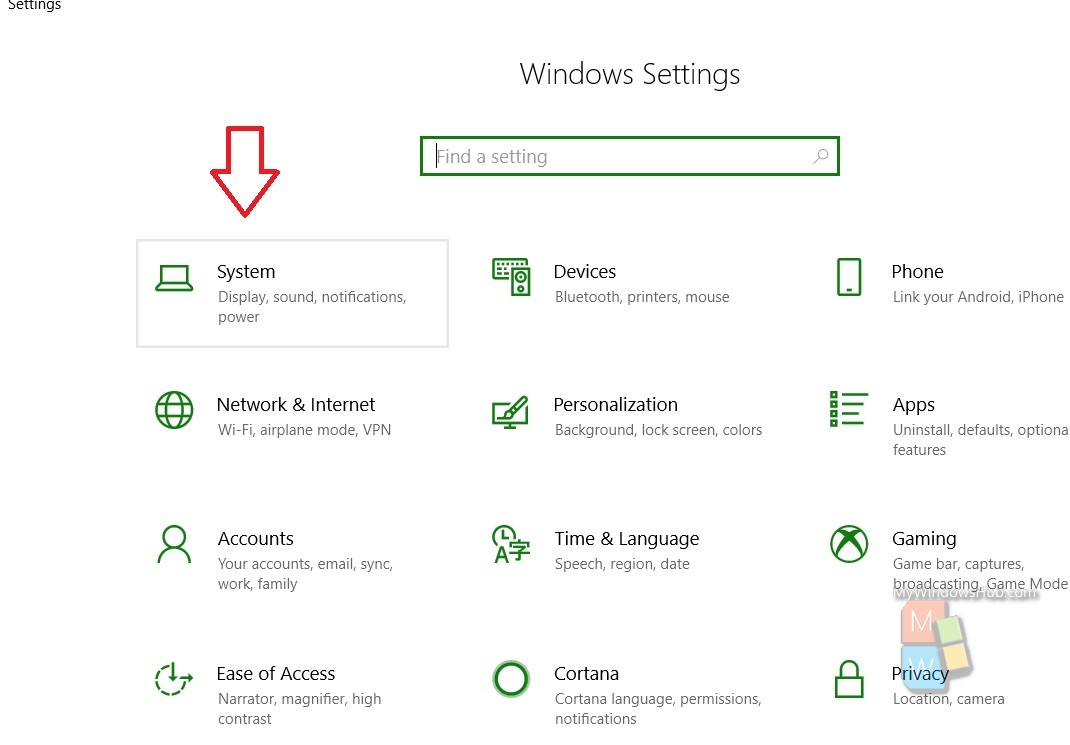
- Open the Start menu by tapping on the Start button. Then click on the Gear icon to open Settings app.
- Next, click on System.

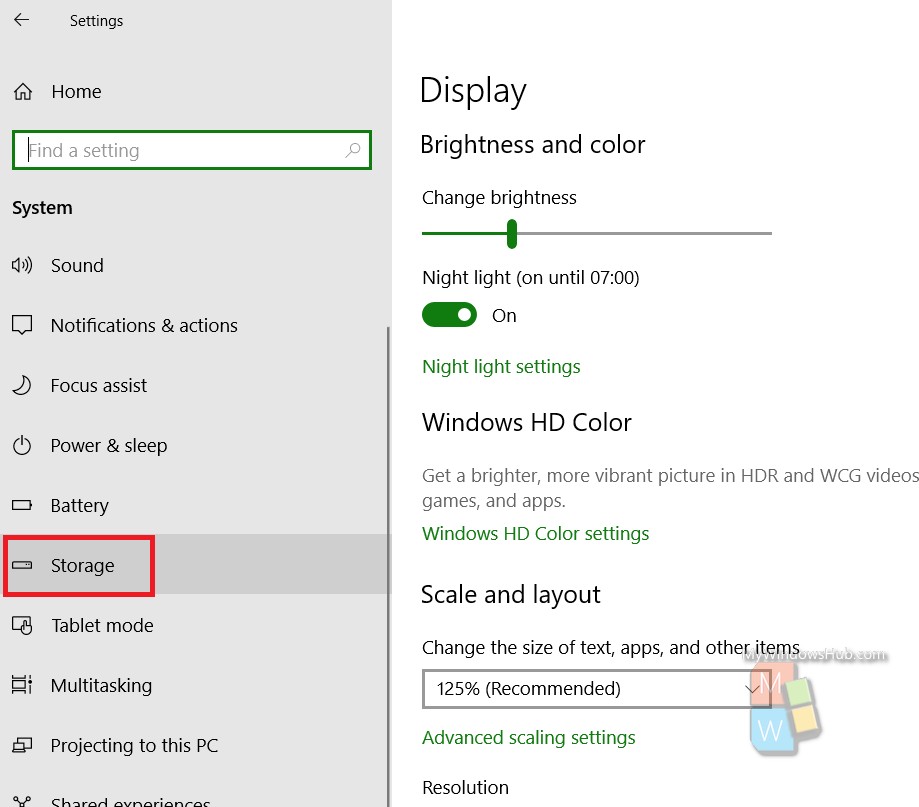
- In the left panel, click Storage.

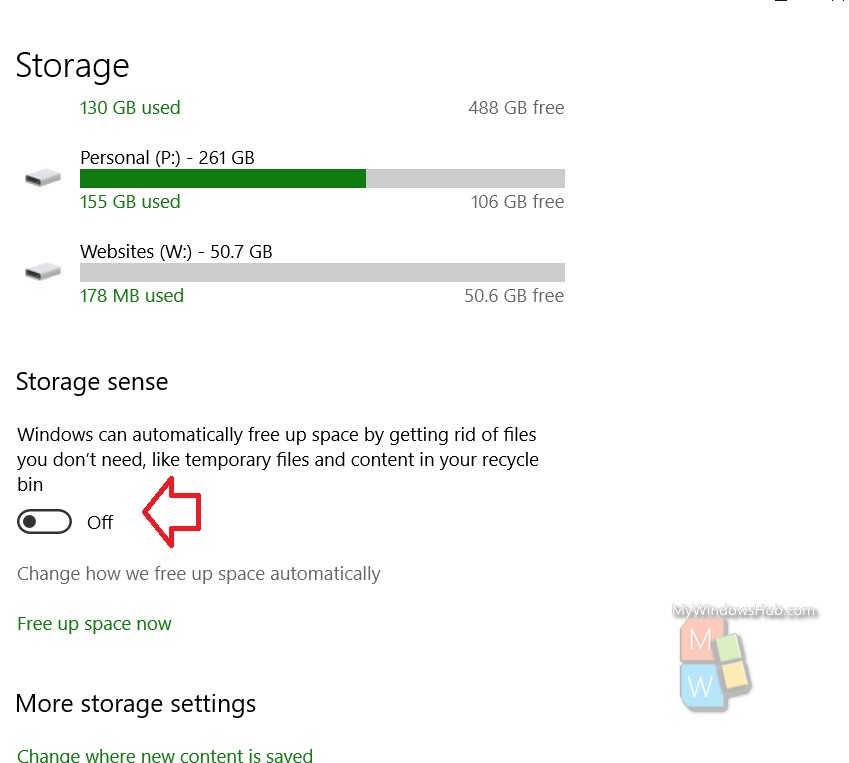
- Next, in the right panel, under Storage Sense, tap on Change how we free up space automatically.

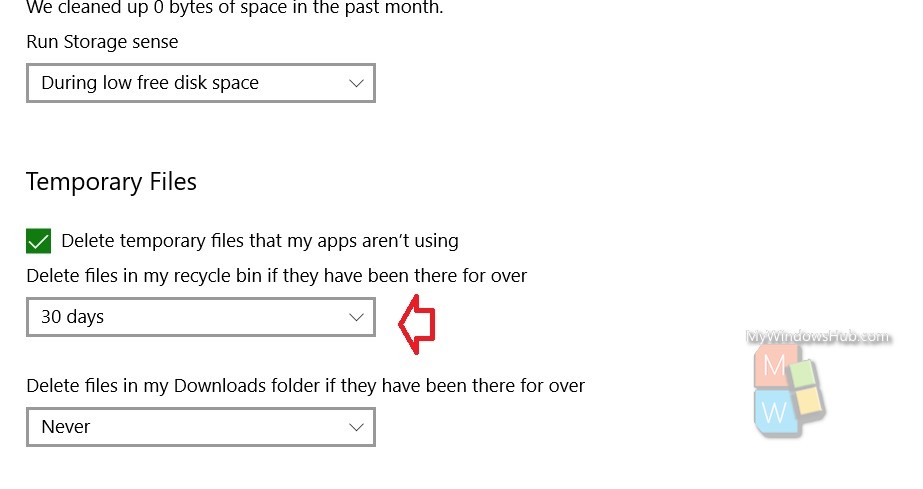
- Scroll down to the OneDrive and find the option Delete temporary files that my apps aren’t using. It is enabled by default. Under that there is an option called Delete files in my Downloads folder if they have been there for over. Choose a time period: 1 day, 14 days, 30 days or 60 days.


