

The following tutorial will help you to configure the network profile and the file sharing encryption settings in Windows. While you share your files over your computer, encrypting the files is immensely important so that the confidentiality is maintained. Some computers support 128 bit encryption while some support 40-50 bit encryption. Check out the steps below and learn how to change the encryption settings.
Steps to Change File Sharing Connections Encryption Settings in Windows 10
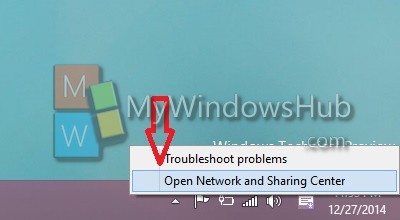
1. Right click on the Network icon from the notification area of Taskbar and tap on Network and Sharing Center.
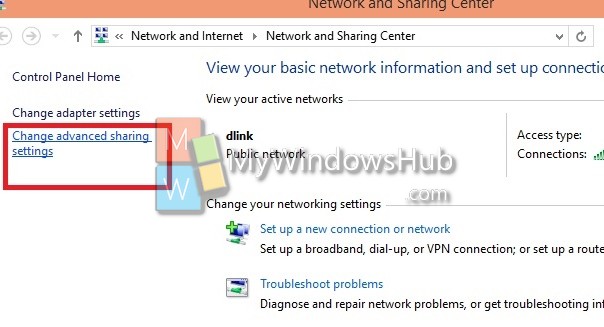
2. In the left side pane of Network and Sharing Center, click on the Change advanced sharing settings.
3. Click on the drop down button to the right of the All Networks profile to open it. If you want to assign “File Sharing Connections” to 128-bit Encryption in Windows 10, then check “Use 128-bit encryption to help protect file sharing connections”. Else, check the option “Enable file sharing for devices that use 40- or 56-bit encryption”.
4. Tap OK to save changes.
About Nick
Nick is a Software Engineer. He has interest in gadgets and technical stuffs. If you are facing any problem with your Windows, feel free to ask him.