Windows operating system deploys index while searching in order to give your better and faster search results. The search index in Windows only includes your selected locations. Users can customize and filter these locations whenever they want. Users can add new extensions, specify a file type in the search index and even remove file type extensions from being indexed.
Windows Search service is carried on by Index. The index also runs as the Searchindexer.exe process in the background and automatically rebuilds and updates for the updates being made to the included locations. Indexing speed is usually reduced owing to user activity. The indexing speed is reverted back to its original full fledged speed when the computer is idle.
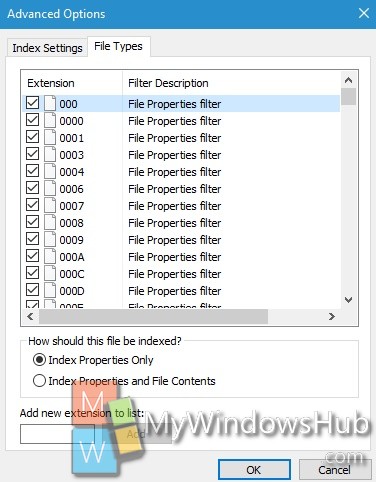
While performing the steps to add or remove file types for search index, you will come across two main options in the Control Panel. The options are the Index Properties only and Index properties and file content.
Index Properties Only – The metadata for that file will be included in the index. For example, file name, date modified, author, etc
Index Properties and File Contents – The above will be included as well as the contents of the file itself if available. For e.g., all text in a Notepad .txt file. Not all file types contain text though.
Steps to Add or Remove File Types for Search Index in Windows 10
1. Right click on Start Button and click on Control Panel.

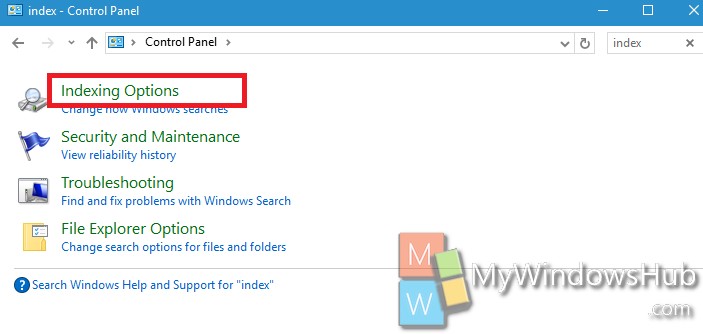
2. In the Control Panel search panel, type Indexing Options.

3. Next, click on Advanced.

4. If you want to add file type extension to Search Index, then go to File Type tab. Now select the extension that you want to include in the index. Check either Index Properties Only or Index Properties and File Content based on your requirement.

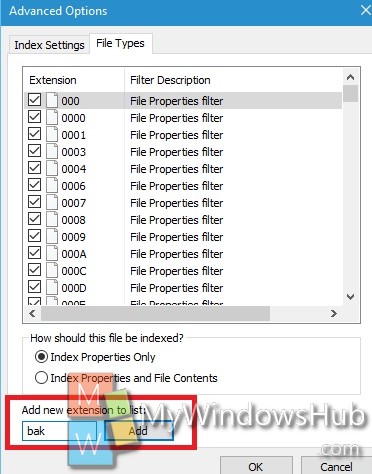
5. If you want to add New File Type extension to List, then type the file type extension in the Add new extension to list.Next click Add to include it in the list.

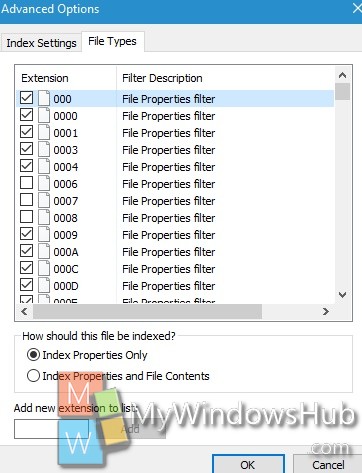
6. If you want to remove File Type Extension from search index, simply uncheck the required box.

7. Click OK and close the tab.

