Windows Defender is the default security checking software and anti-virus of Windows operating system. The Windows Defender periodically check the system files, folders and processes in your computer to keep it clean and free from malwares. Windows 10 provides you an extended service to this. With the latest version of Windows 10, you can add an exclusion to files, folders and processes. For example, suppose you have imported images from your camera and you are pretty sure that these image files are safe and virus-free. Then you can exclude that particular folder from Defender and the next time when Defender starts scanning your system, it will skip that particular folder. There are several more ways by which you can exclude files. You can create exclusion for a particular file time, like .jpg files. You can create exclusion for individual files and applications also. By excluding unnecessary files from Windows Defender scan, you can reduce the load of information that Defender has to scan.
Steps to Add an exclusion of files, apps and folders in Windows Defender
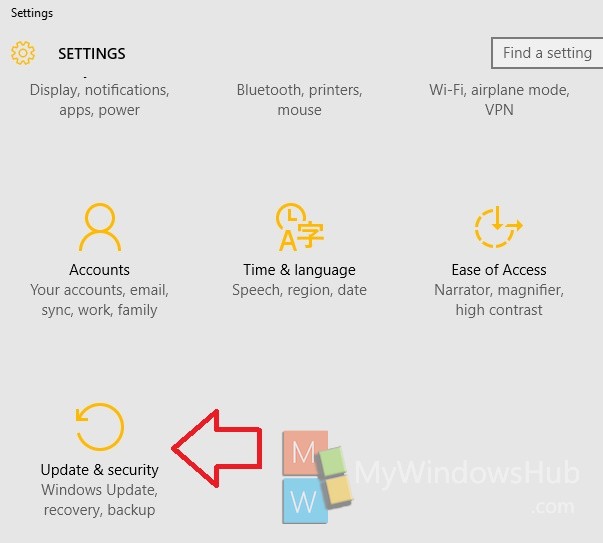
1. Press Start Button and go to Settings.

2. Now tap on Update and Recovery.

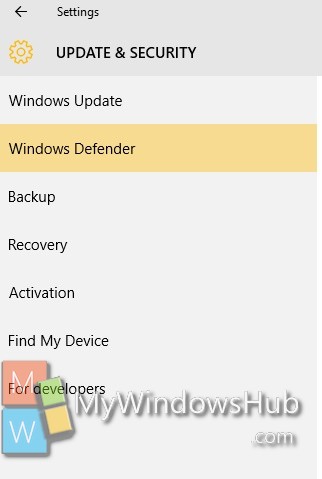
3. In the left panel, tap on Windows Defender.

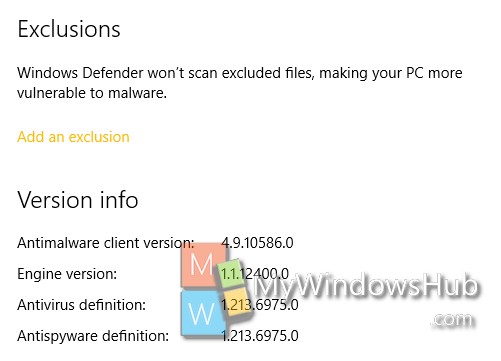
4. In the right panel, check out for the option Exclusions. Now tap on Add an exclusion.

5. When the new page opens, choose the option you need. You can exclude
1. File
2. Folder
3. File extension
4. Process or application.
If you want to exclude a file, then choose the Plus sign beside exclude a file. In this way, choose the option based on your requirement.

Browse the file/folder/process and it will be excluded from Windows Defender scanning.

