

EaseUS Data Recovery is a data recovery software that we have reviewed. Apart from giving you a brief about the utility software, we have jotted down the step by step method of recovering lost data using this software. EaseUs Data Recovery is a user friendly, fast and efficient software that can recover deleted files from a plethora of devices which include PCs, USB Flash Drives, memory cards. If you have deleted files from Recycle Bin, then this software can be used to extract the deleted files from the hard drives. The wizard can work perfectly even if your hard drive is damaged, files deleted, drives and devices formatted by mistake, data manipulated or destroyed by virus attack, crash in operating system, partition loss, RAW partition etc. EaseUs Data Recovery also supports SD Card Recovery.
The software can recover data from a variety of devices like:
Hard Drive
External hard Drive
USB Drive
External Memory Card
Digital Camera
Mobile Phone
Music Player
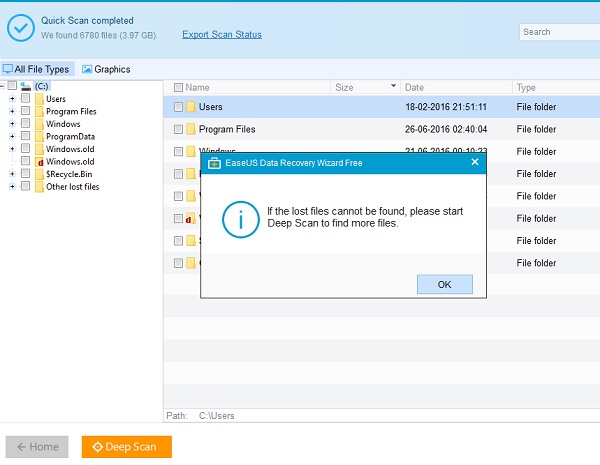
The software provides two scan options, one is Normal Scan and the other one is Deep Scan. Sometimes, certain files become non-recoverable with normal scan. In that case, you can choose the Deep Scan which to get an advanced scanning.
EaseUS is available in both free and paid versions. The paid versions have 1 GB limit of recovery whereas the free version has 500 MB of recovery storage. The paid version is priced at $69.95. Now check out the steps to recover lost files using EaseUS.
1. Download EaseUs Data Recovery Software</a >.
2. Run the .exe file and install the Software by following the instructions as given to you.
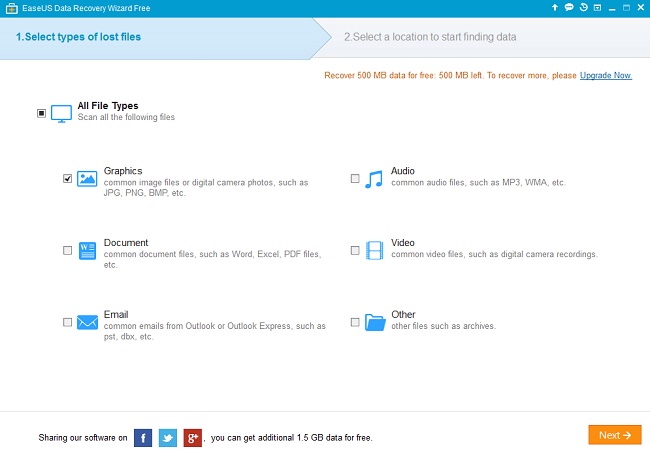
3. When the installation is complete, the EaseUs Data Recovery Wizard will open. Select the file type that you want to recover. Click Next.
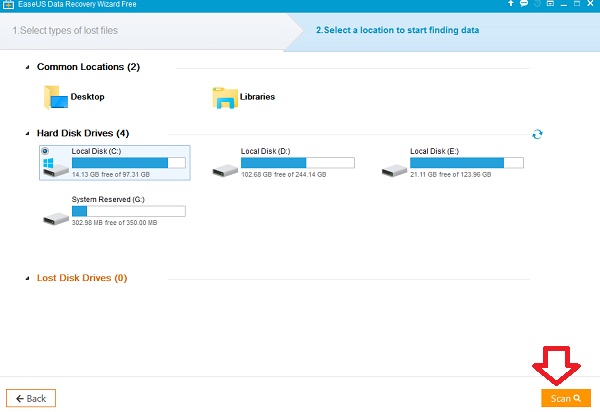
4. Next select the Drive that you want to scan and hit Scan.
5. Scanning will take some time. When scanning is complete you will be prompted to choose Deep Scan in case the folder the folder you want is not available for recovery.
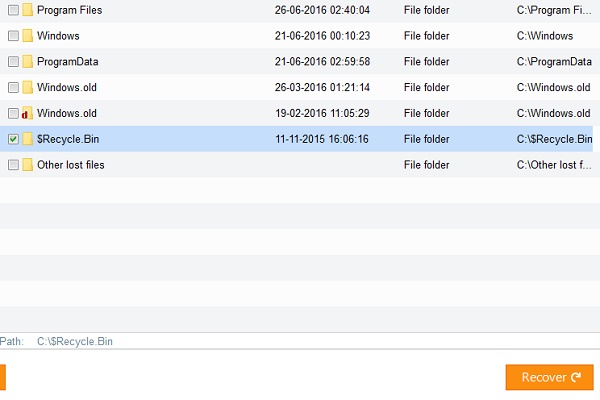
6. Now select the file and click Recover. The process will redirect you to browse the folder or location you want to store the recovered files.
7. When recovery is complete, you will get this message and will be redirected to the location under the name folder name NTFS.

About Nick
Nick is a Software Engineer. He has interest in gadgets and technical stuffs. If you are facing any problem with your Windows, feel free to ask him.