VHD is a file format which is the acronym for Virtual Hard Disk which produces virtual drives which has the same functionality of the physical hard drives like disk portioning but at the same time present in the same physical drive. This format was first developed by Connectix and later acquired by Microsoft in the year 2003. Virtual hard disk is of immense importance and it allows different OS to be installed in the same host machine. It has significant role in the field of IT and software because testing of a software on different OS platforms can be done with ease and poise with the help of VHD. There are many more utilities of VHD. The following tutorial will help you to create virtual hard disk in Windows 8.1.
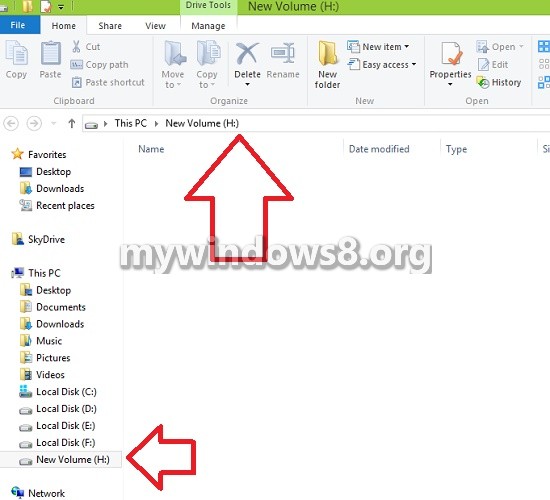
Steps to Create and Attach a VHD or VHDX File in Windows 8
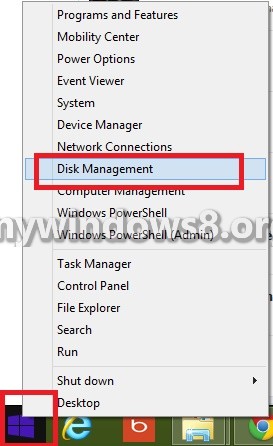
1. Right click on the Start Button on the desktop and select Disk Management.
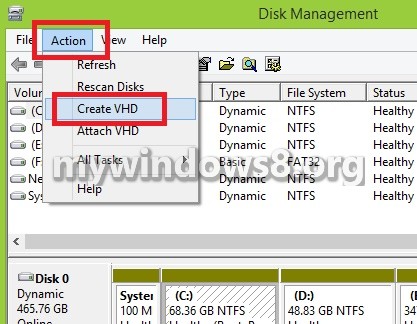
2. Click on Action tab and select Create VHD.
3. Now Create and Attach Virtual hard Disk box opens. Click on Browse.
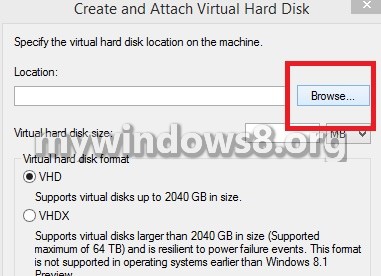
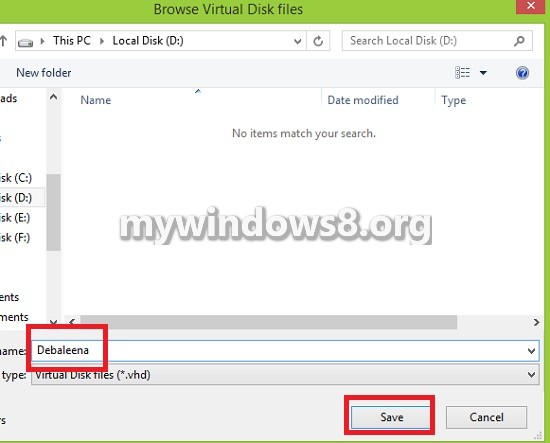
4. Select your desired location, and in the File name field, type a name of your choice and click Save.
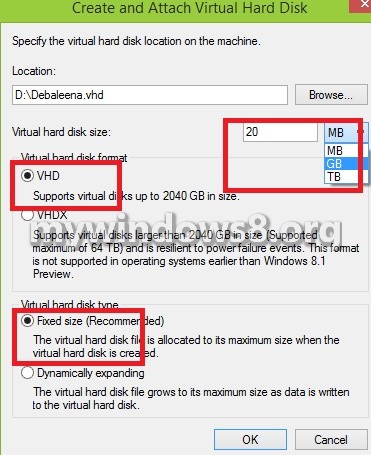
5. Select the preferred size of the VHD. Make sure that other options are selected as shown in the image.
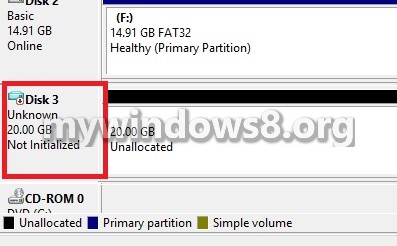
6. Creating the VHD would consume some time. After it is created , see that the VHD is uninitialized.
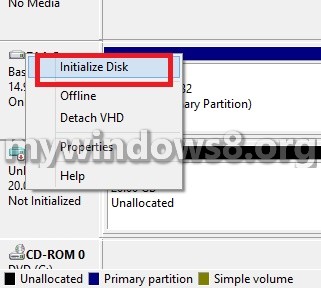
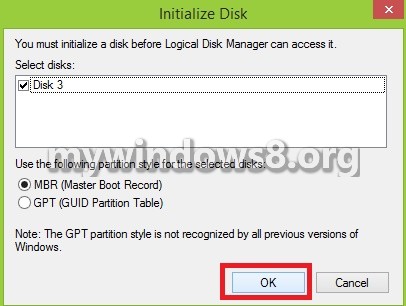
7. Right click on the Disk and select Initialize Disk.
8. Select MBR and click OK.
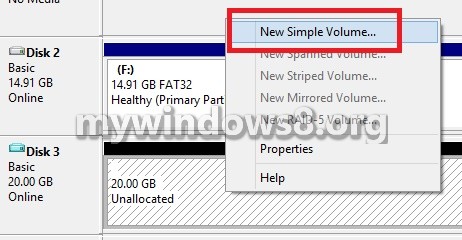
9. In the right hand side partition of the newly created VHD, right click and select New Simple Volume.
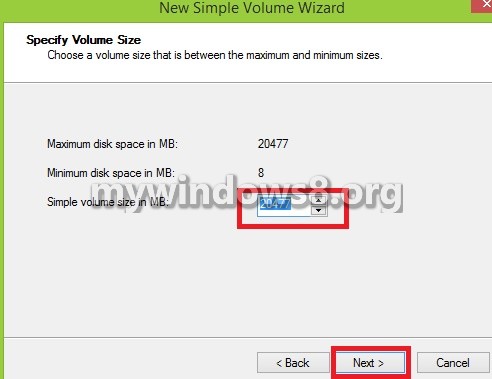
10. Click Next and then select a size for Disk Space which should be any value between the mention minimum and maximum. Click Next.
11. Select the settings as shown in the screenshot and click Next.
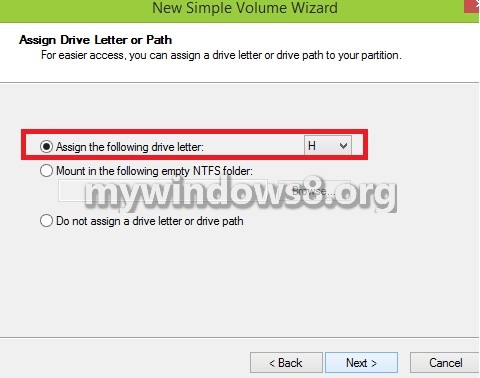
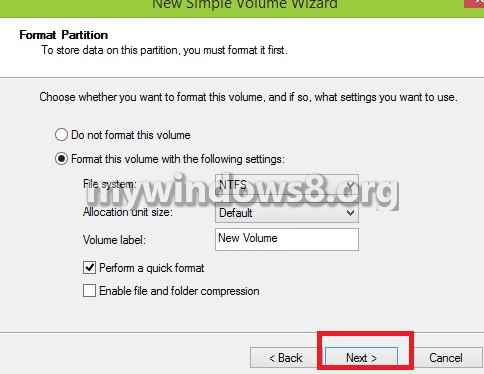
12. Follow the screenshot and click Next.
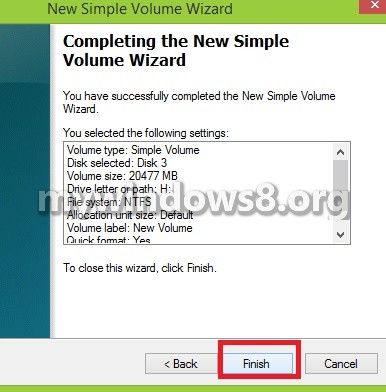
13. Click Finish.


Thanks a great little guide.