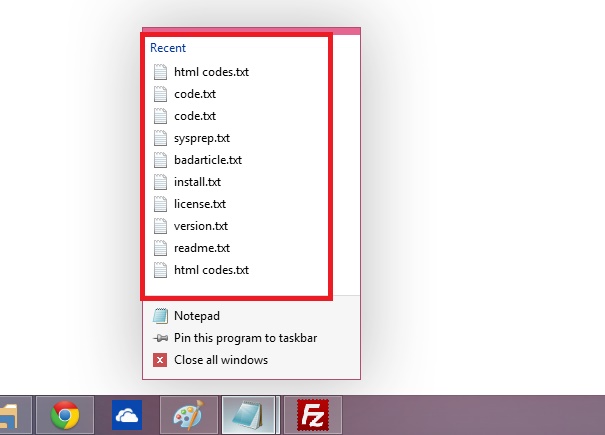
Recent Items are displayed in Windows 10 whenever we right click or long press any application on the taskbar. Not only taskbar but in Start menu and individual applications, we find this option. The Recent Items feature helps us in finding out our last used files quickly. So we don’t need to hover through the entire paths to go to the location. the number of recent items which are displayed in the list can be changed from 0 to 60. The default value is 10. The following tutorial will help you to change the number of recent items to display in jump Lists in Windows 10.
Steps to Change Number of Recent Items to Display in Jump Lists in Windows 10
METHOD ONE
The first method is the simplest and easiest method.
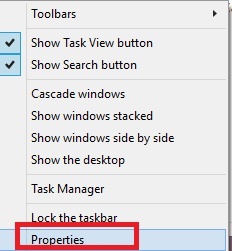
1. Right click at any empty space in the taskbar and go to Properties.
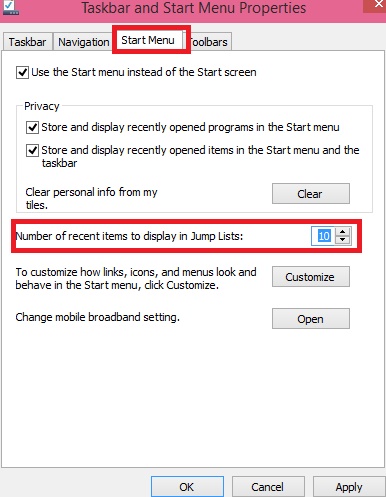
2. Now navigate to Start Menu tab. Now find out the option Number of Recent Items to display. Click on the drop down box below and select any number between 0 to 60. Tap Apply and then OK.
METHOD TWO
1. This method is a bit lengthy. Still it will help you to know you can accomplish it using Registry Editor. Sometimes, problems within the registry cause additional issues. Then instead of downloading reg files from other sites, just follow the steps. Press the Windows + R keys to open the Run dialog, type regedit and press Enter to open Registry Editor.
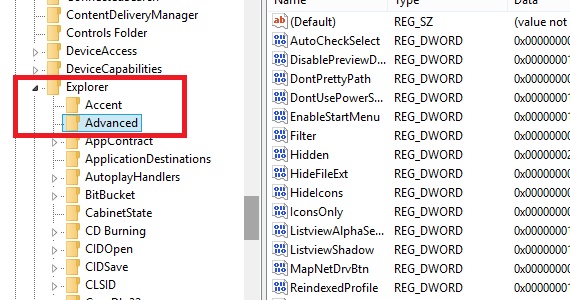
2. Now navigate to the following location HKEY_CURRENT_USER\Software\Microsoft\Windows\CurrentVersion\Explorer\Advanced.
3. In the right pan find out Start_JumpListItems.
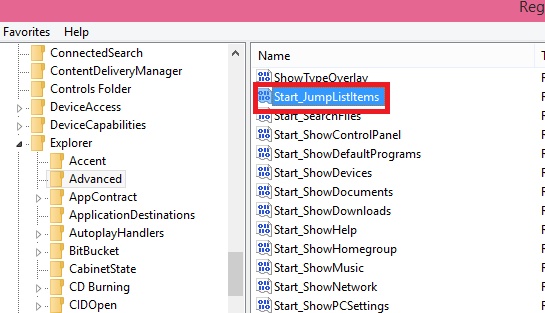
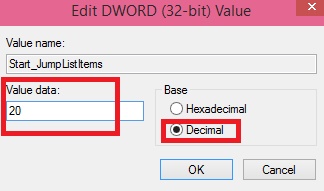
4. Now double click on it to change its value. Check Decimal option/ Set value to any number from 0 to 60. Click Ok and close registry editor. Your changes for number of diplayed Recent Items will be saved.
