

The following tutorial will help you to cancel a scheduled chkdsk at boot in Windows 10. The Chkdsk Autochk is a command that is used to set the disk checking countdown time in Windows 10. If you enable disk checking, then in the next login session, you will have a stipulated timestamp before which you can tap only key to skip disk checking. In this regard, it’s to mention that disk checking is very useful as it periodically checks for bugs and system failures. When you start your computer, you will get by default 8 seconds to skip disk checking. Now let’s look at the scenario where you have a scheduled Chkdsk boot but you do not have much time to carry on the disk checking. In such cases, you can cancel the scheduled DskChk at Boot. So to cancel the disk checking, you first need to identify if any drive has any scheduled check. Once you identify, you can simply press any key to skip the disk check on the next reboot session.
Steps to Cancel a Scheduled Chkdsk at Boot in Windows 10
1. Press Windows+X and select Command Prompt (Admin) to open Elevated Command prompt.
2. To check if any drive is scheduled for a disk check in the next boot session, type the following command and hit Enter
chkntfs “Drive letter”:
Replace “drive letter” by the actual drive letter, for e.g. chkntfs C:
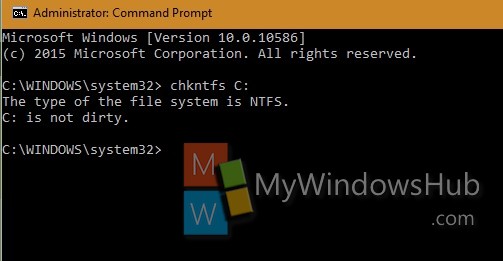
If you get the message that Drive is not dirty, it means no check disk is scheduled.
But if you get the message Chkdsk has been scheduled manually to run on next reboot on Volume C:, it means a chkdsk has been scheduled.
3. To exclude a Drive from default Boot-Time Check, copy and paste the following command
chkntfs /x “drive letter”:
To stop autochk:
To stop autochk in a dual boot system, where there are more than one logical drives set each as primary partition, the command chkntfs /x “drive letter”: will not work.
If this is the case, open the Registry and go to Settings:
HKEY_LOCAL_MACHINE\SYSTEM\CurrentControlSet\Control\SessionManager@BootExecute
The data value for Bootexecute is set to autocheck autochk * (with that value set, Chkdsk does run at Startup)
Erase the value and reboot
Yea, I have 4 drives. So only registry solution worked.
You rock. Reg fix worked.
Another “Kudos to Sop”.
I only have the one drive, but it kept checking every boot until that value was deleted.
Cheers
I have done the above along with entering from command prompt:
dism /online /Cleanup-Image /RestoreHealth
sfc /scannow
and looked in Task Scheduler where chkdsk is not showing. For the life of me, I cannot figure out what is causing chkdsk to start upon boot up. I have used both the autocheck autochk * as well as auto check autochk /k:C * in the registry and the darn thing still runs every stinking time the machine restarts.
Dear Sop!
The Registry approach does work. Thank you for your help.
Thank you. The Regedit approach worked just fine to solve the problem.
for me it said drive is dirty
I scheduled a disk check while logged In with the command in prompt – “chkdsk /x /r /f” now I find that it will take more than 3hours to complete. But the problembos when the screen shows “to skip… Press any button” my keyboard and mouse are not working. Just before that screen keyboard light flashes and it stops working so I can’t press any key. I tried chkntfs c: it says the drive is not dirty I tried it on all drive none is dirty. Regedit doesn’t have bootexecute key. I can open cmd from advanced startup. Windows 10
If you enter into BIOS (usually F2 as you boot up) ensure that USB are set to legacy devices to ensure it allows your keyboard to work. If your keyboard won’t allow you to go into BOIS you will need to use the old PS/2 port connector which you can buy from Amazon
Thanks! Your instructions stopped the problem. I have an SSD primary (C:) drive, and it seems it’s not good to have chkdsk operate on it. Is this still true?
I used the crystalDiskInfo to check the SSD and other hard drives, and it showed all is well with all of them. Is this still considered reliable?
I look forward to hearing from you on this, and thanks again!
DKSurfer
I tried chkntfs /x C: and it said “The type of the file system is NTFS”
I had disk check run on one of my drives. It was taking an incredibly long time, so I allowed it to complete overnight. When I woke up, windows login screen was up, looked like everything was all good.
When I rebooted later that day, problem repeated – wanted to rescan the same drive again.
I skipped the scan and got into Windows. The instructions in this article didn’t work for me, so I went into Administrative Tools and into Computer Management.
Under Disk Management, Windows was reporting that my F drive was healthy but at risk. On the right side, I chose more actions, and then “Rescan Disks.”
Windows updated the F drive to “healthy” and no longer at risk. Problem solved.
Your the best, tried everything else this worked.