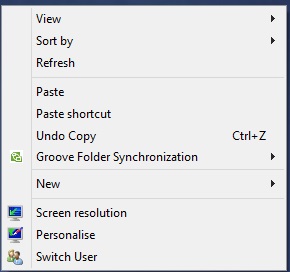
Switch User or Fast User Switching is a feature available in Windows that permits you to switch from the present user account that you are signed in to be signed in to some other user account rather than without having to shut down any programs and files or sign out of the present user account, and then be capable to revert back exactly where you had left off your work at. This article will show you how to add or remove Switch User option to the desktop context menu of all users in Windows 10.

Steps to Add “Switch User” to Desktop Context Menu in Windows 10
1. First of all download the below Switch_User_Win10_Reg.rar file and extract it.
2. To Add Switch User to Desktop Context Menu, Double click on the Add_Switch_User_to_Desktop_Context_Menu.reg file to include it to your current registry, and click on Run, press Yes (UAC), Yes, and OK when asked to sanction the merge process.
3. To Remove “Switch User” from the Desktop Context Menu register the Remove_Switch_User_from_Desktop_Context_Menu.reg file.
4. You may need to restart the PC, now Right click or press and hold on your desktop to see the change.

