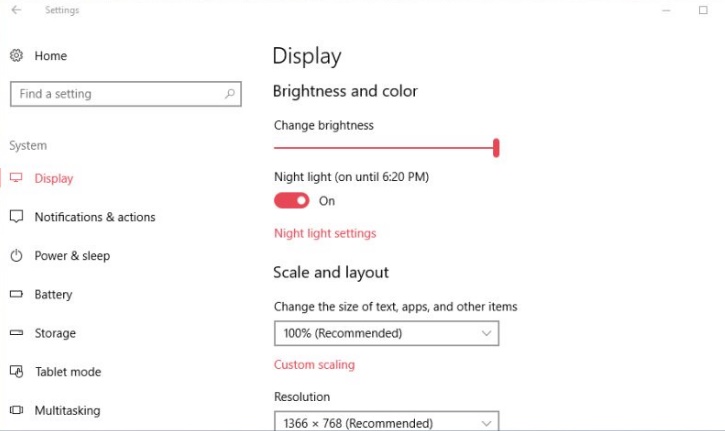
Microsoft has integrated a new feature in the Creators Update in Windows 10. The Night Light feature is similar to the Flux feature of Apple. We know that the Blue Light in the backlight of a mobile device or laptop is not good for eyes. Researchers found out that the blue light stimulates the brain and the nerves to such an extent that the users cannot sleep. The main reason that we don’t sleep and remain glued to our laptops and mobile devices is the blue light stimulation. A potential solution that was being chalked out by scientists is the inclusion of a red light filter on the backlight.
This red light filter minimizes the effect of the blue light which is soothing to the eyes and the brain calms down. The Build had arrived in several iterations and in different Builds, the feature has been named ‘Night Light’ and ‘Blue Light’. The feature lets you tint your screen a warmer color. You can schedule the feature and enable it at a preset time or when the sun sets. This setting can be customized further. It also makes it so the bright white screen doesn’t drive away your sleep. The following tutorial will show you the steps to enable night light in Windows 10.

Steps to Enable Night Light in Windows 10
1. Open Start Menu and go to Settings.
2. Go to System.
3. Next tap on Display
4. In the right panel, you will find Night Light. Move the slider from left to right to enable Night Light.
5. There will be a default time up to which Night light will be enabled. If you want to change the tim, then you have to Night Light Settings.

