Windows PowerShell is a more refined version of the command prompt and enables users to perform all sort of system tweaks and configurations. Windows PowerShell also helps you download a file directly to your computer in your desired location with the help of a PowerShell command. The following tutorial shows you how.
Steps To Download A File With A PowerShell Command In Windows 10
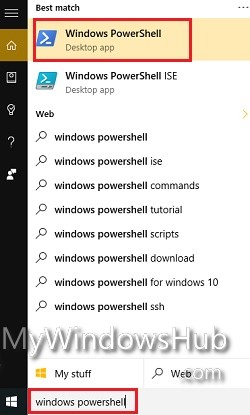
1. Open Cortana and type Windows Powershell in the search bar. When Powershell appears in the search result, click on it to open it.

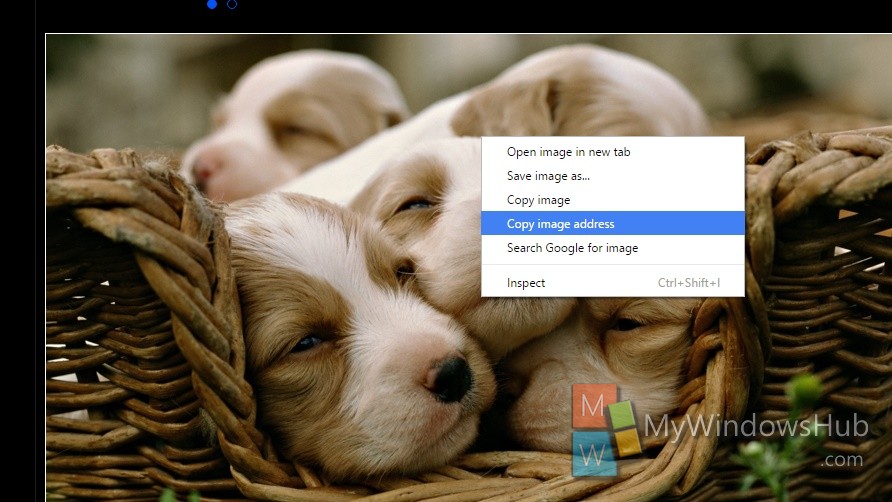
2. Copy the link of the file that you want to download via PowerShell.

3. Now substitute the text
Download Link within inverted comma with the actual download link from where you want to import the file, and File Destination by the location of your computer where you want to save the file.
$client = new-object System.Net.WebClient
$client.DownloadFile(“Download Link”,”File Destination\file name.file extension”)
P.S: file name, file extension notation have their usual meanings
For example
$client = new-object System.Net.WebClient
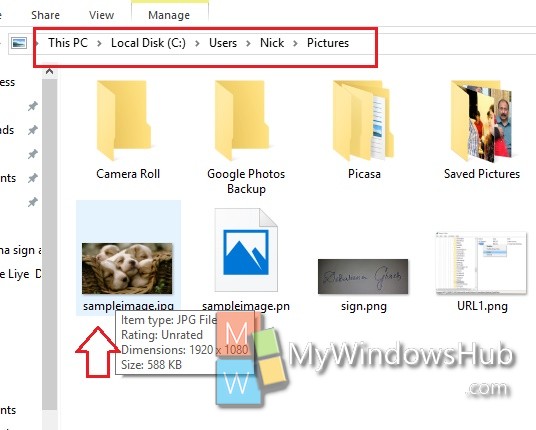
$client.DownloadFile(“http://www.hd-wallpapersdownload.com/upload/bulk-upload/desktop-hd-pictures-of-dogd.jpg”,”C:\Users\Nick\Pictures\sampleimage.jpg”)
4. After substitution, copy and paste the entire Powershell command in Windows PowerShell and hit enter.

P.S: If downloading the file needs login to some service like email, cloud, then copy and paste the following command in between the above stated commands.
$client.Credentials = Get-Credential
For example,
$client = new-object System.Net.WebClient
$client.Credentials = Get-Credential
$client.DownloadFile(“http://www.hd-wallpapersdownload.com/upload/bulk-upload/desktop-hd-pictures-of-dogd.jpg”,”C:\Users\Nick\Pictures\sampleimage.jpg”)
5. Voila! This is as simple as that.


does it work with youtube ? and how to track the downloading progress.