Windows 11 along with all previous versions of Windows support the net user command. The net user command helps in adding or modifying user accounts or even displays user account information. To use the net user command, you must be logged in as administrator and have elevated rights. This is nothing complicated. All it means, you need to have an administrator account.
If you use the net user command without command-line switches, the user accounts for the computer are listed in the result. The user account information is stored in the user accounts database and this command works only on servers. In this article, I will show you how to use the Net user command in Windows 11.
Steps To Use Net User Command On Windows 11
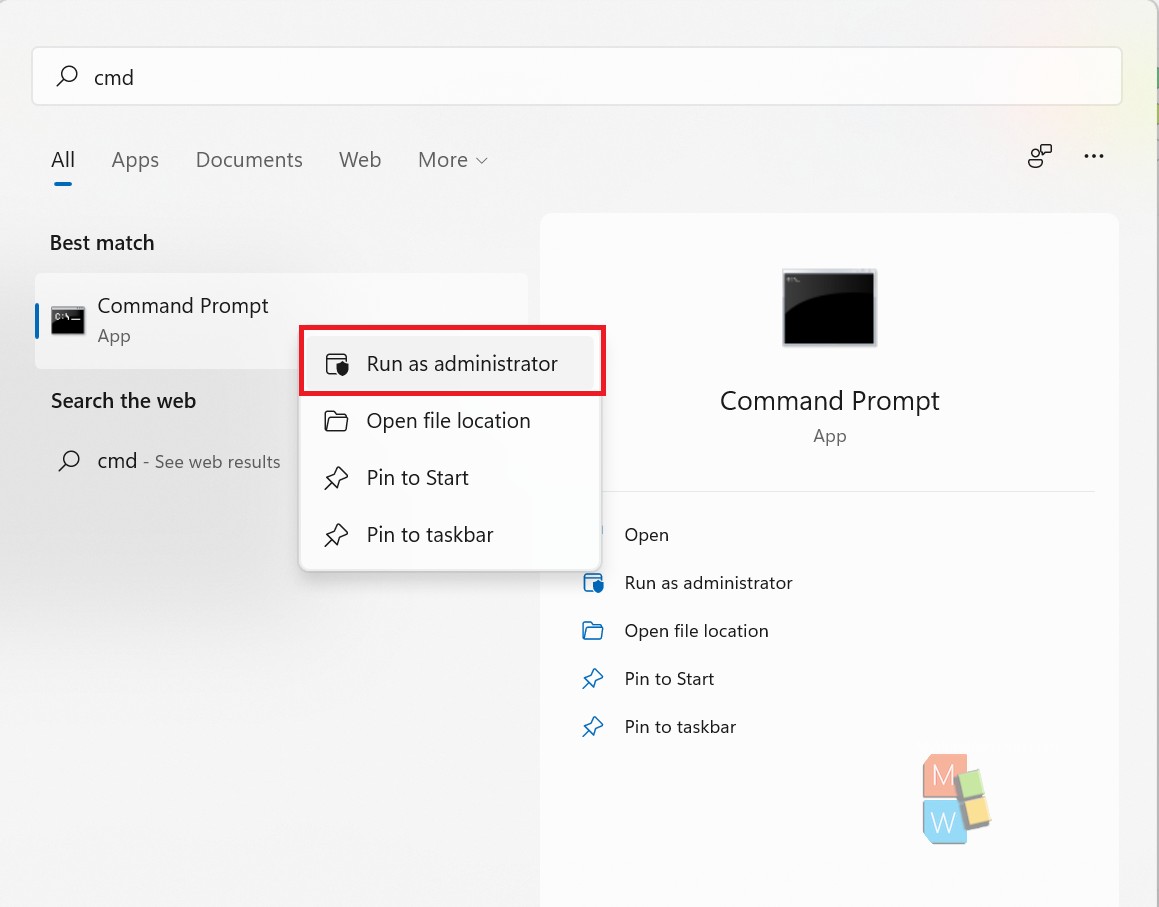
1. Open Search Menu, type cmd. From search results, find out the Command prompt application, right click on it and select Run as Administrator.

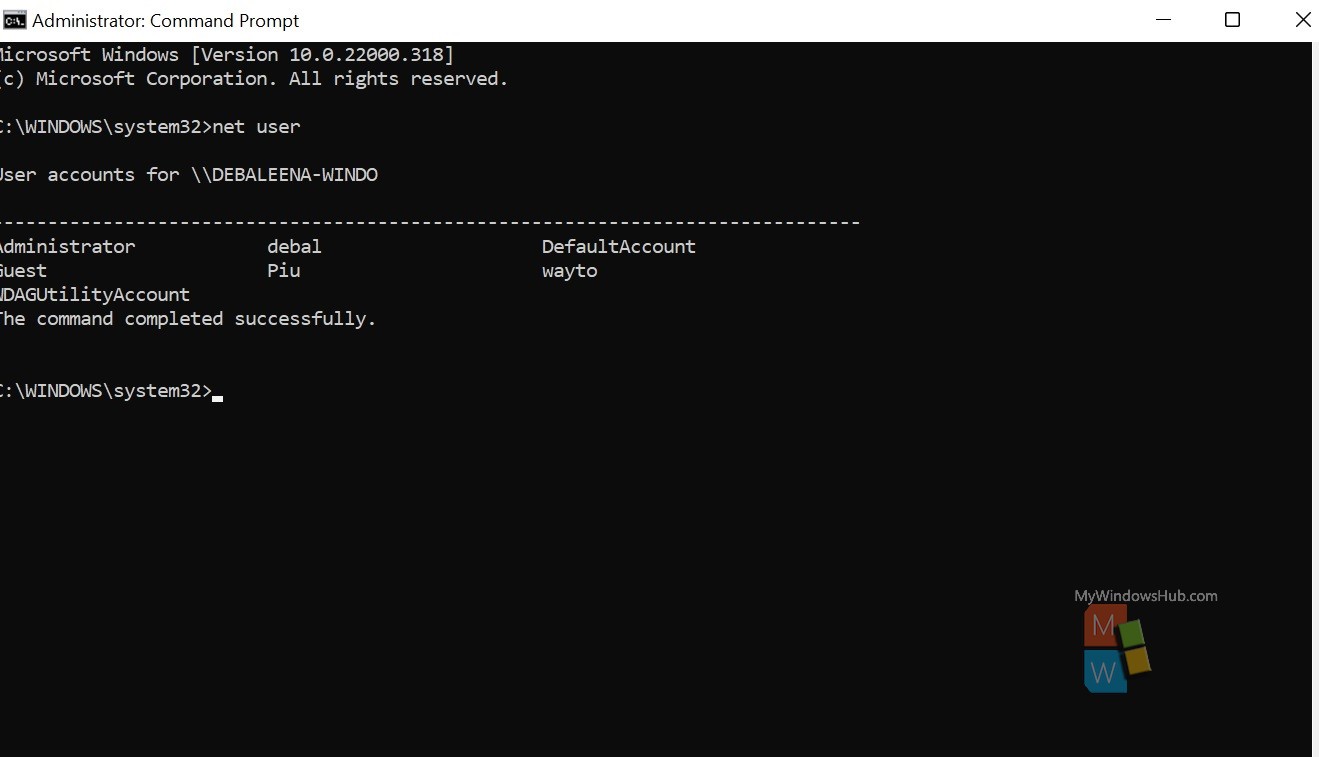
2. Now type the command net user and hit Enter. You will get information on all the accounts attached to your PC.

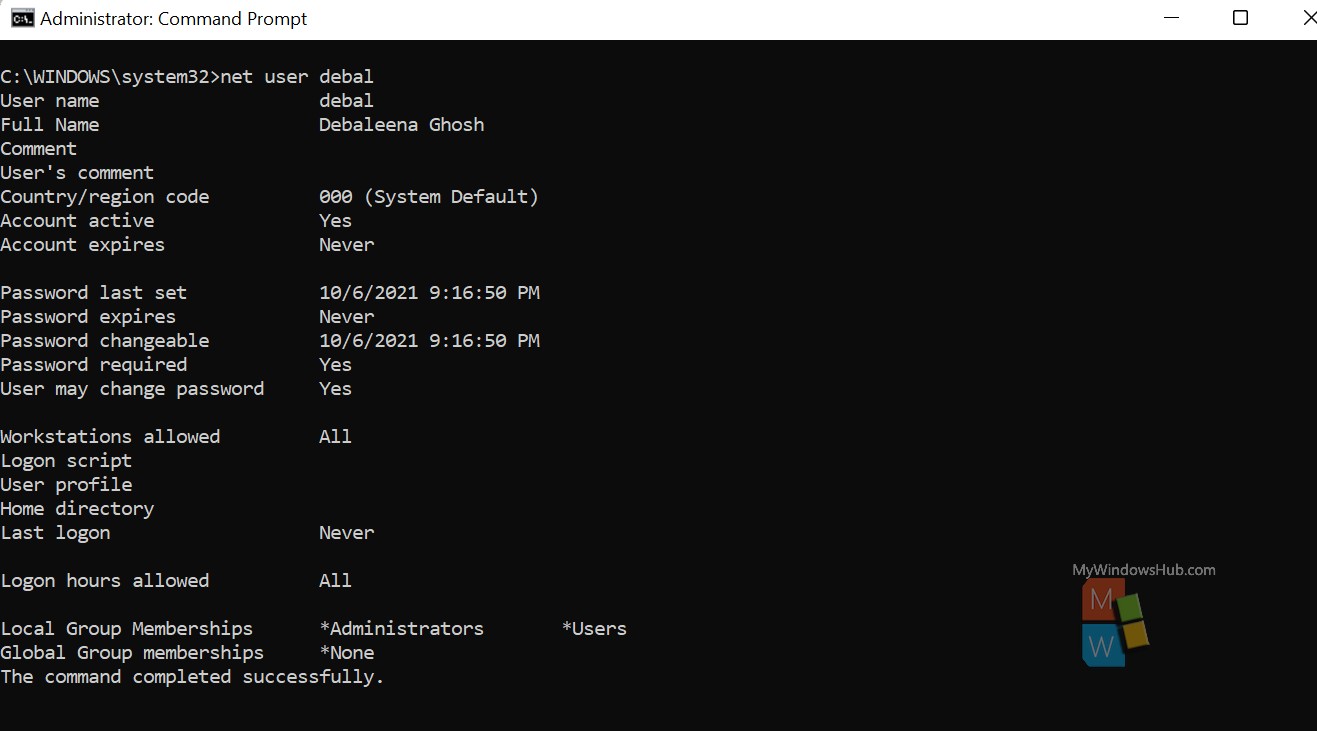
3. To get information about a specific user account, type the following command
net user usernameExample: net user debal

4. You can modify the commands, and get different results. The syntax would be like this:
net user [<UserName> {<Password> | *} [<Options>]] [/domain]
net user [<UserName> {<Password> | *} /add [<Options>] [/domain]]
net user [<UserName> [/delete] [/domain]]
The meaning of the annotations are given below:
- username The name of the user account you want to add, delete, modify, or view.
- password This will assign or change a password for an account.
- * will produce a prompt for the password.
- /domain performs the operation on the primary domain controller of the current domain on PCs running Windows NT Workstation which are members of a Windows NT Server domain.
- /add To add a user account to the user accounts database.
- /delete To delete a user account from the user accounts database.
That’s all!

