The Windows Defender Firewall application is developed by Microsoft and comes inbuilt with Windows operating system. The functions of Windows Firewall are to filter and check data transmission to and from your Windows PC, thus aiding protection against any kind of virus attacks from the internet or locally. It can refrain tough and dangerous worms like the Trojan Horse from crossing the wall and entering your system.
Windows Defender Firewall also has a set of settings that can be changed by a user based on the convenience of the user. As you can understand the importance of Firewall, it is recommended that you change the settings of Windows Firewall only you are quite sure about your purpose. If you have altered any setting by mistake and forgotten what you have changed, then it is advised to restore the Windows Firewall settings to its default. In the following tutorial, we shall show you how doing that using the Command Prompt. For this, you must use the Elevated Command Prompt, that is Command Prompt with Administrative Rights.
If you want to restore the settings by using Command Prompt, them you have to take help of the netsh advfirewall. The command restores the Windows Firewall with Advanced Security Policy to the default policy. The current policy can be optionally exported to a specific file.
Steps To Restore Windows Firewall Settings To Default Using Command Prompt
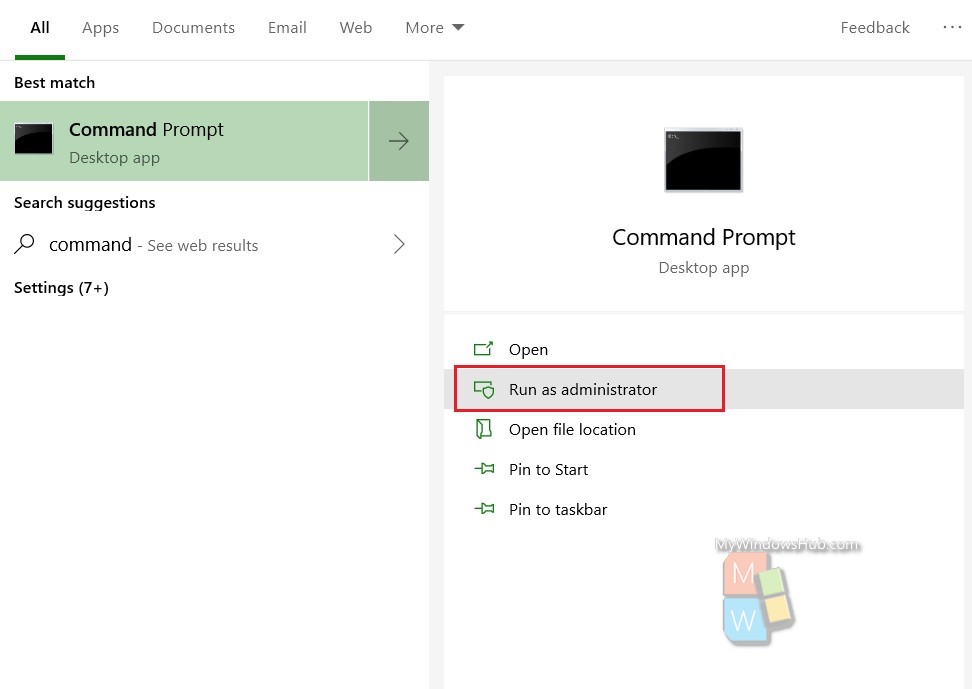
Open the Start Menu and type “Command Prompt” in your Cortana search bar. The result will appear. Choose Run As Administrator to open Command Prompt with elevated properties.

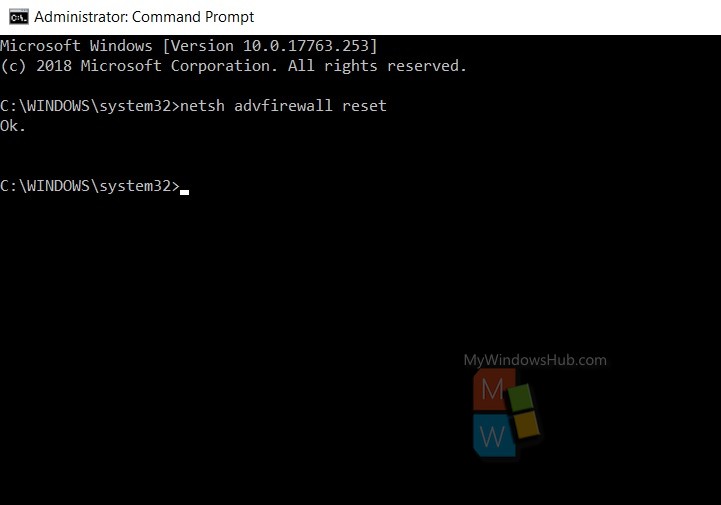
Now type the command netsh advfirewall reset and hit Enter.

That’s all! As Microsoft says, the command will restore the Windows Firewall with Advanced Security policy to the default policy and return all Group Policy settings to Not Configured and delete all connection security and firewall rules.

