

Microsoft Excel is an extremely popular Office application among students, offices, researchers. It facilitates a plethora of options to create a huge table. You can create graphs, pie charts, trends of a particular business or scientific model and so on. The number of features are almost endless.
Microsoft Office Excel is humongously used in research and study purposes. It has an amazing set of features that help users to perform complex mathematical formulae and functions. However, Excel also covers deveral formatting options which might be necessary for creating a complete Excel sheet. Sometimes, you might feel the need to increase of decrease the width of a column, row or a table. You can manually adjust the column width or row height or automatically resize columns and rows to fit the data but that may not be the same in every case. So, you can set the width of the row, column or table or choose an option to make the column or row content automatically fit into the tabs.
In this article, we shall show you how to adjust the width of the row, column and table in MS Excel.
Steps To Resize A Table, Column, Or A Row In MS Excel
Steps To Resize Rows in MS Excel
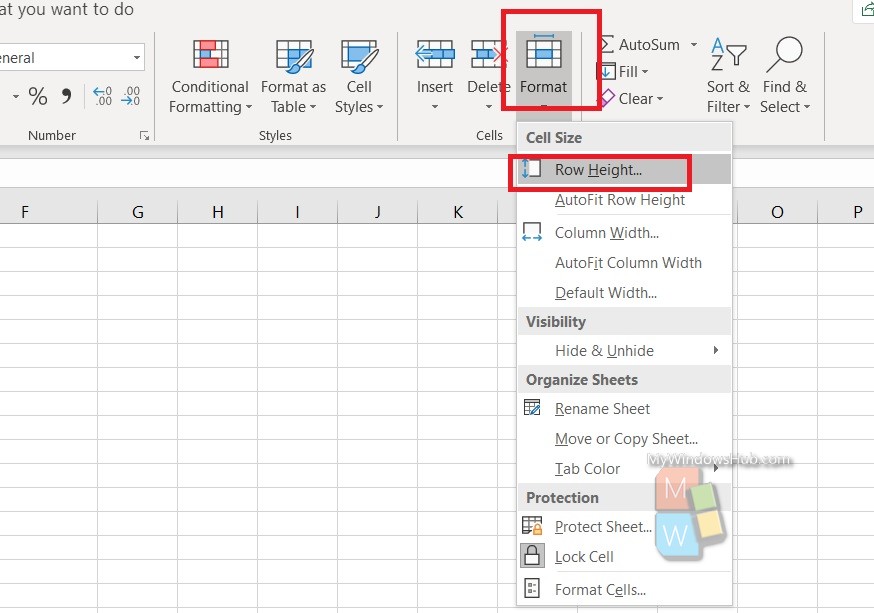
First of all, select a row or a range of rows.
Select Format option from the panel above. Next, choose Row Width.
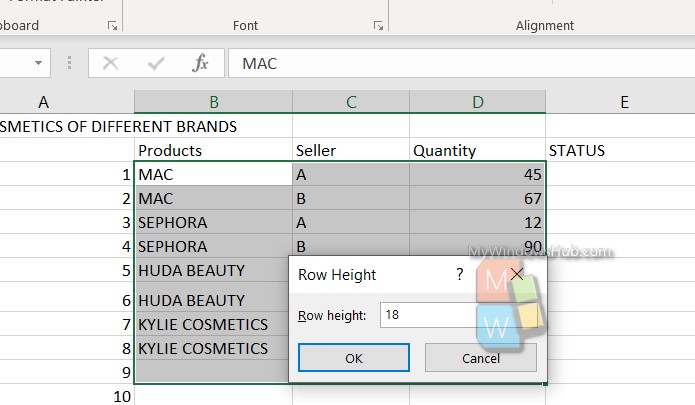
Now type a value for the Row Width and click OK.
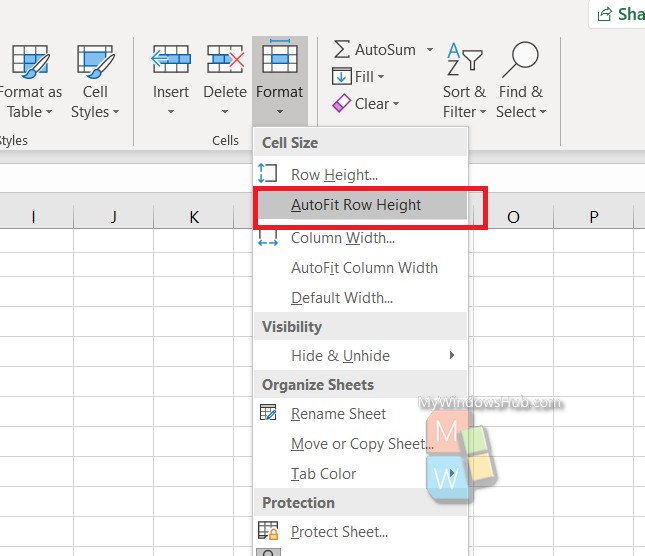
If you want to autofit the content, then follow step 1 and then choose Auto Fit Row Height.
Steps To Resize Columns in MS Excel
First of all, select a column or range of columns.
Next, go to Format Menu and click on Column Width.
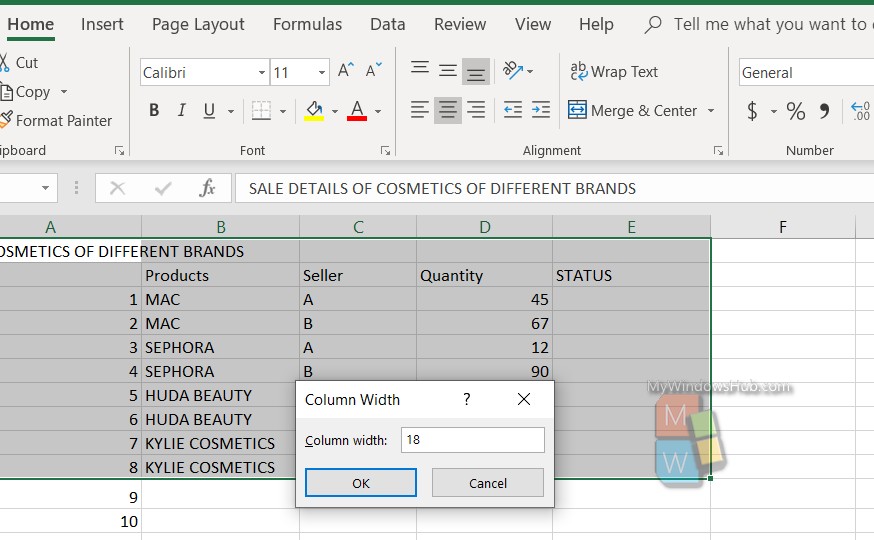
Type the Column width you want. Hit OK to save.
If you want to autofit the column height, then follow step 1 and then choose Auto Fit Column Height.
That’s all!