When it comes to a shared workstation, it isn’t easy to maintain private files’ privacy. Even most of the time, it isn’t easy for us to share our personal computer with anyone due to the obvious reasons. You might think of using a separate user account for guest access, but it isn’t enough to protect your files from the guest users’ access if the files are not encrypted. This article shall discuss one crucial feature of Windows that lets you protect your private folder. There are not many in-built methods available on Windows to protect your personal folders; the user always prefers to use third-party tools to accomplish this.
If you are using Windows 10 Professional, Enterprise, or Education, you can use the in-built feature to encrypt files on a USB device.
How To Password Protect A Folder In Windows 10 Using EFS?
In this section, we shall be showing you the steps to encrypt your folder using the Windows in-built feature called Encrypted File System(EFS).
- The feature is only available for Windows 10 Professional, Enterprise, or Education users.
- This method locks your personal folder using Microsoft or local account credentials provided user account should have a password.
- In case you lost access or forgot the Password, you can always use the Encryption key that you have backed up while encrypting your folder for the first time.
Steps:
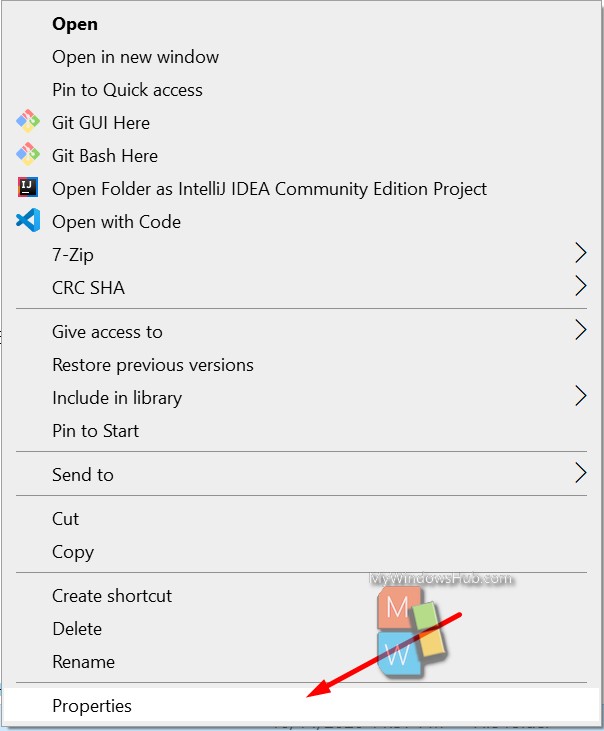
- First, you need to right-click on the targeted folder and click on the “Properties” option.
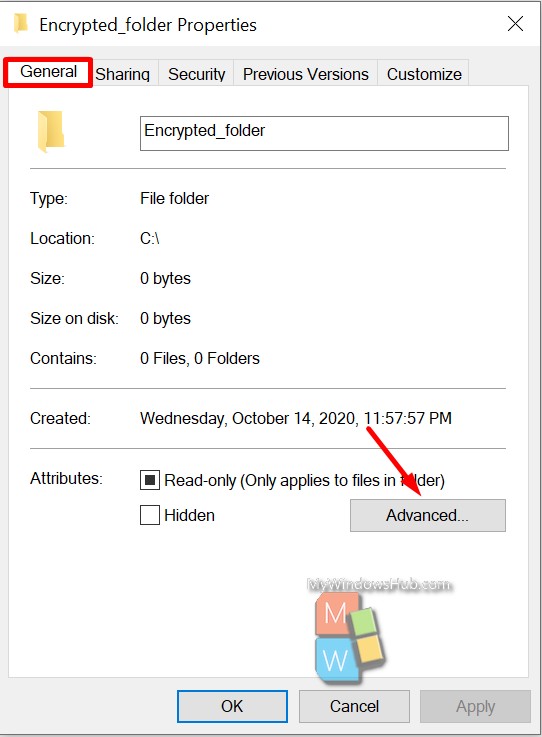
- You need to navigate to the “General” tab and click on the “Advanced” option. Please note that this feature is only available for attached drives, and you can’t see this on shared network folders.
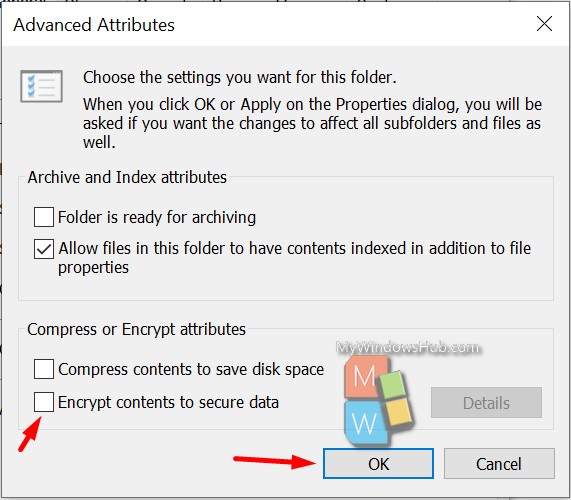
- Inside the Advanced attributes, you need to click on the checkbox saying “Encrypt contents to secure data” and then click on the Ok(->Apply) button twice to save the changes.
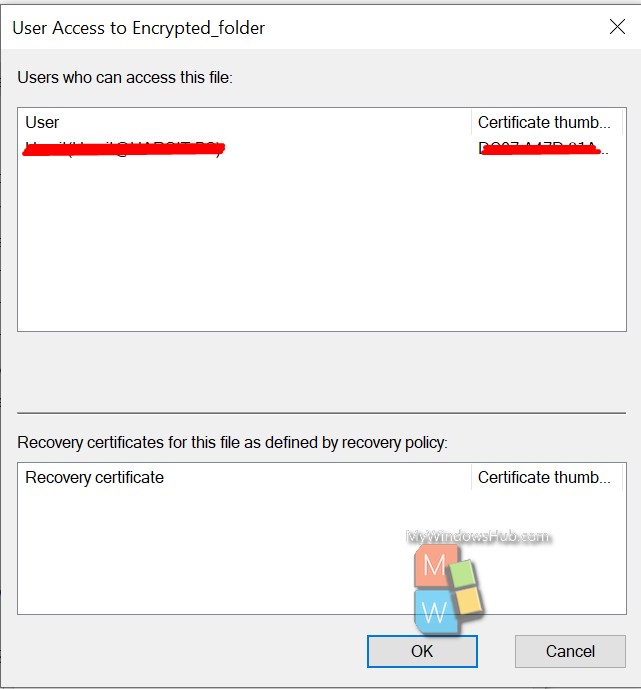
- Once the changes are saved, you can check the user detail and recovery key by navigating to Properties -> Advanced -> Details for the encrypted folder.
- When you encrypt your folder for the first time, you shall be asked to back up the EFS encryption key and certificates.
- It is always recommended to store the encryption key on a USB drive, as keeping it on your personal computer can lead to leaks while shared access.
- To store it on an external device, such as a USB device, click on the “Back up now” or “Back up later.” It is not recommended to go ahead with the “Never back up” option.
- In the Certificate Export Wizard, you will be prompted to create an encryption certificate and decryption password. In our case, we are going ahead with the default options selected. Feel free to use other options, in case you have any preference. Click on the “Next” button to continue.
- To protect your keys properly, make sure to select the checkbox next to the Password(Always use a strong password) and make sure to select “AES256-SHA256” from the Encryption drop-down. Click on the “Next” button to continue.
- On the next screen, confirm the file name and then click on the “Next” button. On the following dialog, click on the “Finish” button to complete the steps.
How To Password Protect A Folder In Windows 10 Using 7-Zip?
For the rest of the Windows versions, you can encrypt your files and folders using the zipping tools such as 7-Zip or WinZip. To begin this section, we are assuming that you have already installed any of the tools mentioned above. In our case, we are using 7-Zip for demonstration purposes.
Steps:
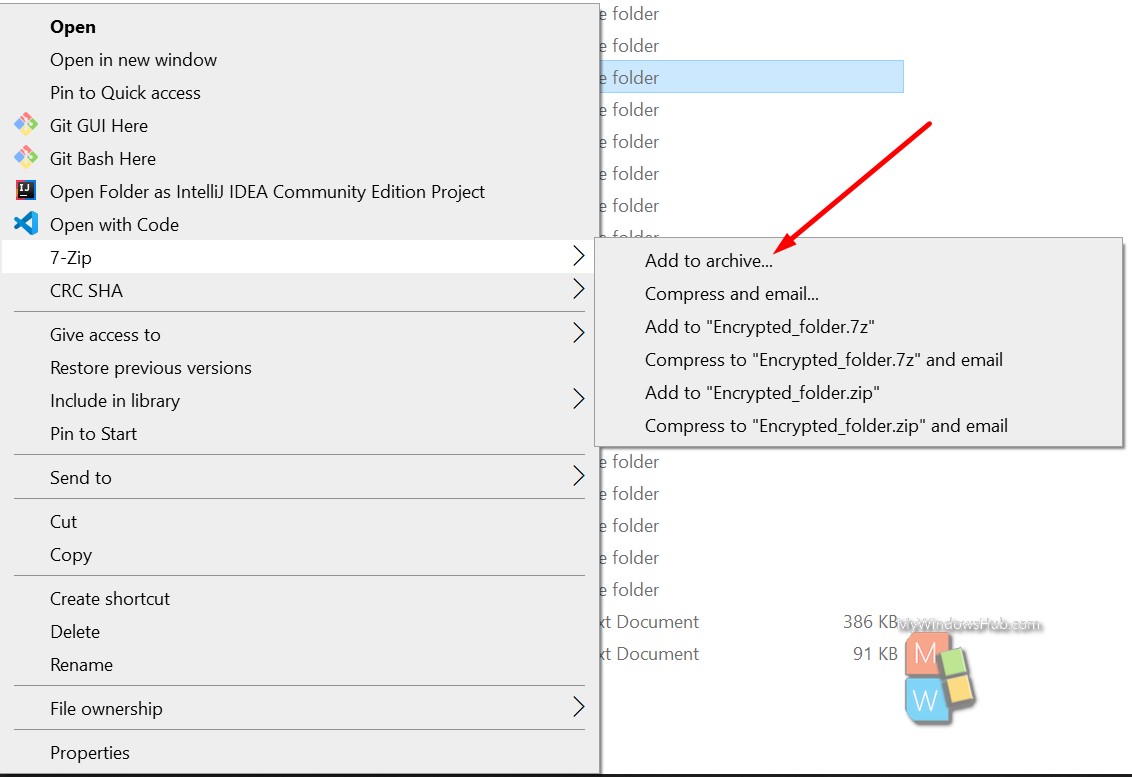
- Right-click on the targeted folder and press 7-Zip > Add to archive option to begin.
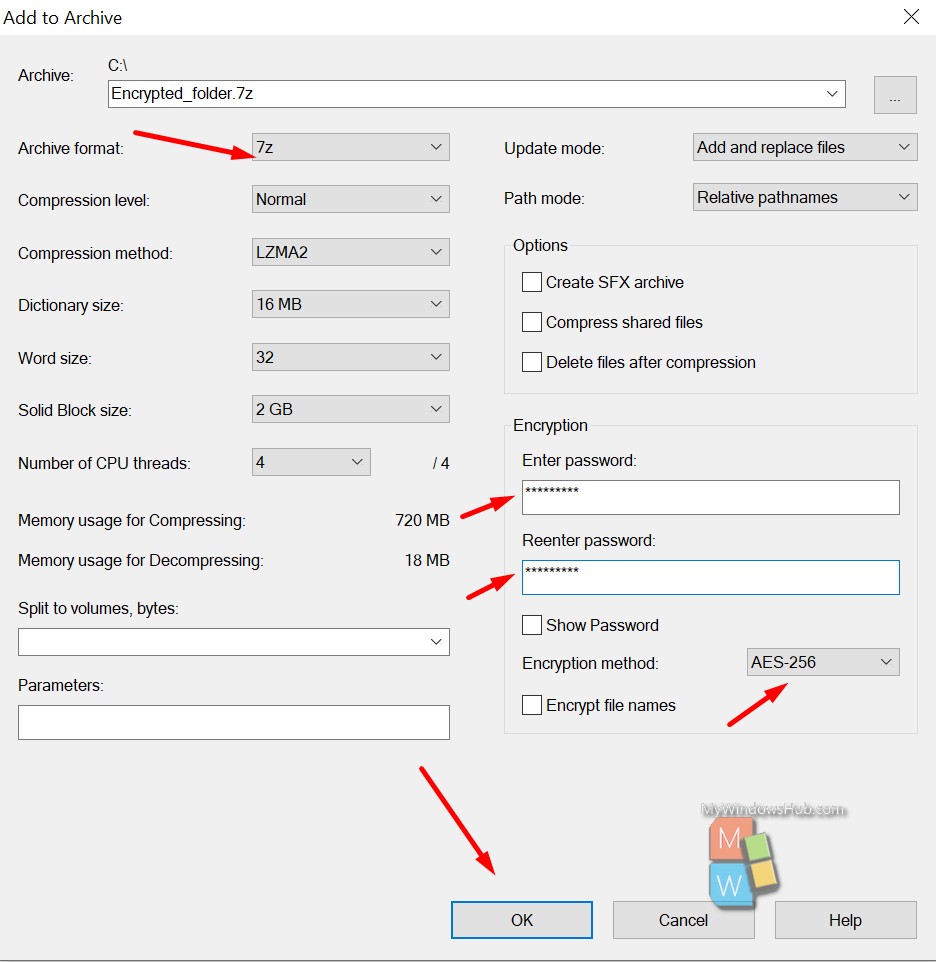
- On the next screen, make sure to do the below selections,
- Select 7z format from the Archive Format drop-down.
- Enter the encryption password and confirm it.
- Make sure “AES256” is selected as the Encryption method.
- Click on the “Ok” button to begin the encryption process; this will take some time to finish.
- The next time you want to access the zipped file, you will be prompted to enter the Password.
Encrypt Folders & Files using Third-Party tools:
If the second method we had stated doesn’t suit you, you can always use a third-party tool to encrypt your personal files and folders. In this article, we shall be using the “AxCrypt” tool for demonstration purposes. There are tons of such tools available on the market; you can try those and make sure to read the documentation before encrypting.
- You can use the “AxCrypt” tool for 30 days as a trial period to explore. Download the “AxCrypt” tool from the official site and follow the on-screen instructions to install it.
- The first time you use the tool, you shall be prompted to set the encryption password.
- Right-click on the targeted folder and press the AxCrypt>Encrypt option.
- Once encrypted, you’ll be able to enter the folder using the AxCrypt client, but any files held within it will be encrypted with the .axx file extension.
Conclusion:
In this article, we had discussed three different ways to encrypt folders on your Windows 10 machine. It is always recommended to use the Windows default encryption feature, but due to its limited availability, you can still use third-party tools such as AxCrypt.

