You must have noticed that Windows Explorer displays all the drives that are configured to your system. The configured drives include reserved drives, local drives, external drives, USB drives, and network drives. If you want, you can hide any drive from File Explorer using the disk management application. But there is a problem with that. It makes the drive inaccessible. This is definitely an undesirable change as there is no point in hiding the drive if it becomes disfunctional.
A much sensible option is tweaking the Registry Editor. For that, you must be signed in as administrator.
Steps To Hide A Drive From File Explorer Without Unmounting It On Windows 10
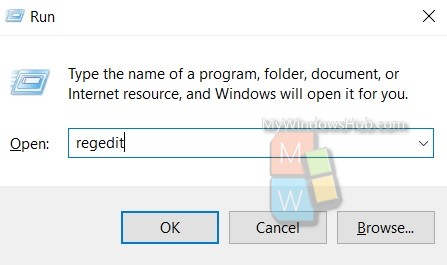
1. Press Windows+R to open the Run window. Type regedit and hit Enter to open Registry Editor.

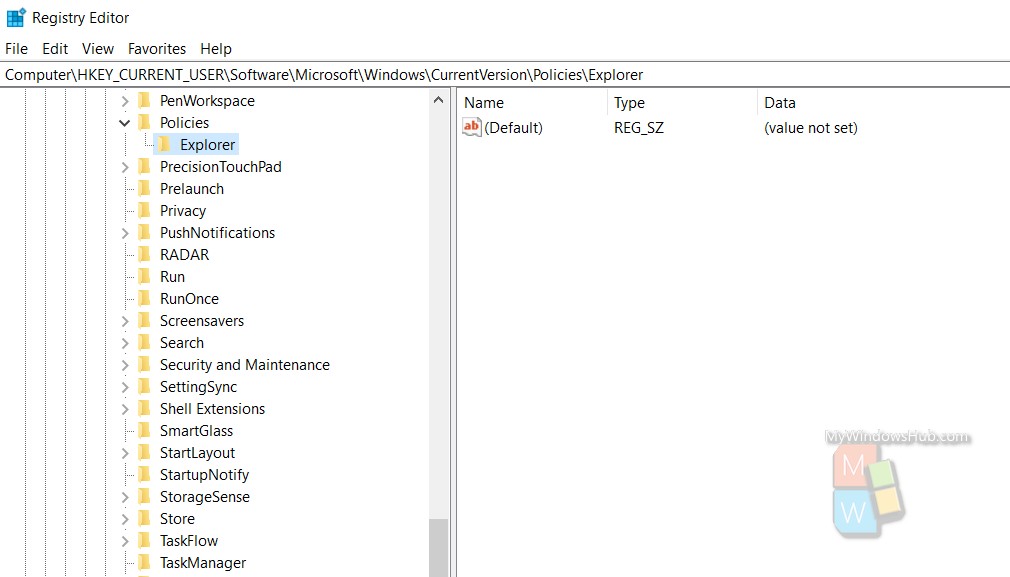
2. Now move on to the following location in the Registry Editor.
HKEY_CURRENT_USER\Software\Microsoft\Windows\CurrentVersion\Policies\Explorer

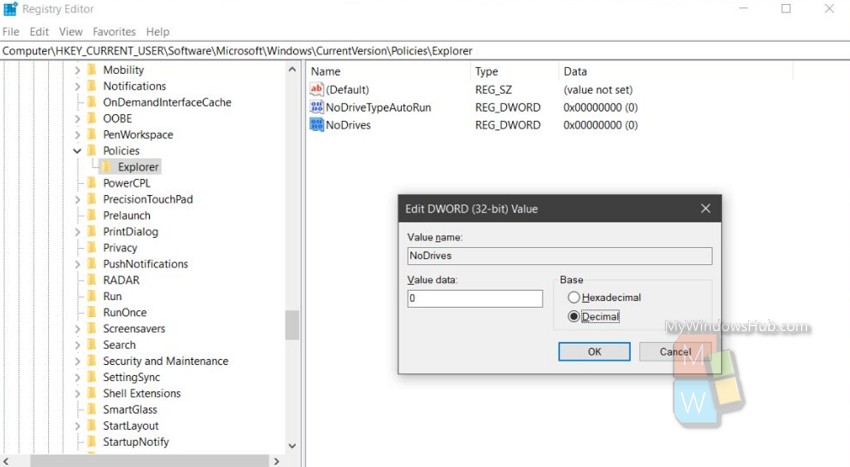
3. Now right click on the Explorer key. Go to New and select DWORD (32 bit) value. Name the Value NoDrives.
4. Edit the value and set its base value from Hexadecimal to Decimal. Now change the value data field.
5. The value of data field depends on the drive you want to hide. You must be aware of the drive letter. If not, first check it from your Windows Explorer and then continue.

Here are the values corresponding to the drive letters:
- A – 1
- B – 2
- C – 4
- D – 8
- E – 16
- F – 32
- G – 64
- H – 128
- I – 256
- J – 512
- K – 1024
- L – 2048
- M – 4096
- N – 8192
- O – 16384
- P – 32768
- Q – 65536
- R – 131072
- S – 262144
- T – 524288
- U – 1048576
- V – 2097152
- W – 4194304
- X – 8388608
- Y – 16777216
- Z – 33554432
Now, to access the hidden drive, click inside the location bar in File Explorer and enter the drive letter. For example, if you want to open the hidden D drive, you will enter;
D:/

