Being system administrators, it is challenging to control user activities and gain sufficient control over it. This requires proper skillset and proper tools. And being an organizational administrator, you don’t want a few settings and configurations get modified by end-user such as VPN, Firewall, and other. Changing such an organization-level configuration should not be allowed and disabled. In this article, we shall be showing you the steps to enable/disable the VPN page in Settings on your Windows 10 device.
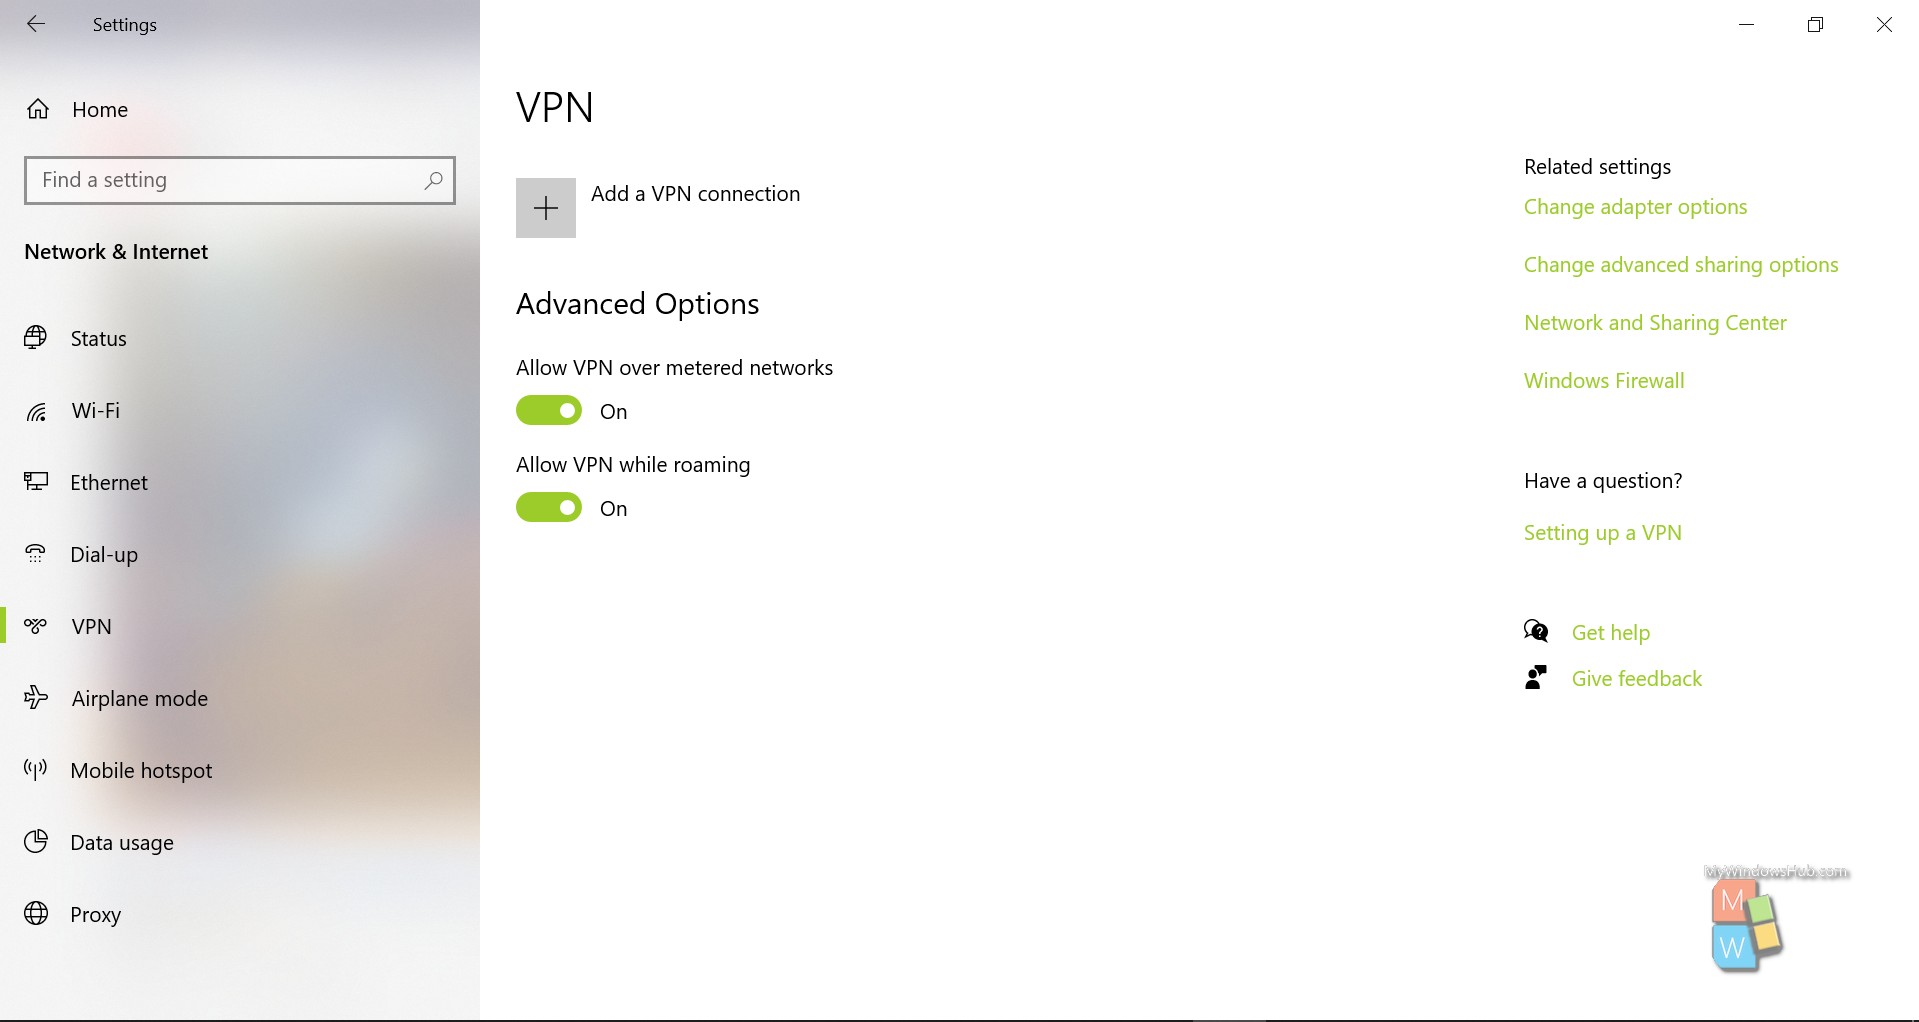
Once you follow the below-mentioned steps, you shall be able to disable the below mentioned on the VPN page,

Steps To Disable VPN Page Using Registry Editor
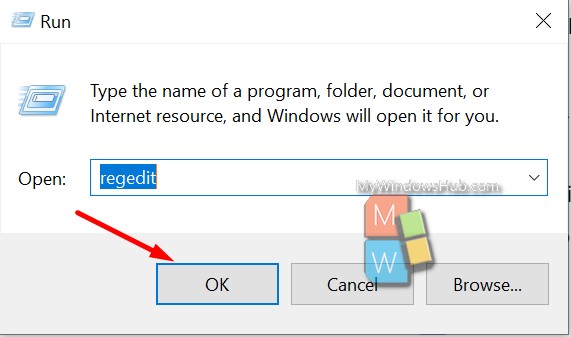
- Press the Win + R key on your keyboard to open the Run dialog.
- Type “regedit” and hit the enter key to open the Registry editor.

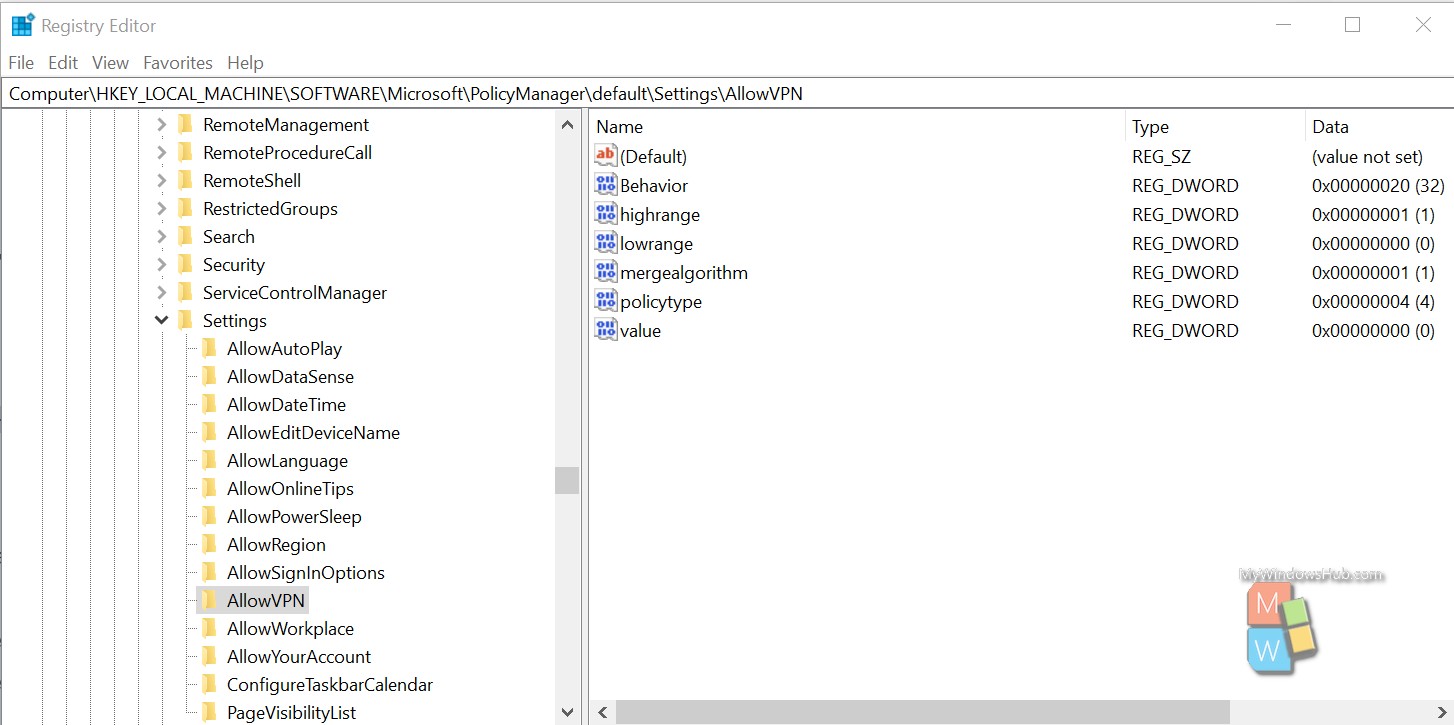
- Navigate to the below-mentioned path,
HKEY_LOCAL_MACHINE\SOFTWARE\Microsoft\PolicyManager\default\Settings\AllowVPN

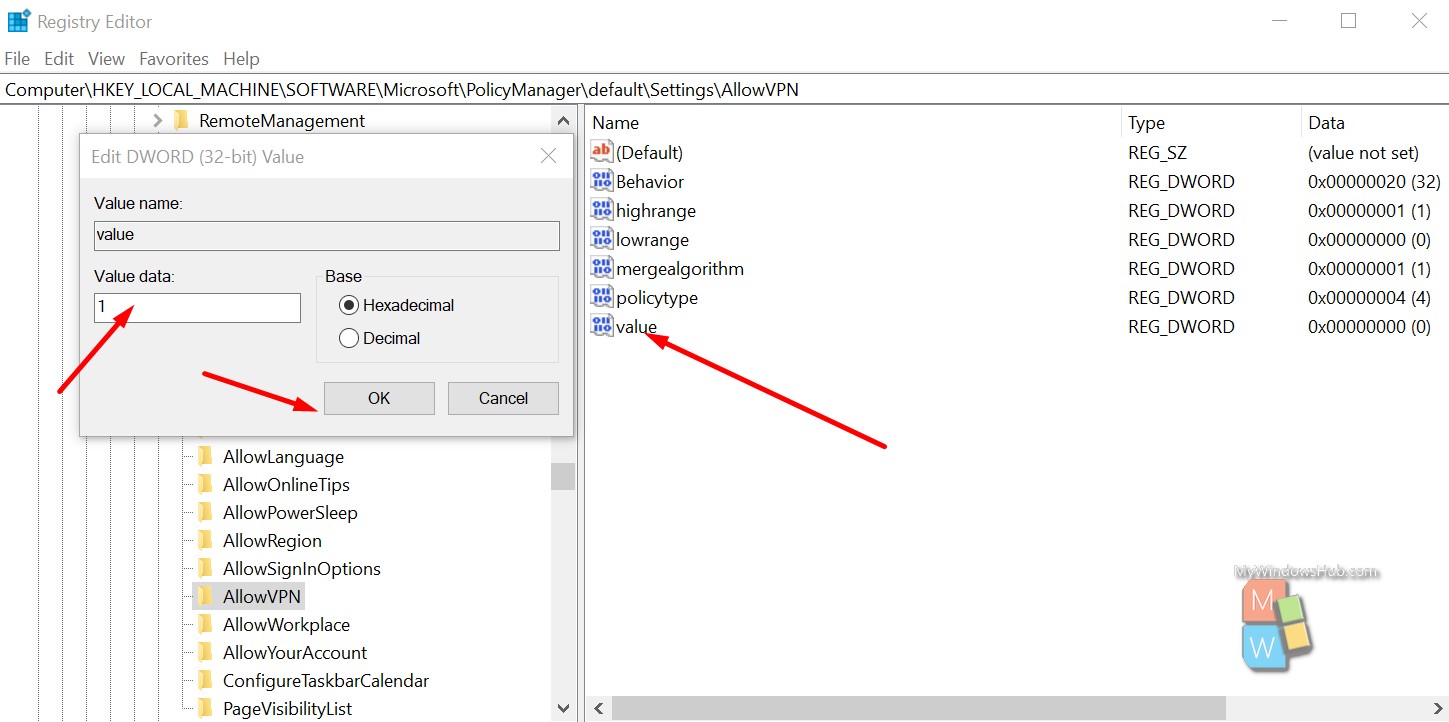
- Change the value of the property “value”(DWORD) as per your requirements,
- value: 0 -> Disable
- value: 1 -> Enable

- Click the Ok button to save the changes.
- Close the Settings app and then navigate to the VPN page on the settings page to check the status.
In case you don’t want to follow the above steps, you can directly execute the below reg files on your device.
Download the below-mentioned files,
To enable the VPN page
To disable the VPN page
Once downloaded, double-click on the .reg file to execute and merge.
If prompted for User Access Control(UAC), click on the Yes/Ok button to continue.
If the Settings app is opened, close it, and reopen the Settings app.
You can delete the reg files if you don’t want to revert the changes.
Conclusion:
Windows’s useful feature is to block the VPN page in the settings app to avoid user modification. This article has shown you how to enable/disable the VPN page in the Settings app on your Windows 10 device.

