After adopting the open-source Chromium engine, Edge started offering better web compatibility with enhanced security features such as DoH. The Microsoft Edge running over the same Chromium engine as that of the Google Chrome browser promising best in class web compatibility and enhancements. With continuous updates, now the Edge is supported by most of the Windows and Mac operating systems. We have been facing many performance degradations while browsing multiple tabs and in the middle of the quest, Microsoft came with an idea “Sleeping tabs.” You will be surprised to know that Sleeping tabs have shown significant memory usage reduction of 26% for Microsoft Edge. Microsoft’s internal testing has shown that the normal tab is using more than 30% of extra memory resources than a sleeping tab.
There are many advantages that you might experience after enabling the Sleeping Tabs feature in Microsoft Edge browser, they are as mentioned below,
- Low power consumption due to less memory usage
- Better browsing experience as switching between tabs is much faster
How does Sleeping Tab work?
- Microsoft worked on a technology known as Freezing technology to facilitate the Sleeping tab feature.
- This technology puts the background tabs into the sleep mode after monitoring the inactivity for a set amount of time.
- The released resources both primary memory and CPU can be used for other tabs and applications running on your device.
- By default, Microsoft has set the sleep timeout to two hours, i.e after two hours of inactivity the inactive background tabs are put to the sleep mode.
- To resume the sleeping tabs, just tap on the tab and the saved content will be loaded immediately.
- Sometimes, you don’t want certain sites to go into the sleep mode, for that you can put those sites to the block list.
Note: Sleeping tabs is currently only available in the Microsoft Edge Beta, Canary, and Dev Channels [87.0.649.0].
In this article, we shall be walking you through many ways to enable or disable the Sleeping Tabs feature in the Chromium-based Microsoft Edge browser.
Method #1: Enable or Disable Sleeping Tabs Feature in Microsoft Edge using Experimental Flag
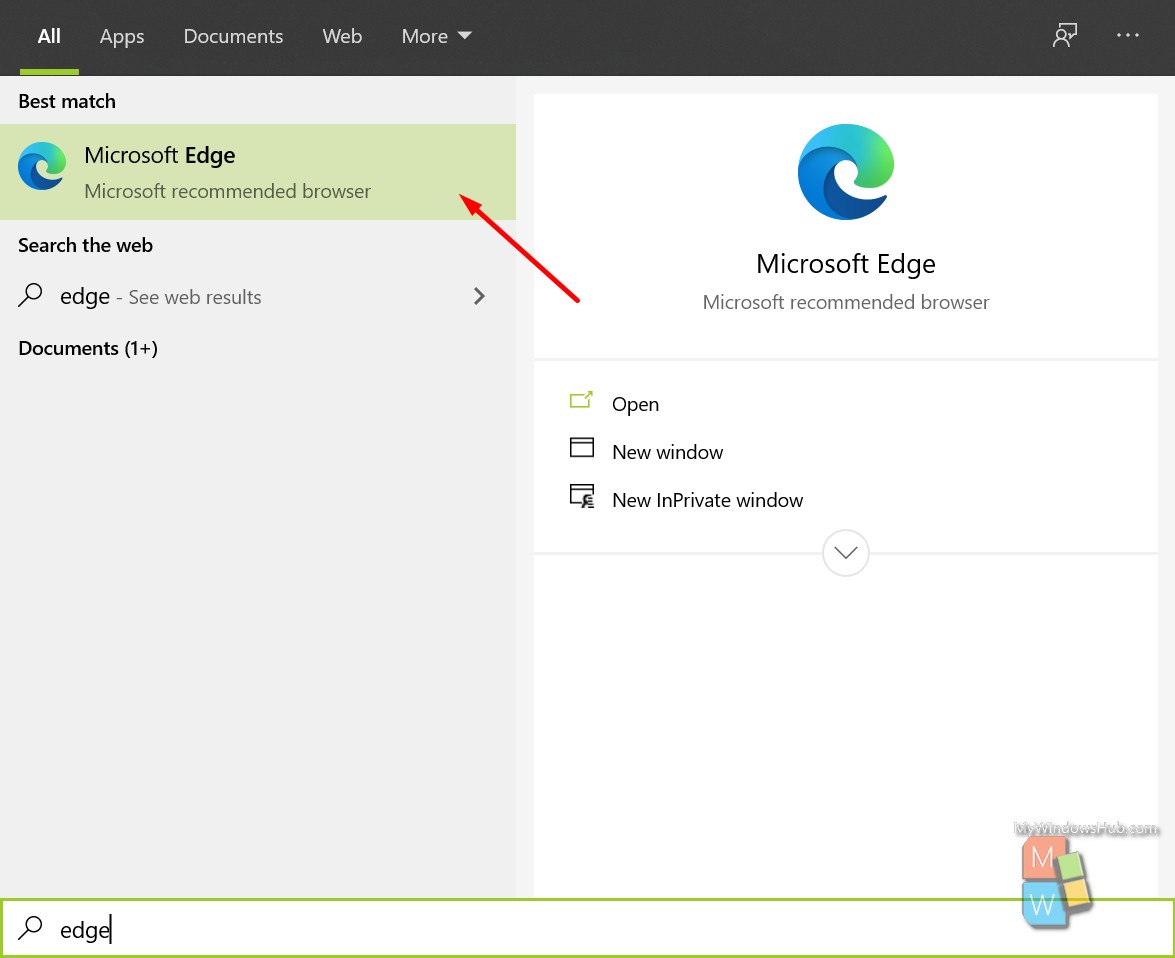
- Open Microsoft Edge.
- Copy and paste the below link in the address bar and hit the enter key to navigate,
edge://flags/#edge-sleeping-tabs
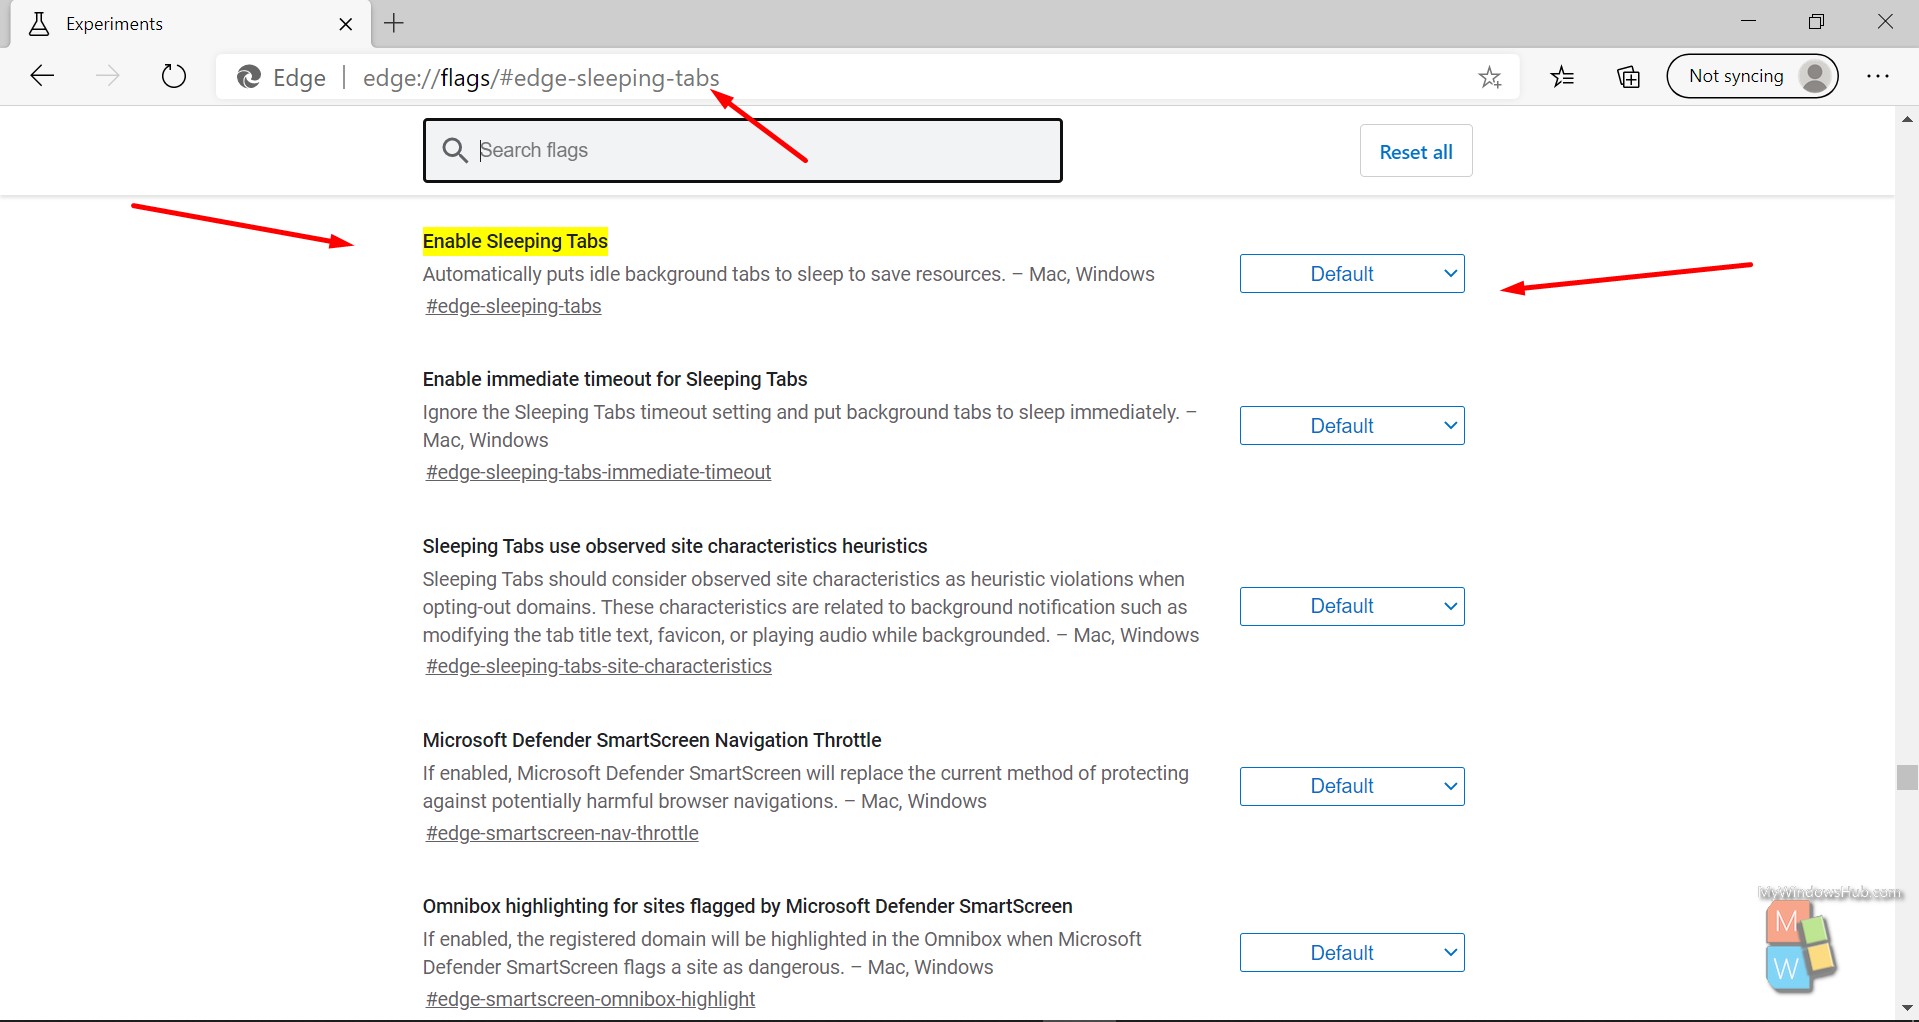
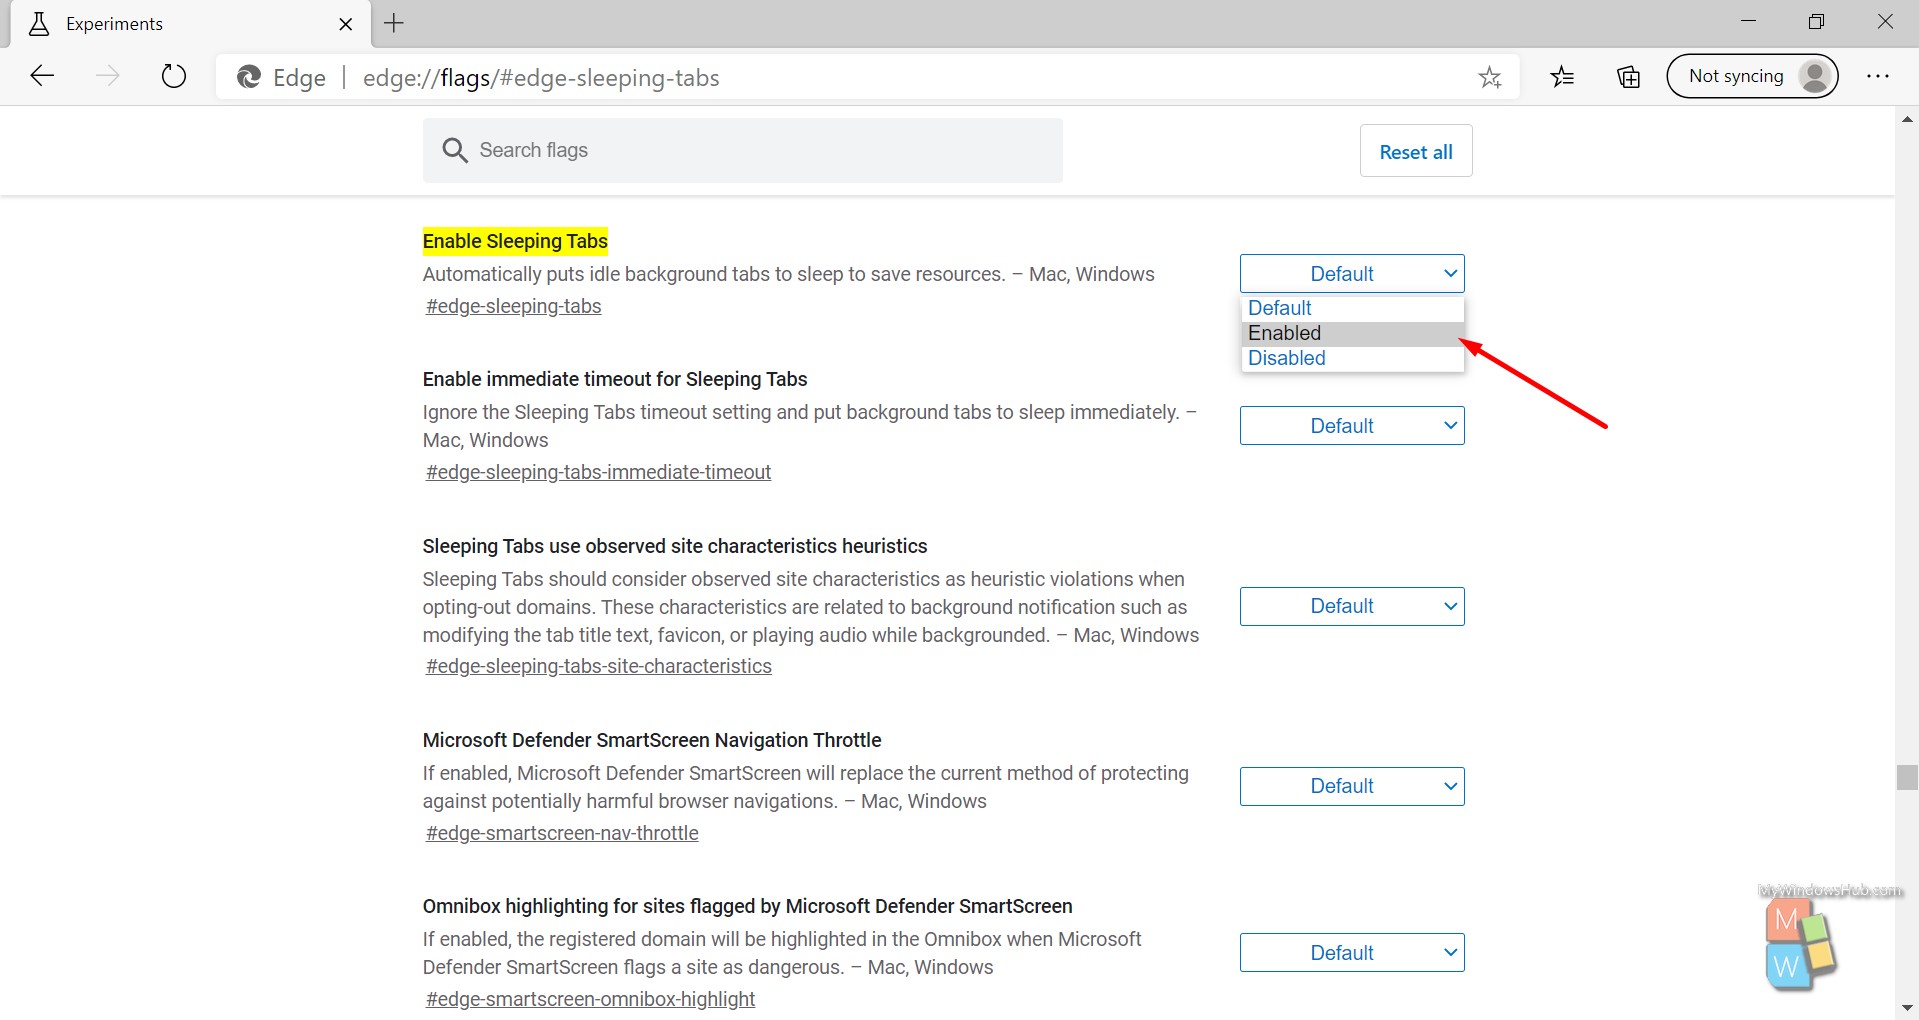
- They’re under the “Enable Sleeping Tabs” section; you shall be able to a dropdown. Click on the dropdown and select the appropriate option,
- Default
- Enabled: To enable the Sleeping Tabs
- Disabled: To disable the Sleeping Tabs
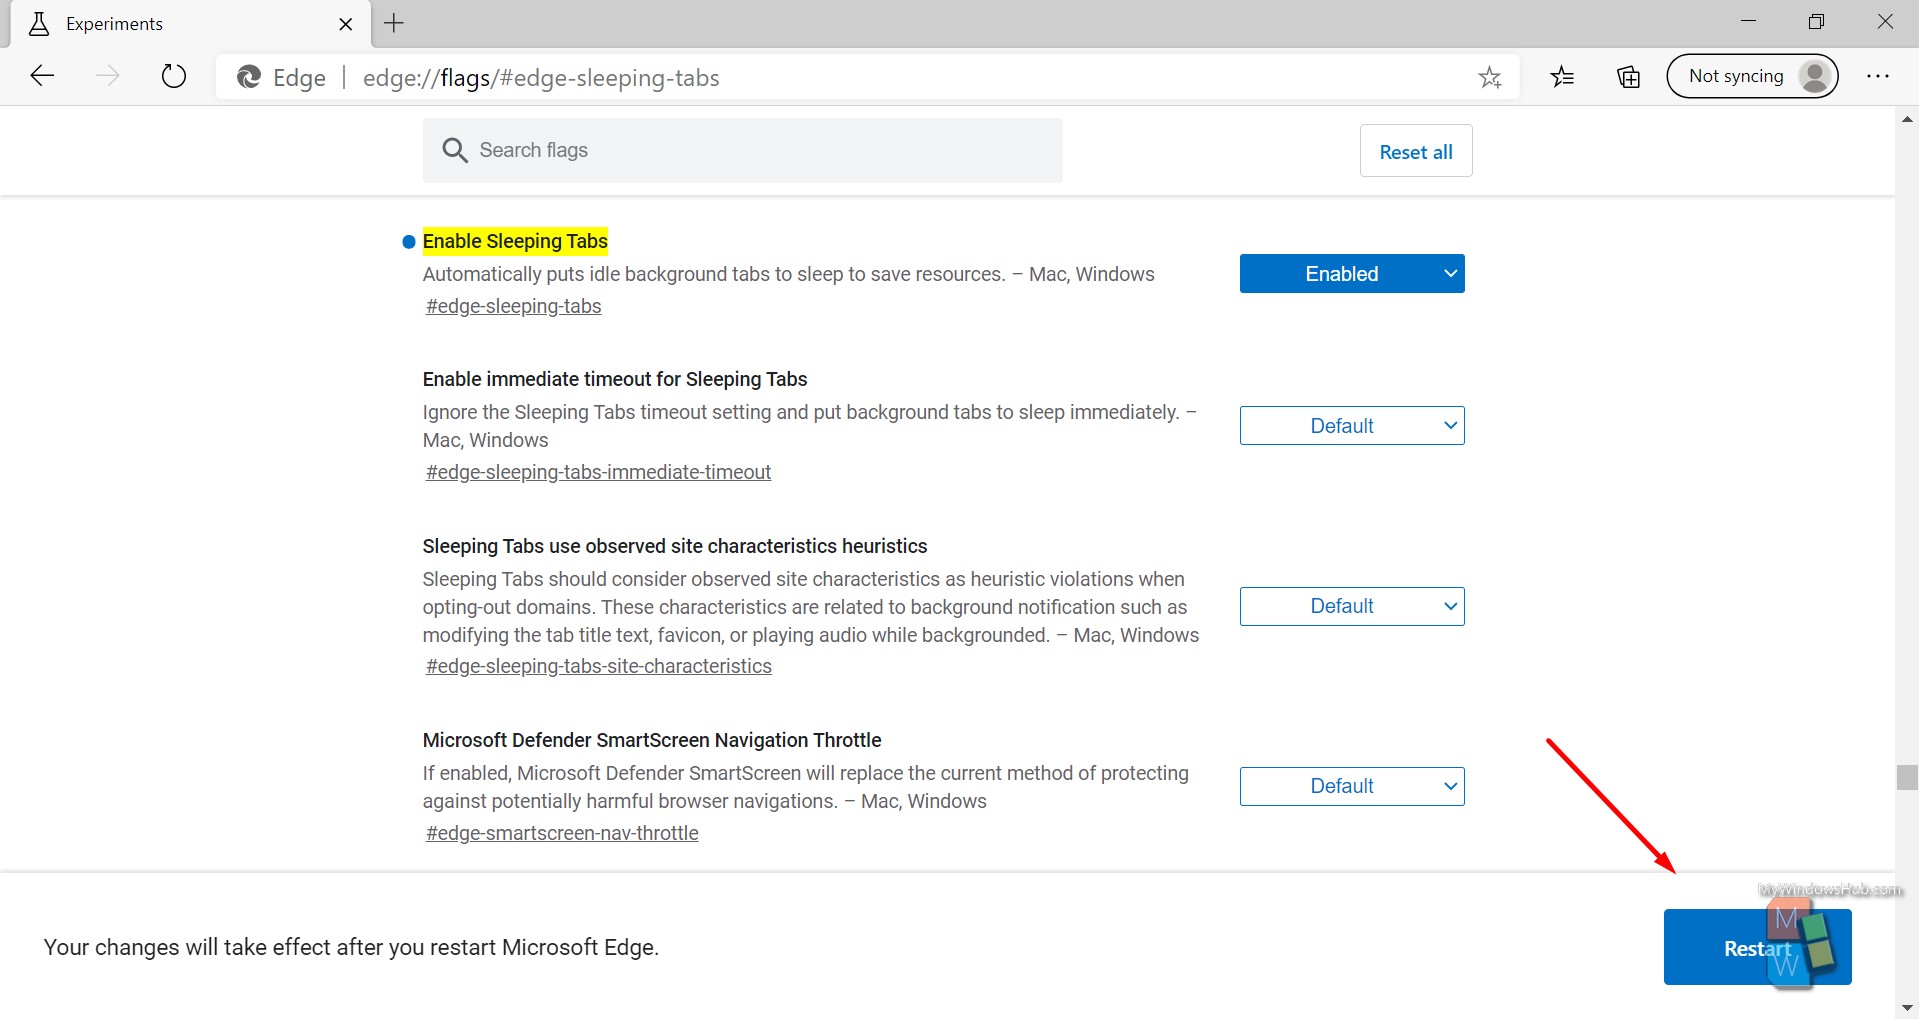
- Once you have selected the option, you shall be able to see a “Restart” button at the end, click on it to see the changes.
Method #2: Turn On or Off Sleeping Tabs in Microsoft Edge in Microsoft Edge Settings
- Open Microsoft Edge.
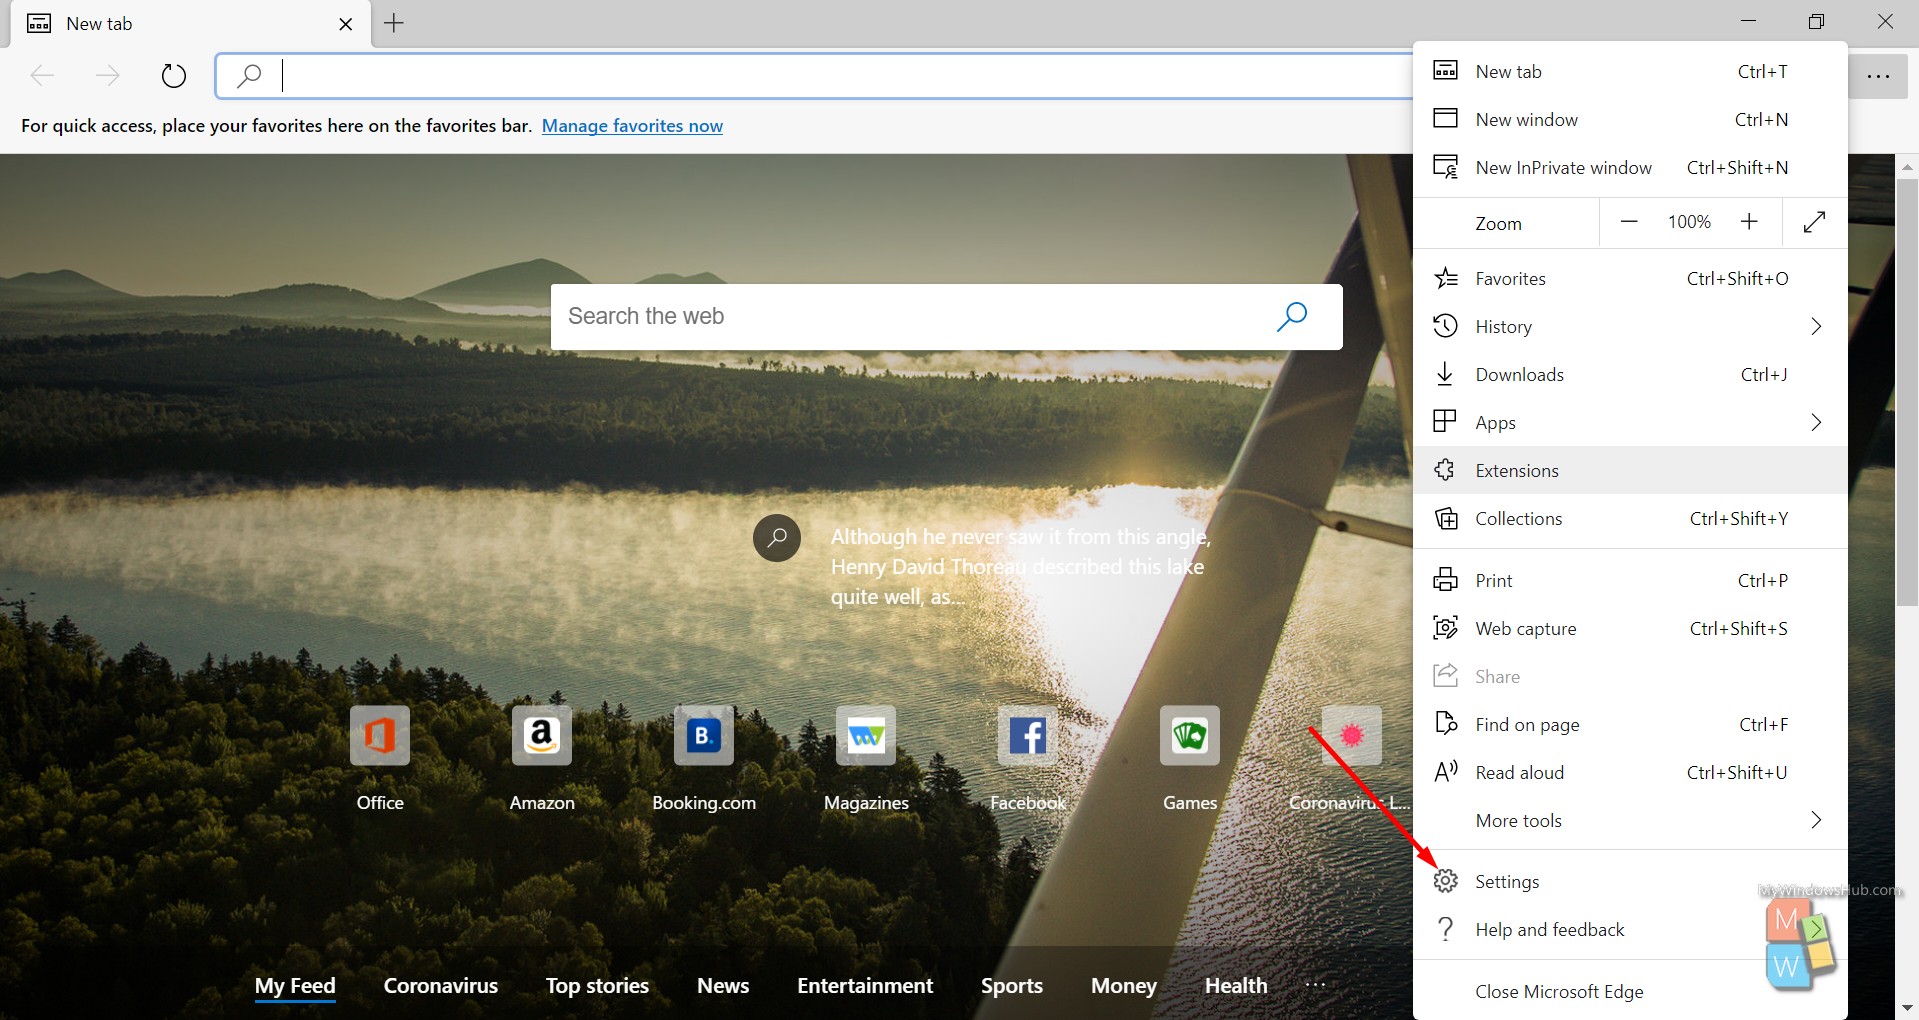
- Click on the three-dot present on the right-hand top corner. Then click on the “Settings” option.
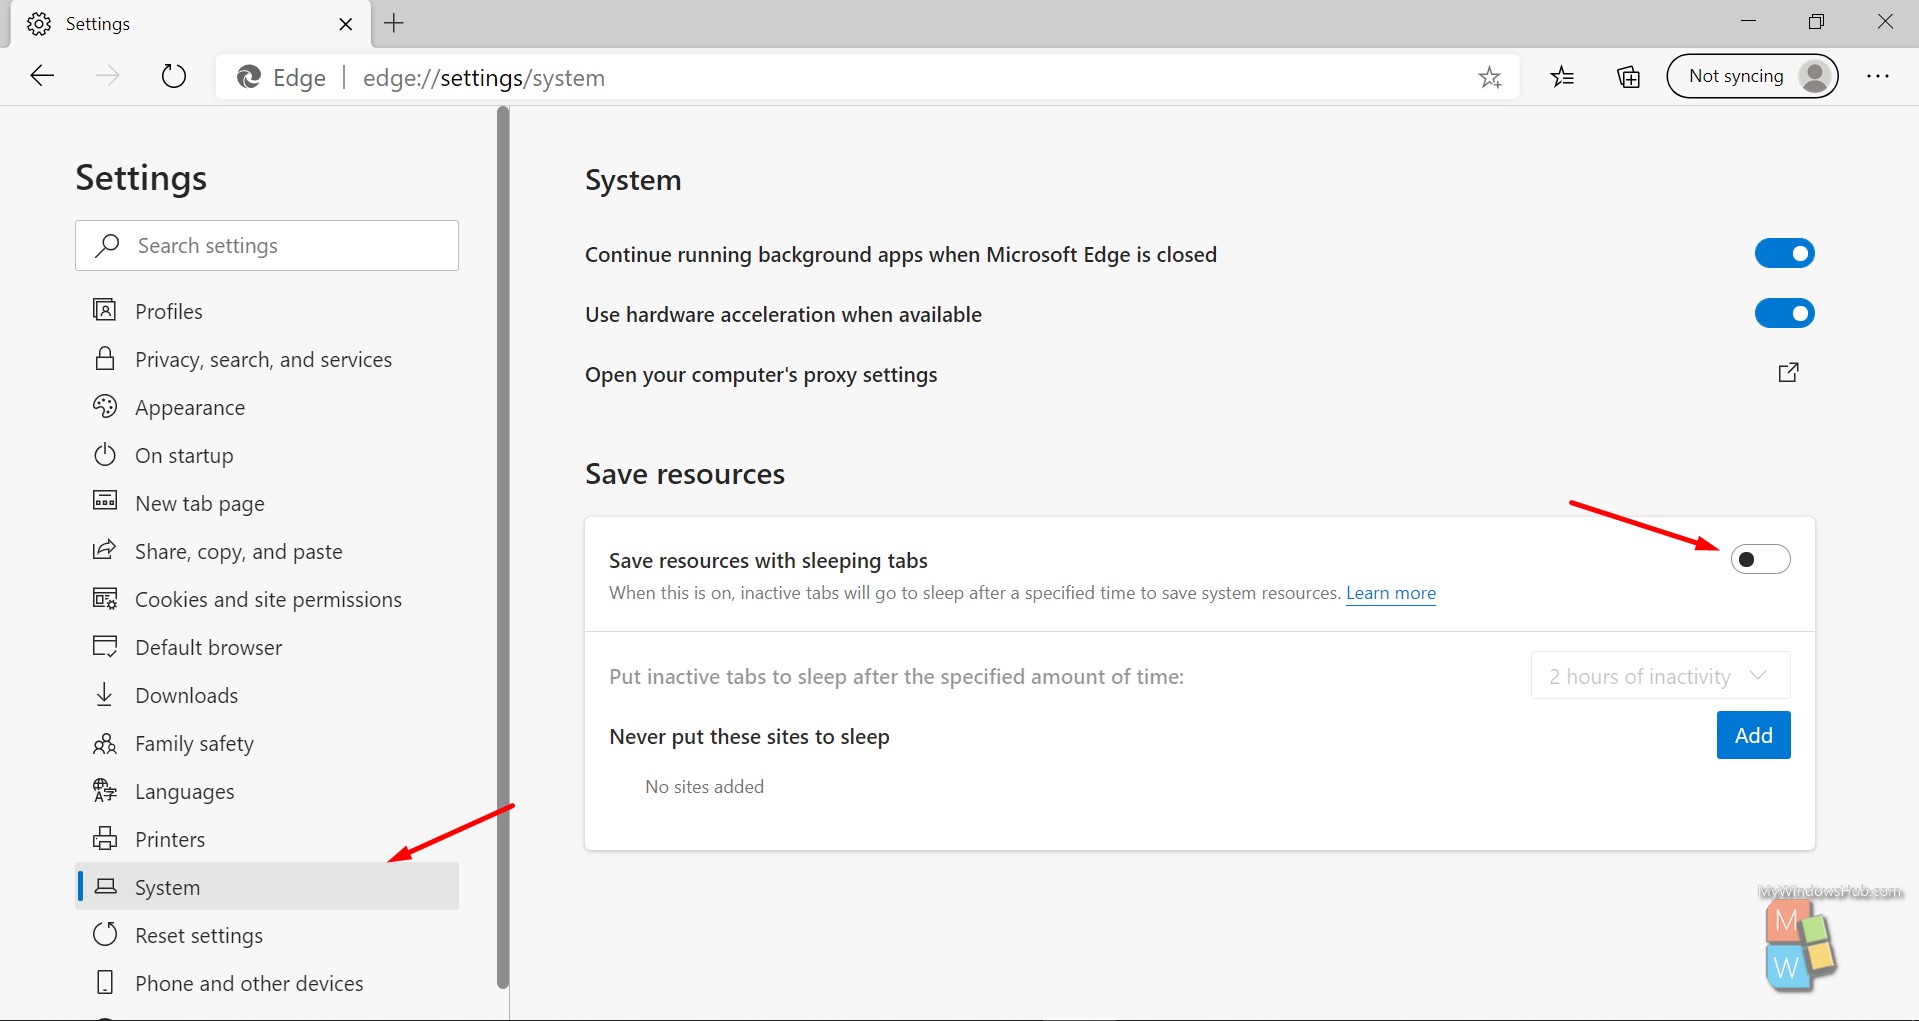
- Click on the “System” option in the left pane.
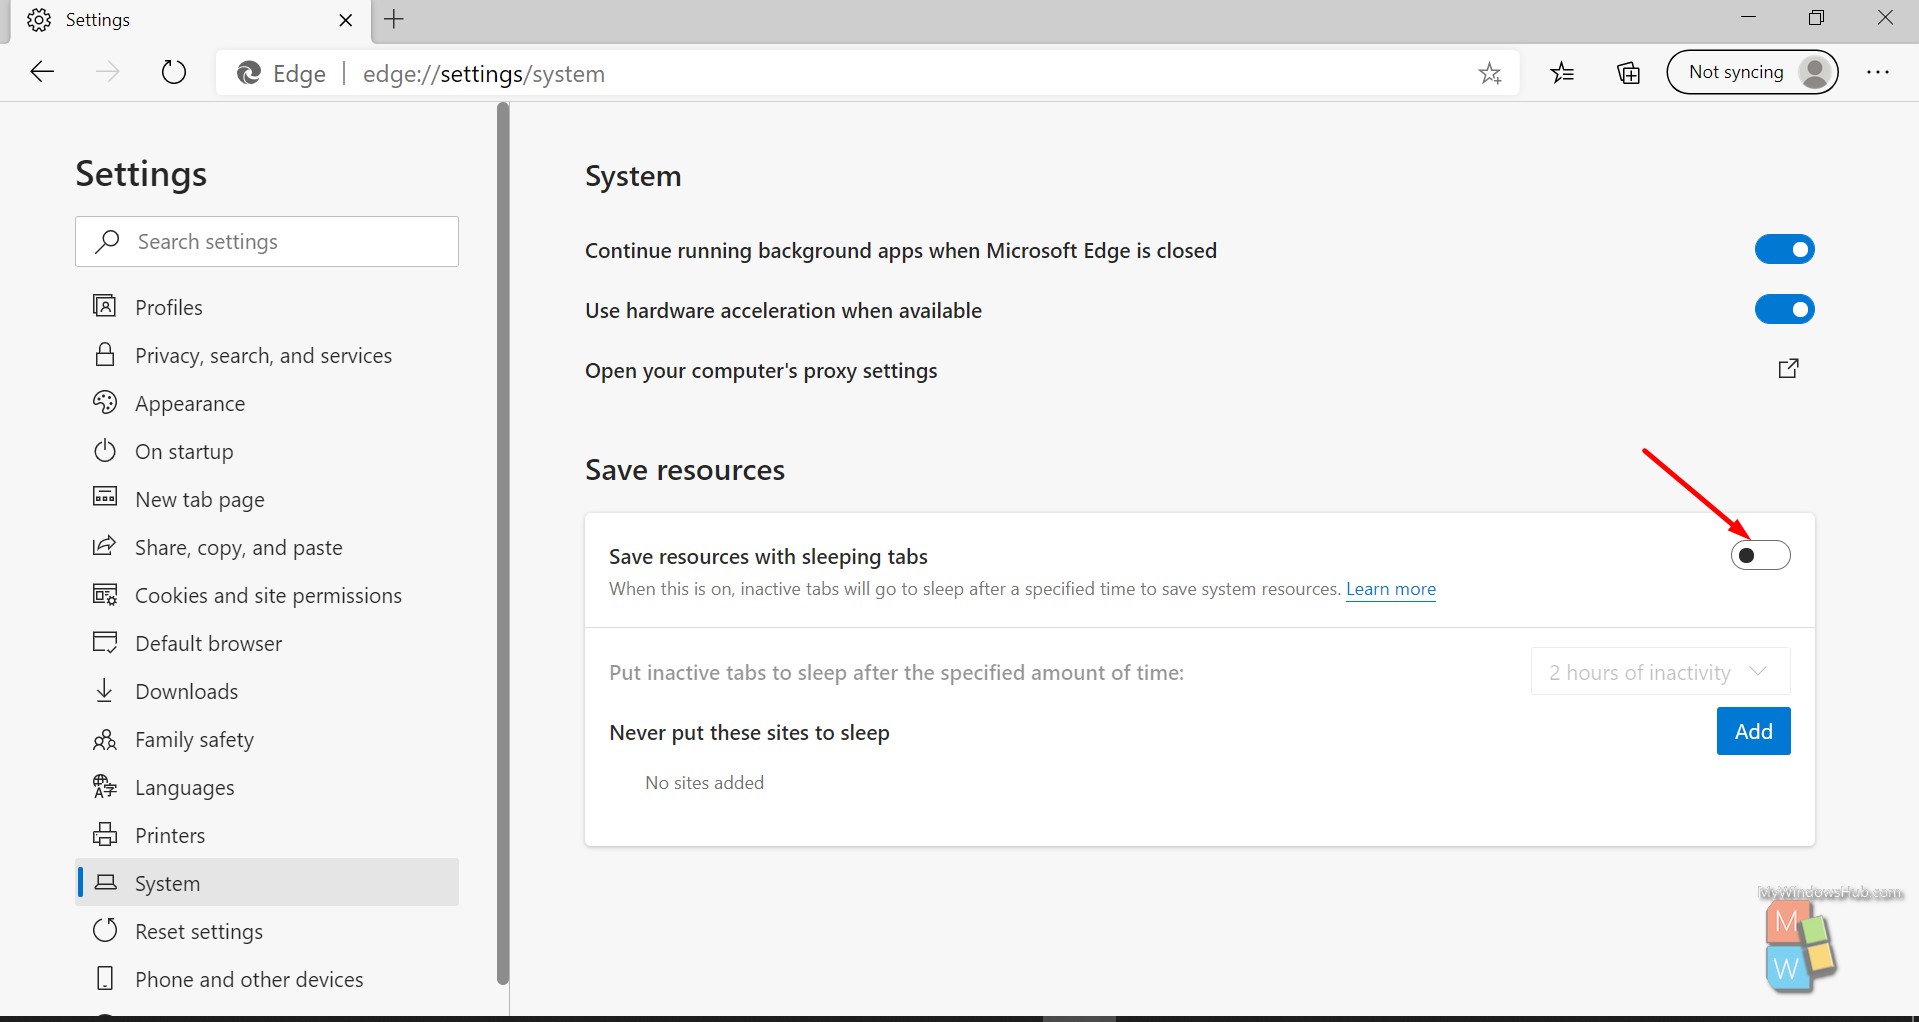
- On the right-hand pane under the “Save resources,” click on the slider aside of the “Save resources with sleeping tabs,” to enable the Sleeping Tabs feature.
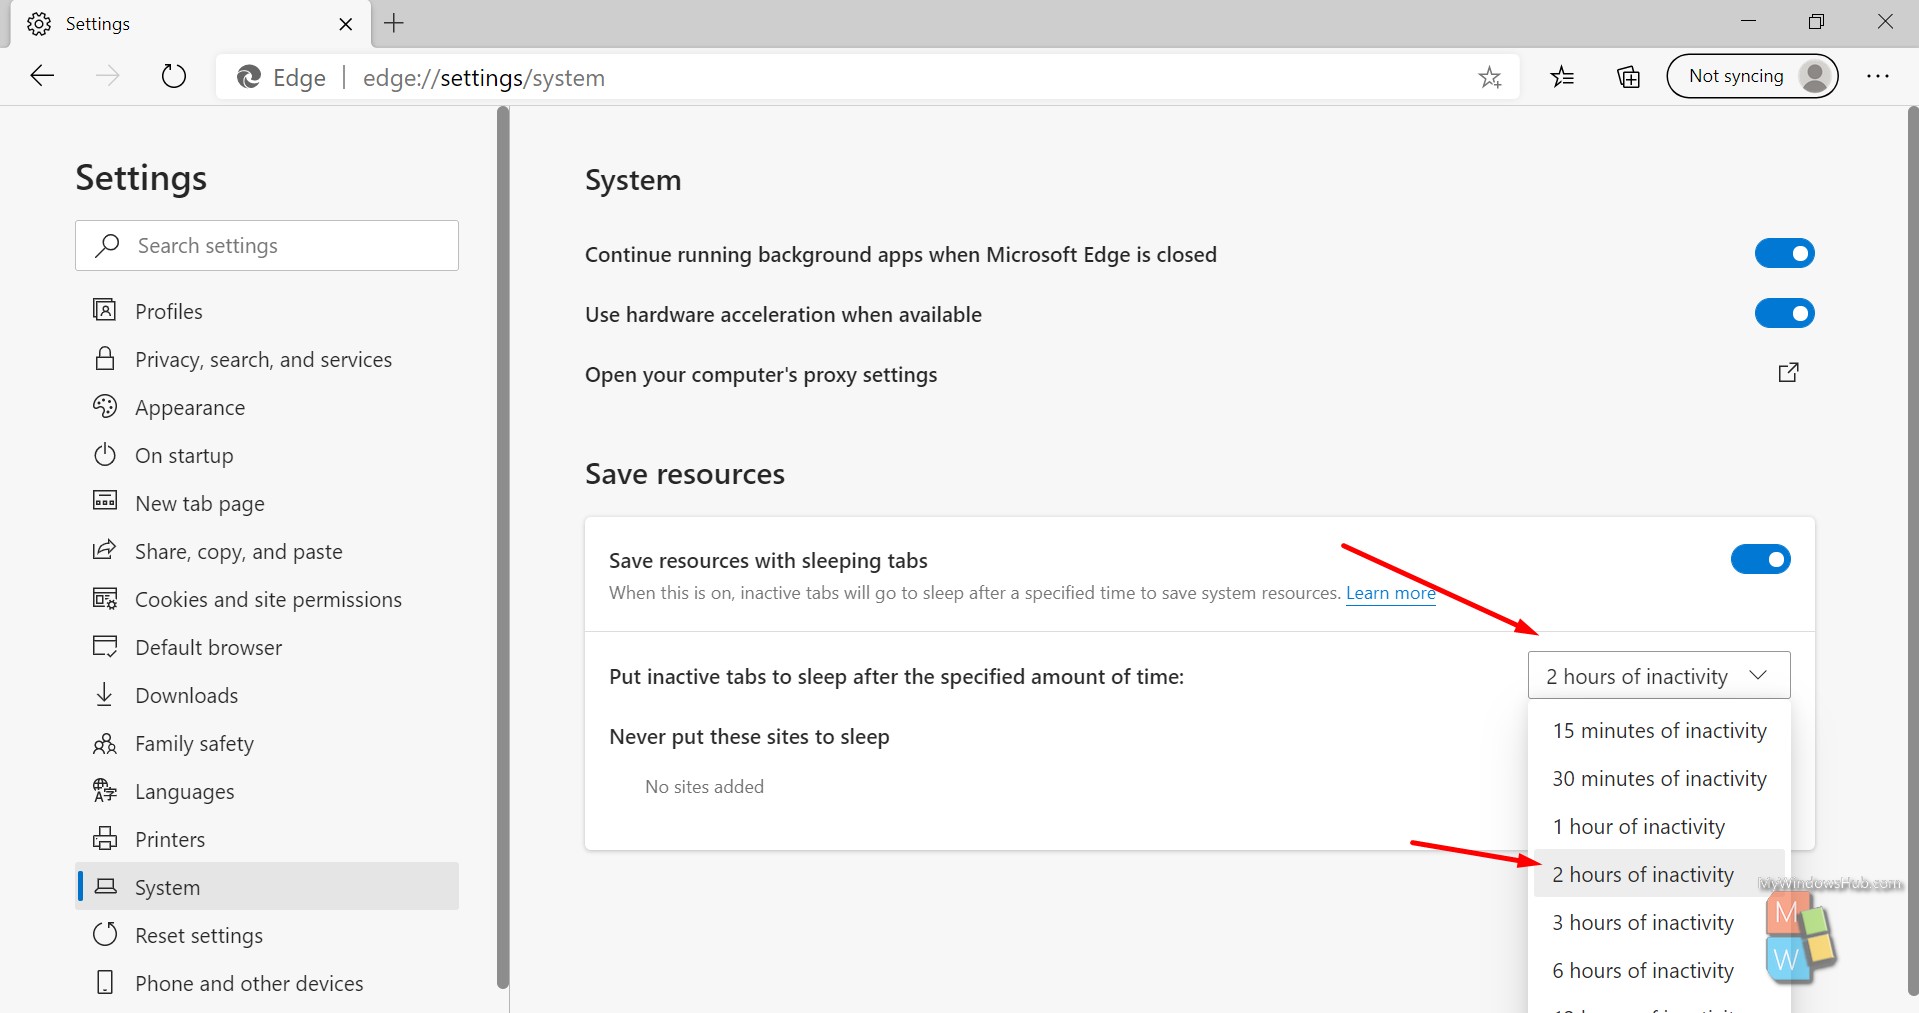
- Tap on the dropdown aside of Put inactive tabs to sleep after the specified amount of time label. There you shall be able to see many timeout options, select one as per your convenience and that’s it.
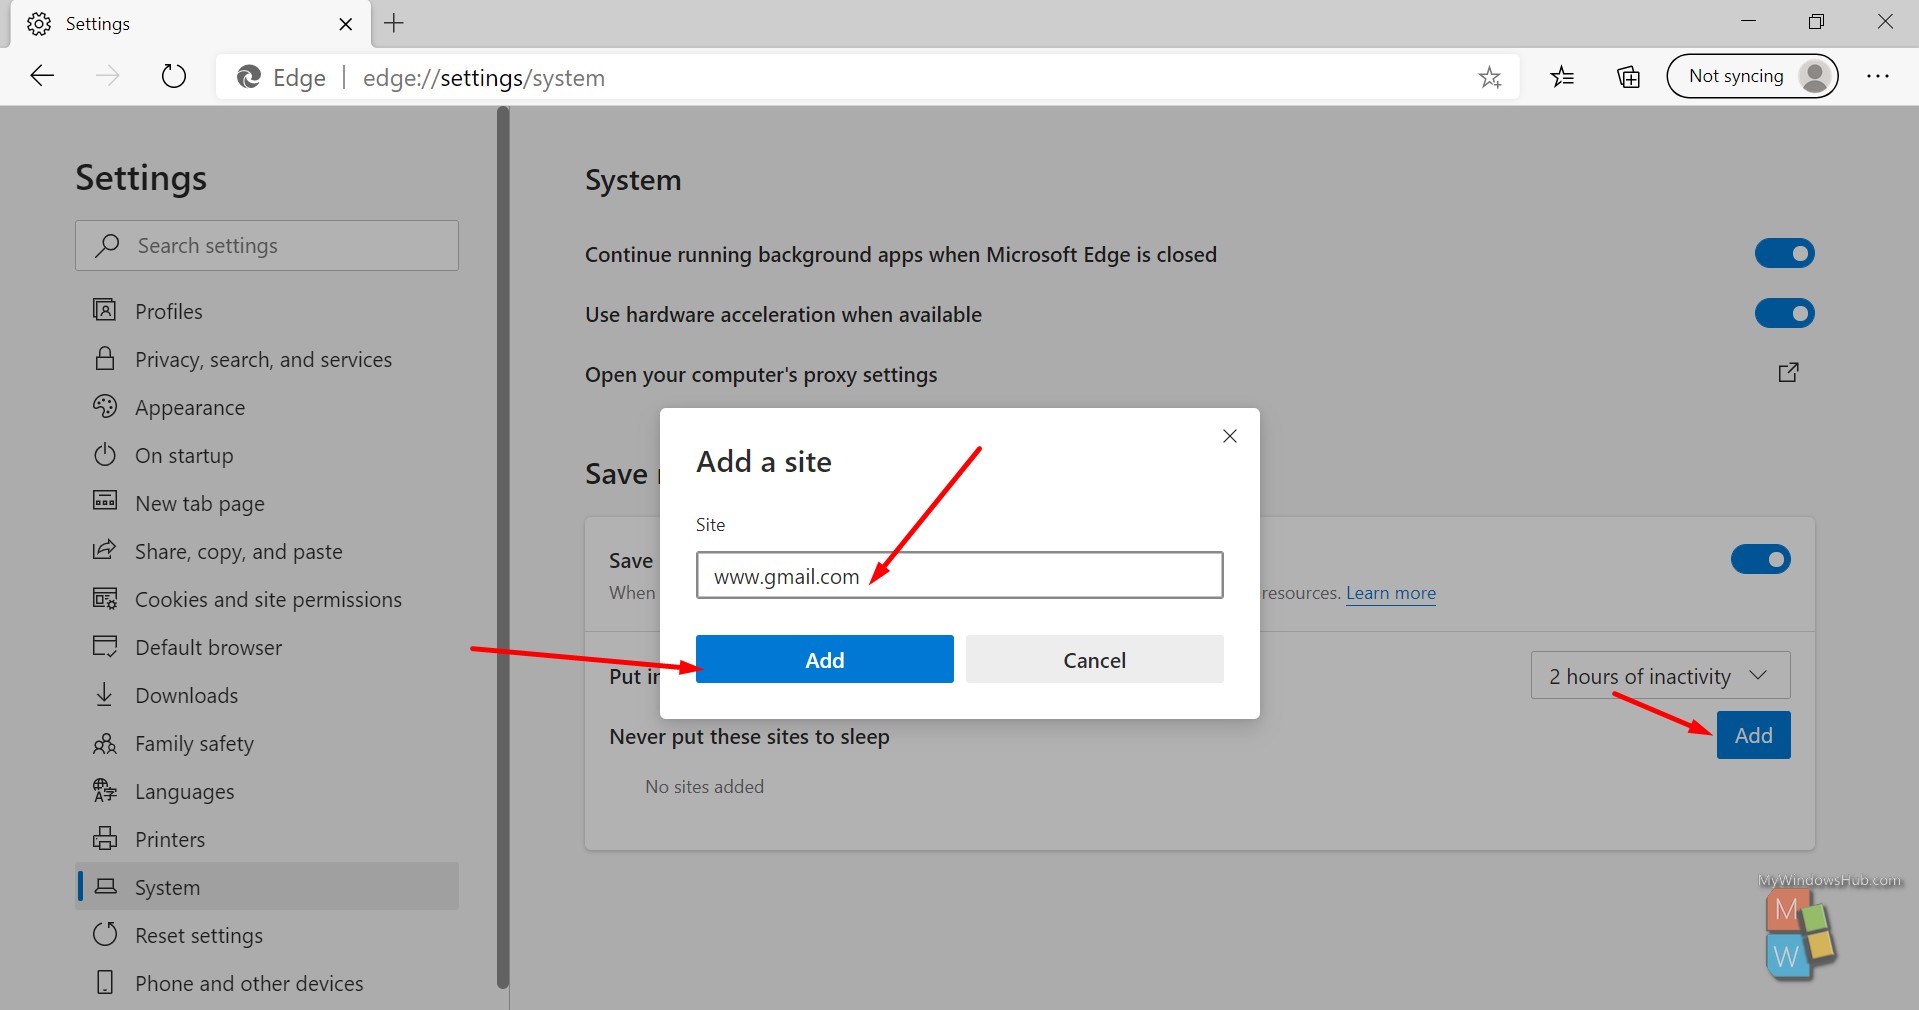
- If needed, you can add a list of websites that you want to put on the block list just by tapping on the “Add” button below.
- On the right-hand pane under the “Save resources,” click on the slider aside of the “Save resources with sleeping tabs,” to disable the Sleeping Tabs feature.
- Now you can close the Settings tab.
Method #3: Always Enable or Disable Sleeping Tabs in Microsoft Edge using Policy
Microsoft provides you with another way to enable/disable the Sleeping tabs other than the conventional method. Here, we are talking about modifying your device’s registry; before proceeding further, please make sure to take a backup of your registry. Please follow the below-mentioned steps,
- Press the “Win + R” keys on your keyboard to open the Run dialog box.
- Type “regedit” and hit the enter key on your keyboard to open the Notepad text editor.
- Navigate to the below-mentioned path,
HKEY_LOCAL_MACHINE\SOFTWARE\Policies\Microsoft\Edge
- Right-click on the Controlled Folder Access and New > DWORD with below values,
EnableControlledFolderAccess -> DWORD
0 = Disable
1 = Enable
- Click on the Ok button to save the changes. Now you can close the registry editor.
Conclusion
- This article showed you two different ways to enable or disable the Sleeping Tabs feature on the Chromium-based Microsoft Edge browser on your Windows 10 device. If you are facing any troubles in executing the steps mentioned above, please leave a comment below.

