Windows 10 has really beautiful vibrant lockscreen that gets updated with amazing images. You can provide feedback if you like of dislike a picture and Microsoft adapts to your choice and sends you lock screen images according to your preferences. If you do not like the concept of lockscreen, then you can turn it off with the help of local group policy setting. This policy setting controls whether the lock screen appears for users. If you enable this policy setting, users that are not required to press CTRL + ALT + DEL before signing in will see their selected tile after locking their PC. If you disable or do not configure this policy setting, users that are not required to press CTRL + ALT + DEL before signing in will see a lock screen after locking their PC. They must dismiss the lock screen using touch, the keyboard, or by dragging it with the mouse.
Steps to Disable Lockscreen in Windows 10
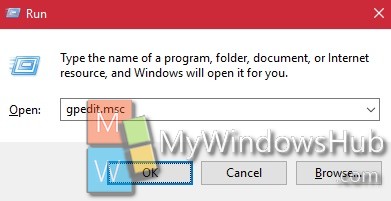
1. Press Win+R to open Run window. Type gpedit.msc and press Enter to open Local Group Policy Editor. If prompted by UAC, click Yes to Continue.

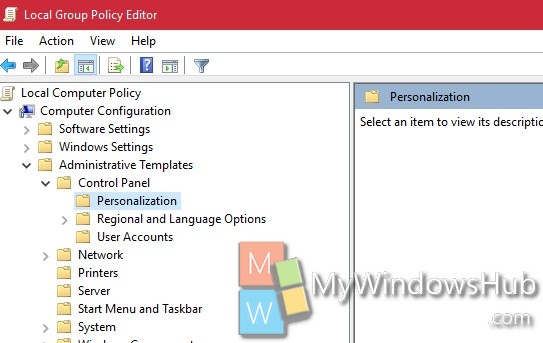
2. Now navigate to the following location Computer Configuration -> Administrative Templates -> Control Panel -> Personalization.

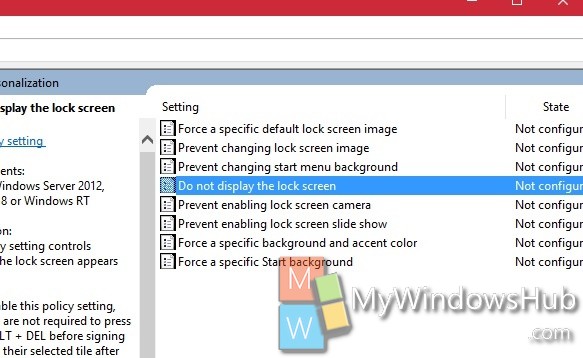
3. In the right panel, find out Do not display Lockscreen. Double tap on it to edit it.

4. By default it’s disabled. Which means your lockscreen is enabled. If you select Enabled, then you will no longer face the Lockscreen during startup.

