MS Word is one of the most used word editing software application across the world. It is full of features and whether you are writing an essay, a book or a journal, MS Word is complete and self sufficient. Many a times, students cannot find out the right guidance to use this software because it is massive and finding out a single layout or design is a tough job.
Also Read: How To Insert A Header And Footer In An MS Word Document?
In this article, we shall show you how to change the orientation of a document of a page in the document from portrait to landscape and vice versa. Usually, the format in which MS Word documents are written are in portrait mode. But sometimes, while inserting big tables, or diagrams, we need to insert them in landscape mode so as to utilize the maximum space of the page without making the drawing or table look clumsy.
Check out the simple steps to change the orientation of a page or an entire document in MS Word document file.
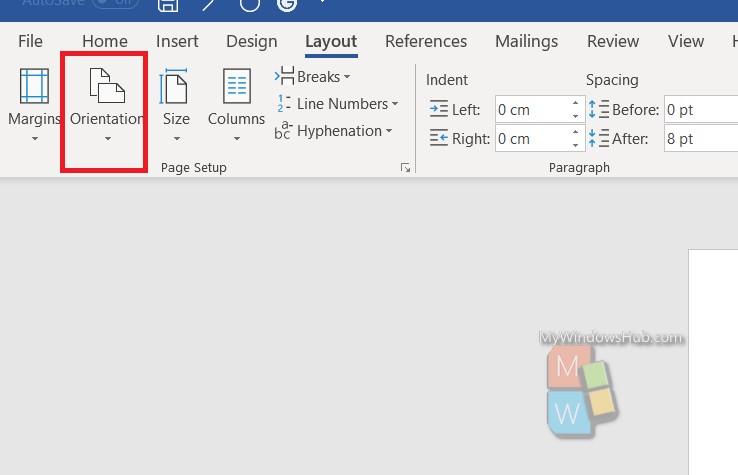
First open your Word document, click on Layout, located on the top panel.
The second option from the left under Layout is Orientation. Tap on it.
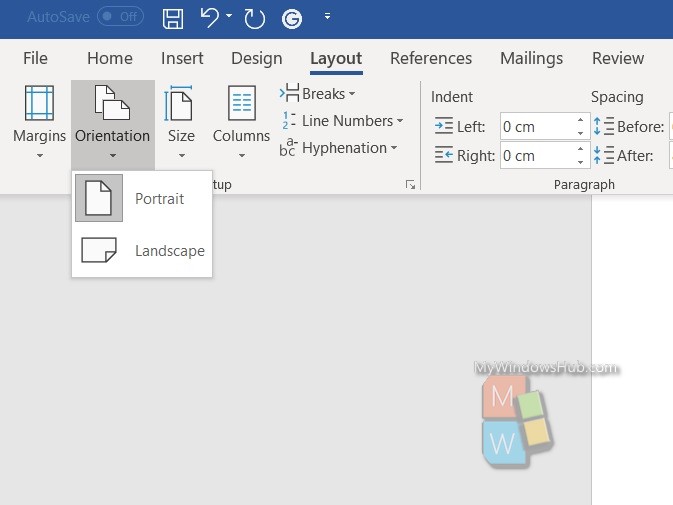
Choose from Landscape or Portrait. And you are done.
I selected the Landscape mode. The entire document changed into landscape mode.
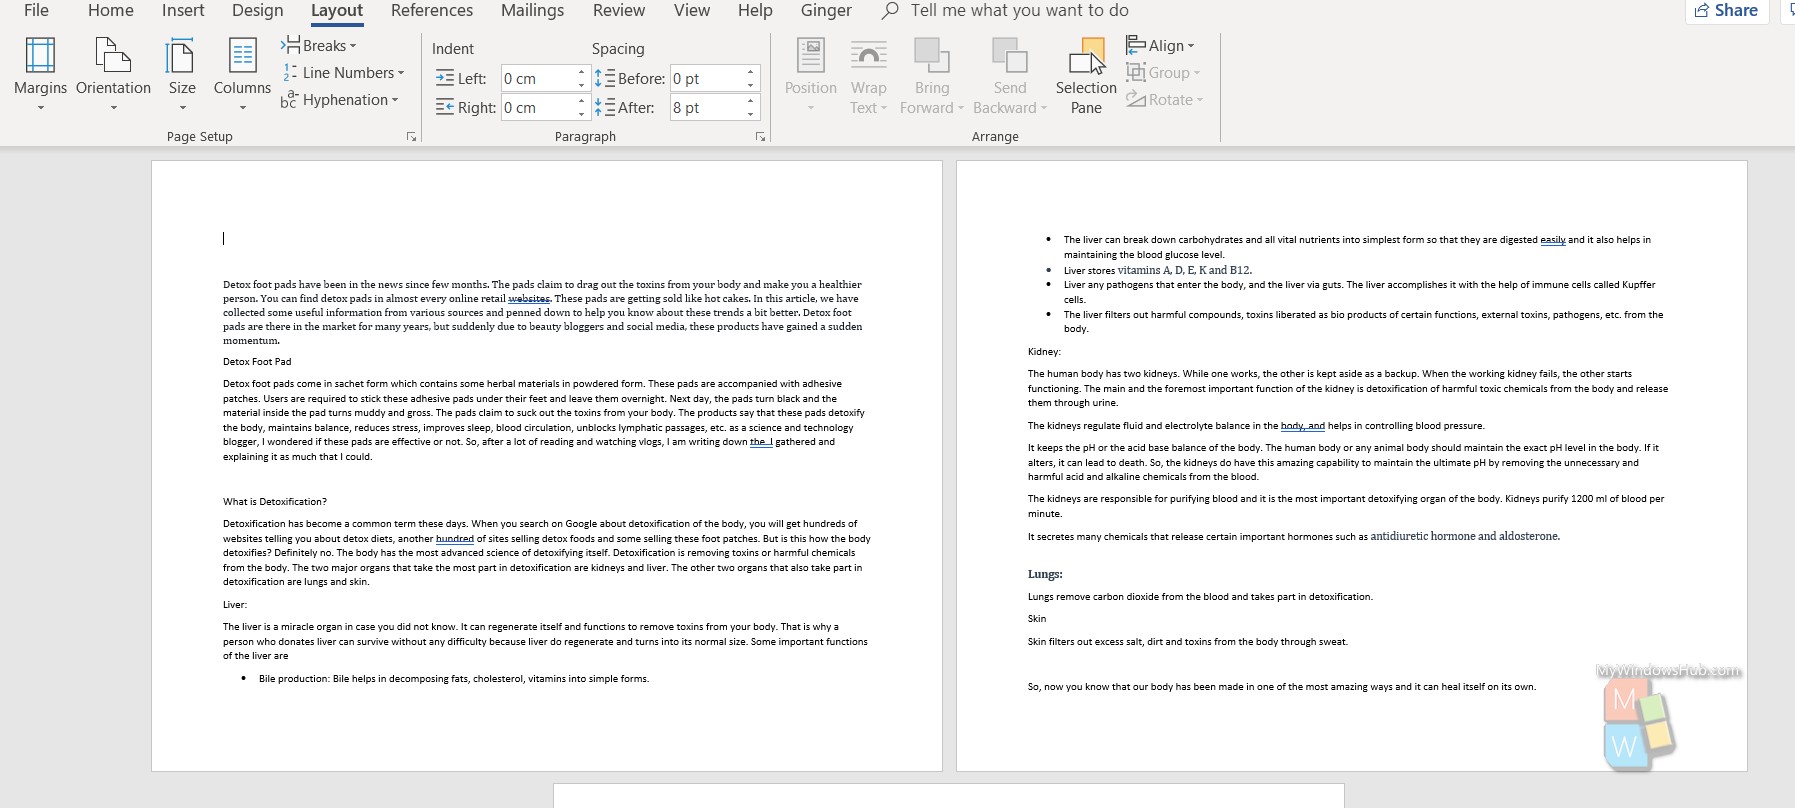
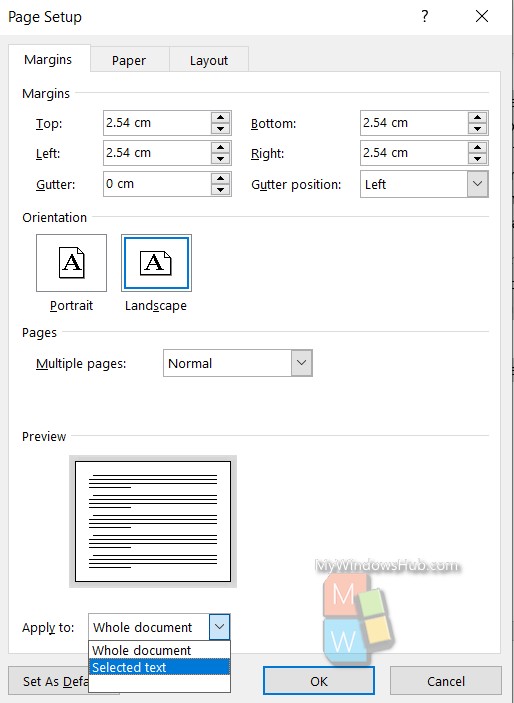
If you want to apply the Landscape mode to only specific page or pages, then you have to follow some additional steps. Select the part of the document you want to change into landscape mode. Now, click on the Page Setup arrow as shown. This will open the full set of page formatting options.
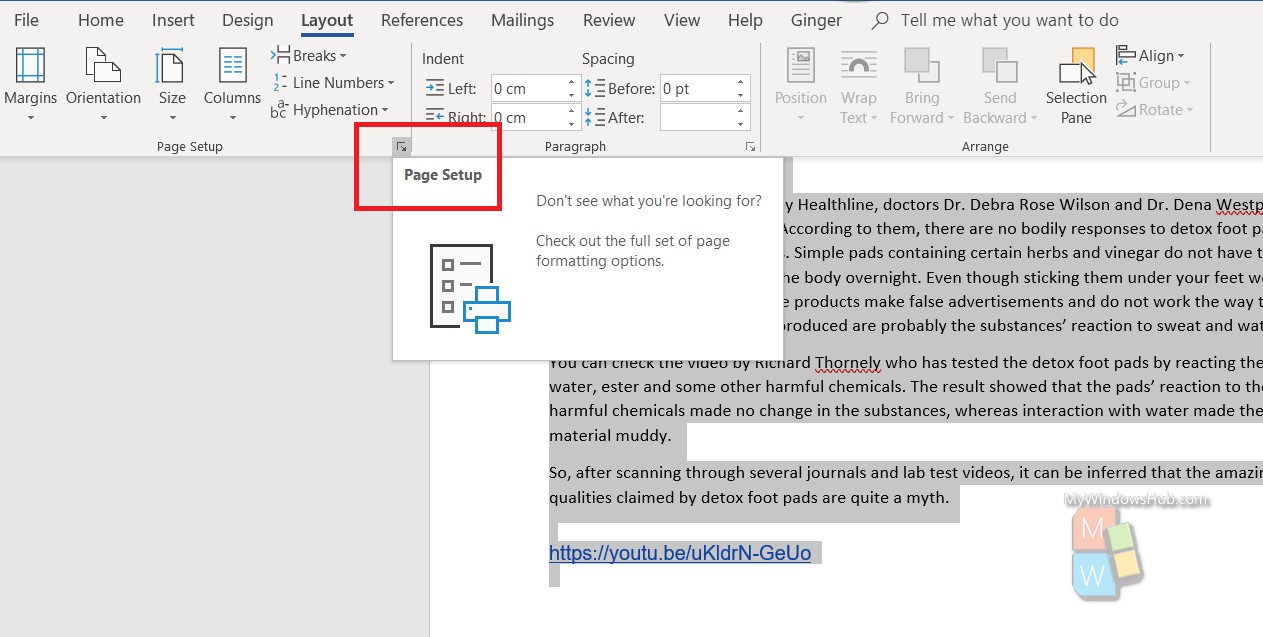
As the Page Setup dialogue box opens, click on the orientation, change it to landscape. At the bottom of the Page Setup box, you will find Apply To option. Click on the drop down box. Select the option “Selected Text”. Click OK. There you go. Only the selected text will be changed into landscape mode.
