

Nowadays, advanced computers have replaced the classic HDD and use NVMe devices for storing data. NVMe is the acronym for Non Volatile Memory Express. NVMe is often implemented as NAND flash memory which comes in various form factors. These include SSD, PCI Express, M.2 Cards, etc.
The Primary NVMe Idle Timeout option is the time required by the NVMe device to remain idle, before it transits to the power saving or non-operational mode. Check out the default values for Primary NVMe timeout.
| Power Plan | On battery | Plugged in |
| Balanced | 100 milliseconds | 200 milliseconds |
| High Performance | 200 milliseconds | 200 milliseconds |
| Power Saver | 100 milliseconds | 100 milliseconds |
| Ultimate Performance | 100 milliseconds | 200 milliseconds |
In this article, you will learn how to add or remove primary NVMe Idle Timeout from Power options in Windows 10.
Steps To Add/Remove Primary NVMe Idle Timeout From Power Options In Windows 10
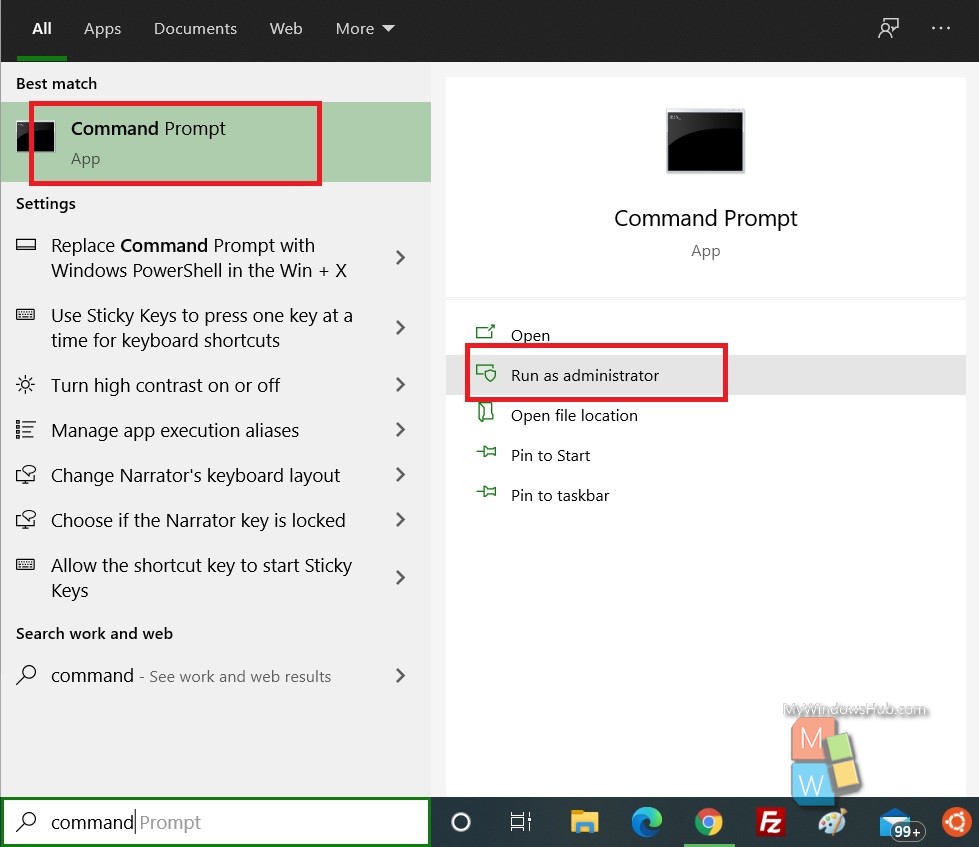
1. Open Windows 10 Search panel, and type Command Prompt. From the search result, right click on Command Prompt and select Run as Administrator. This will launch the Elevated Command Prompt.
2. If you want to add Primary NVMe Idle Timeout to Power Options, copy and paste the following command and hit Enter after that.
powercfg -attributes SUB_DISK d639518a-e56d-4345-8af2-b9f32fb26109 -ATTRIB_HIDE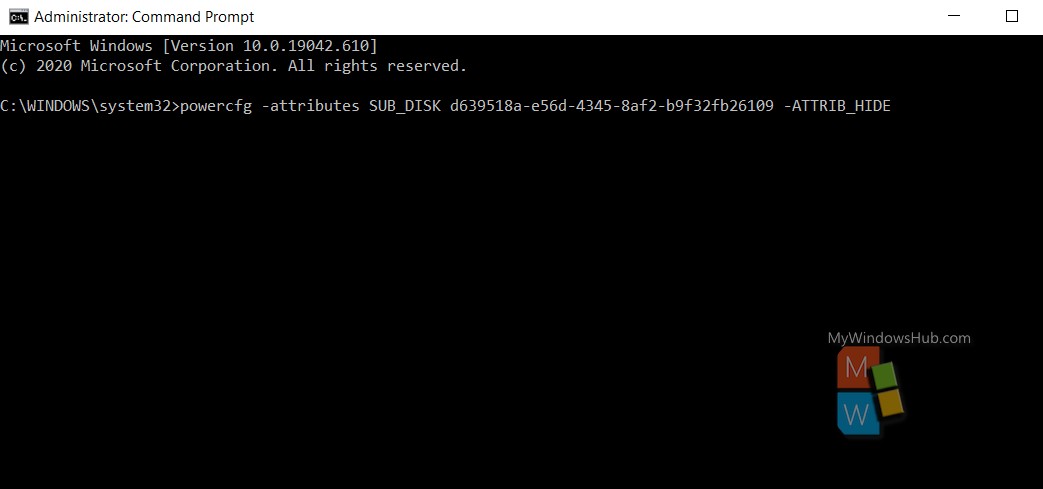
3. If you want to remove Primary NVMe Idle Timeout to Power Options, copy and paste the following command and hit Enter after that.
powercfg -attributes SUB_DISK d639518a-e56d-4345-8af2-b9f32fb26109 +ATTRIB_HIDE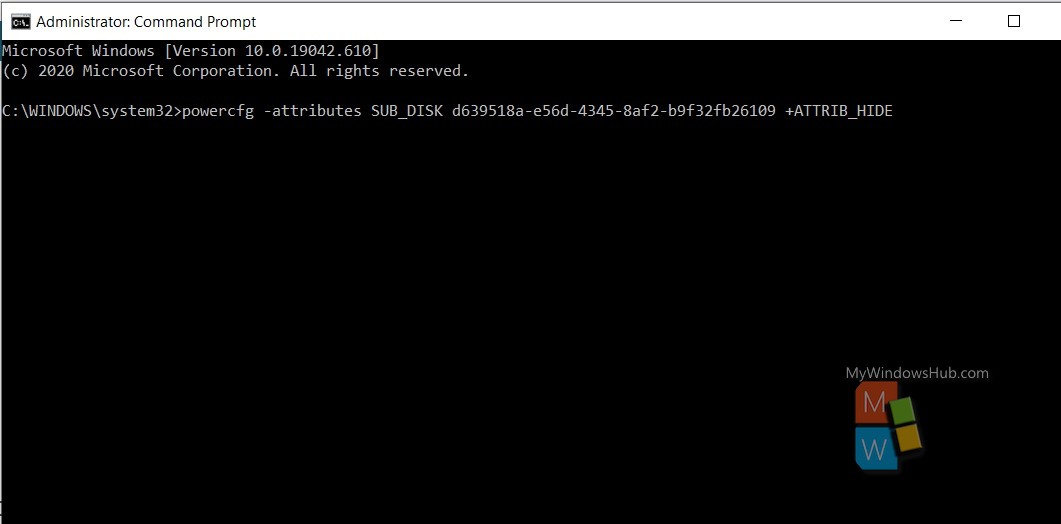
Close the Command Prompt. If you want, you can reboot the computer to see the changes.