Windows 10 and Windows 11 always recommend users to use their Microsoft account for a safe login. Users need to sign-in using their Microsoft or Outlook email ID and password as login credentials. If your PC is used my many users, who are not permanent users, but will use your PC for sometime, then it is better to create a local account for that person.
Remember, for your own use, always use Microsoft login. For ease of use, you can create a PIN so that you don’t need to use the password for logging in. In this article, you will learn how to add local user account in Windows 11.
Steps To Add Local User Account In Windows 11
1. First, go to Start menu. Then click on Settings.
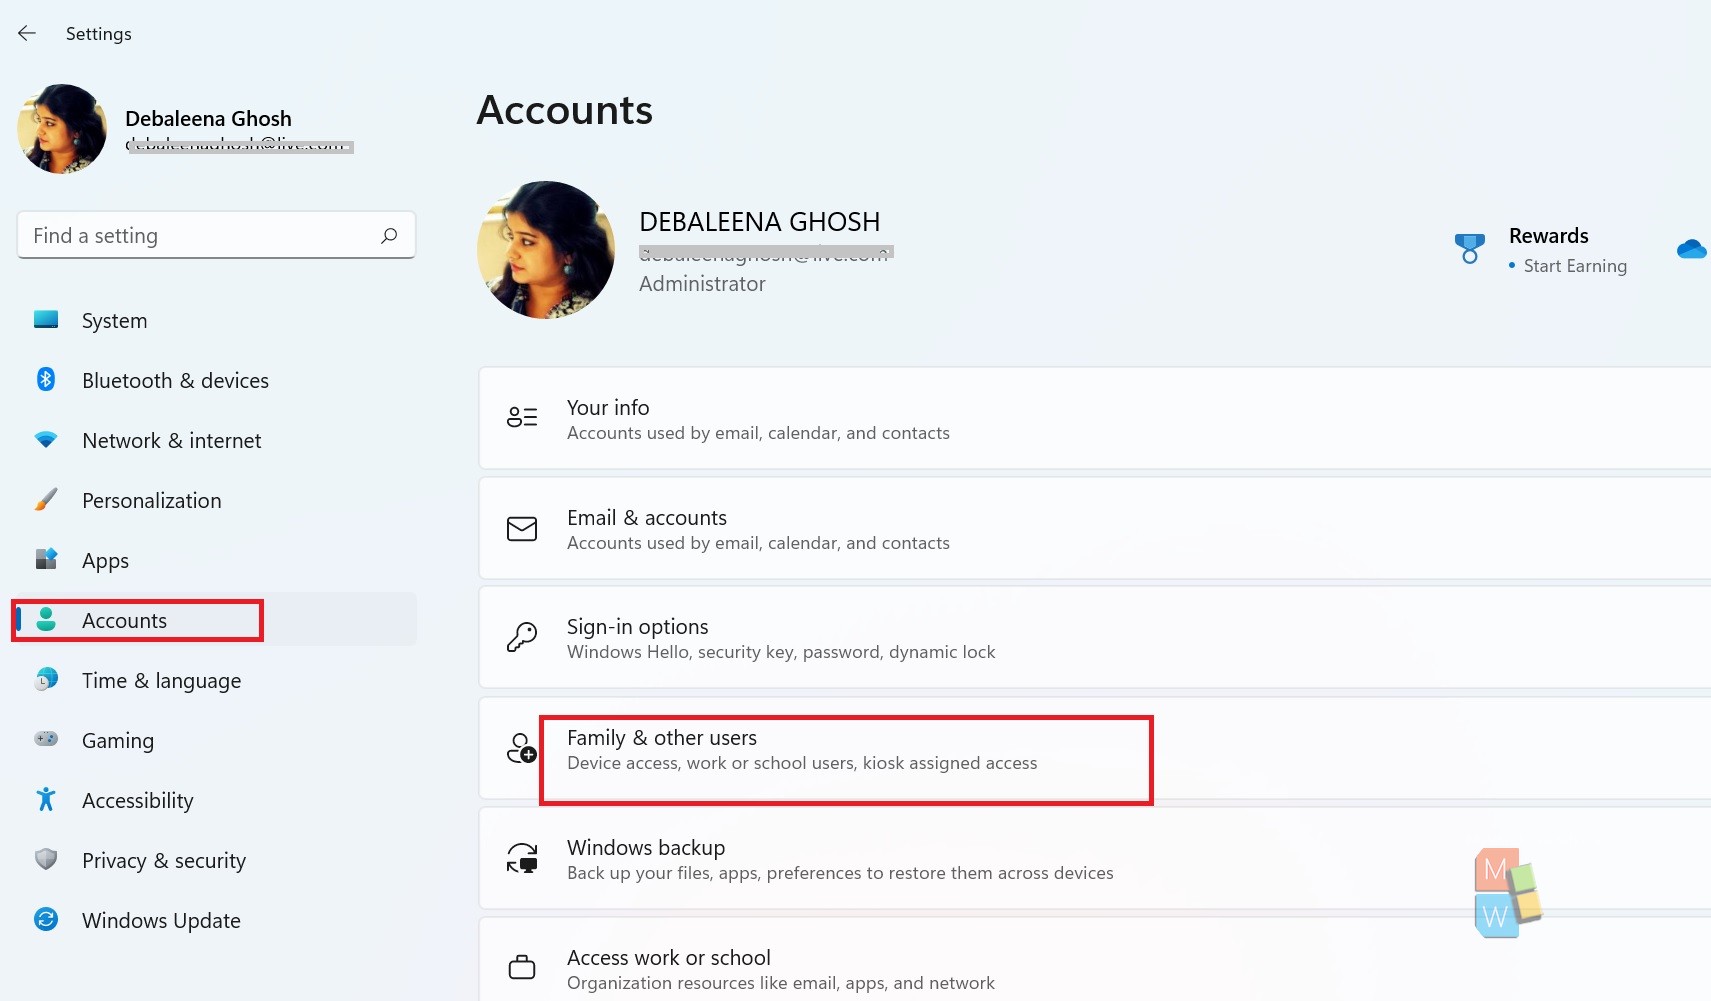
2. In the left panel, click on Accounts. In the right panel, click on Family and other users.
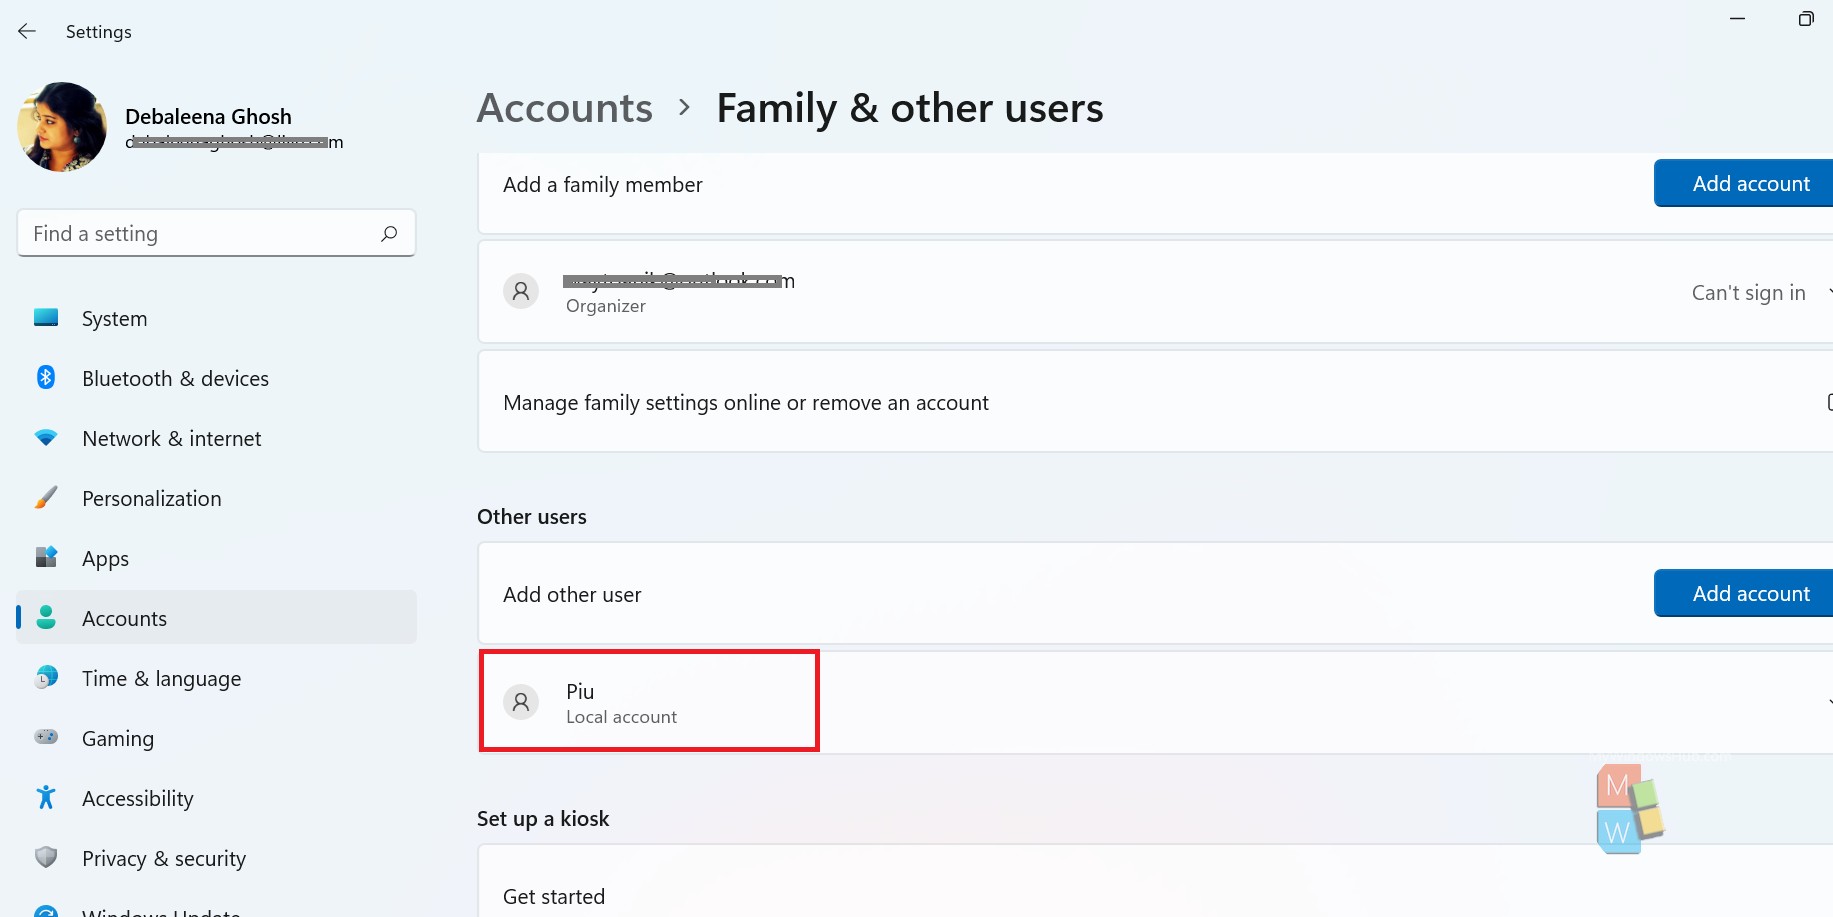
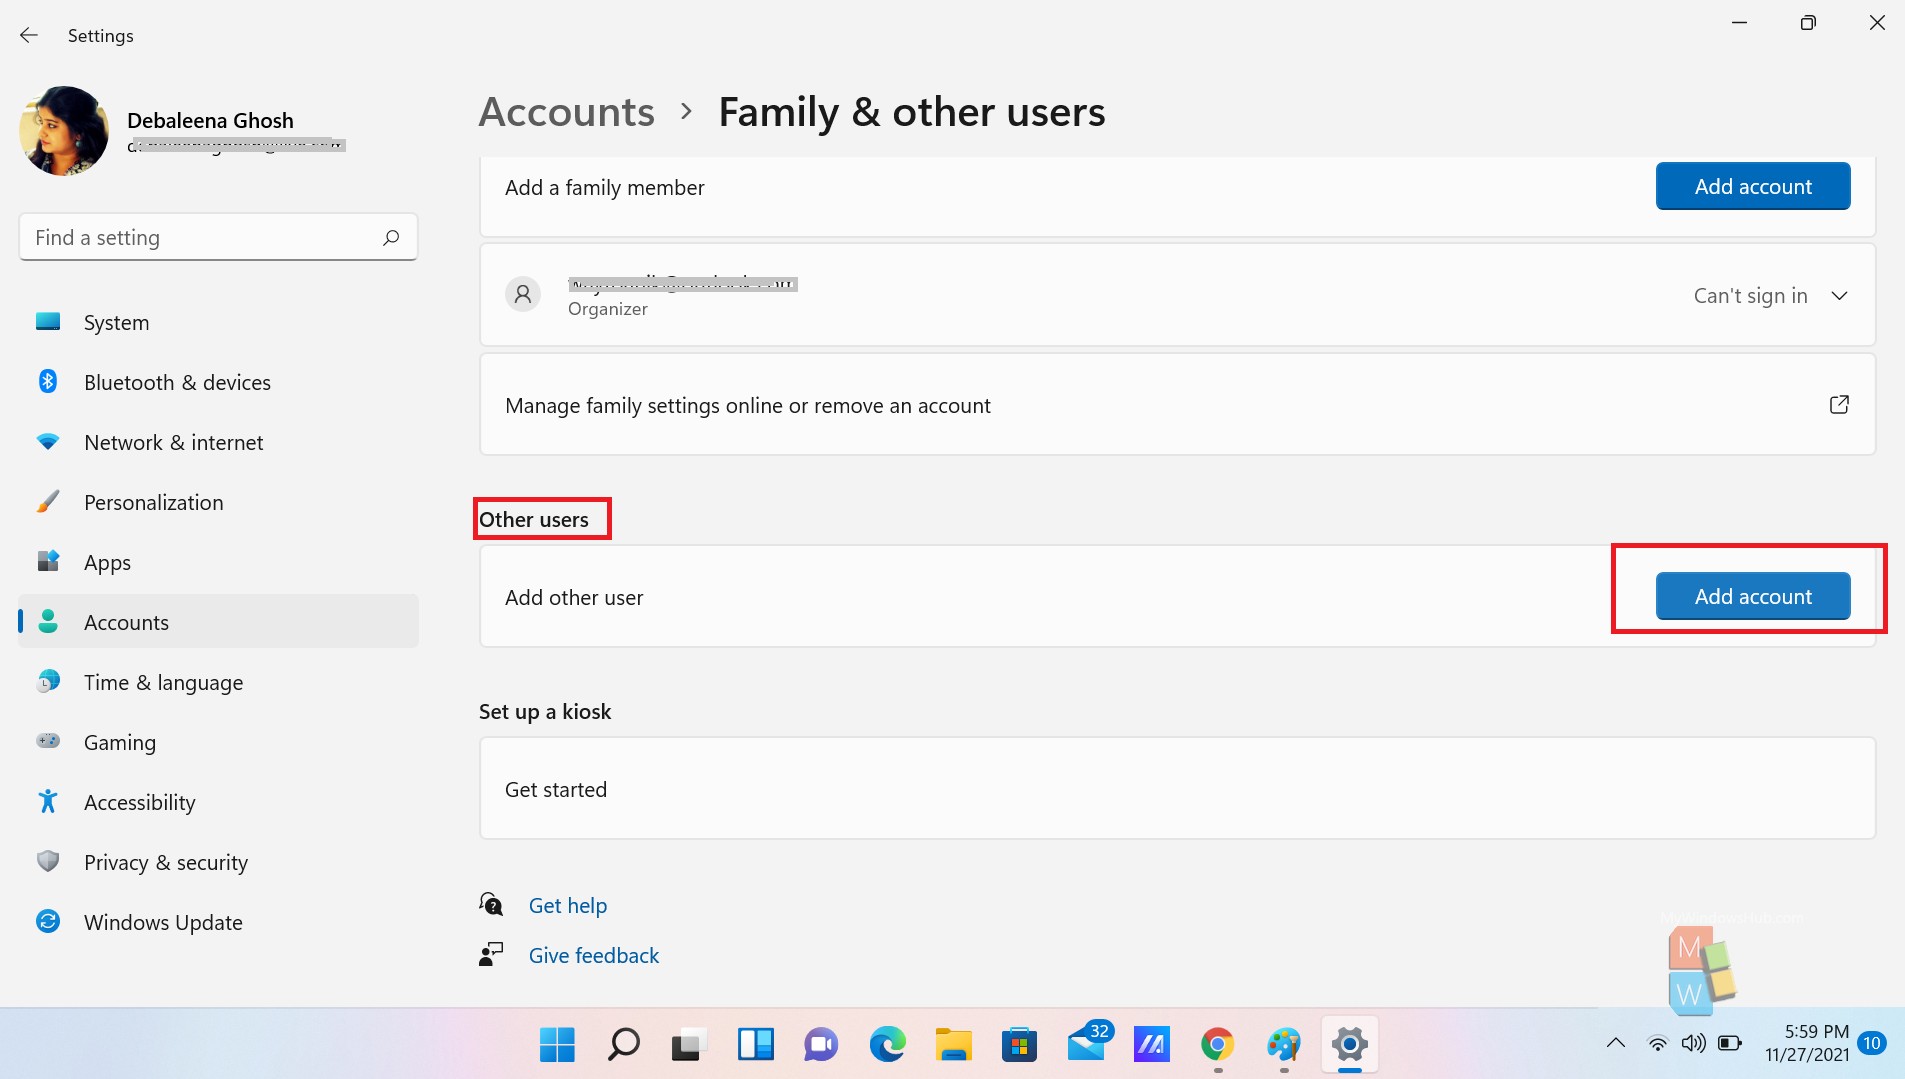
3. In the right panel, scroll down and find out Other users. Under this option, click on Add Account.
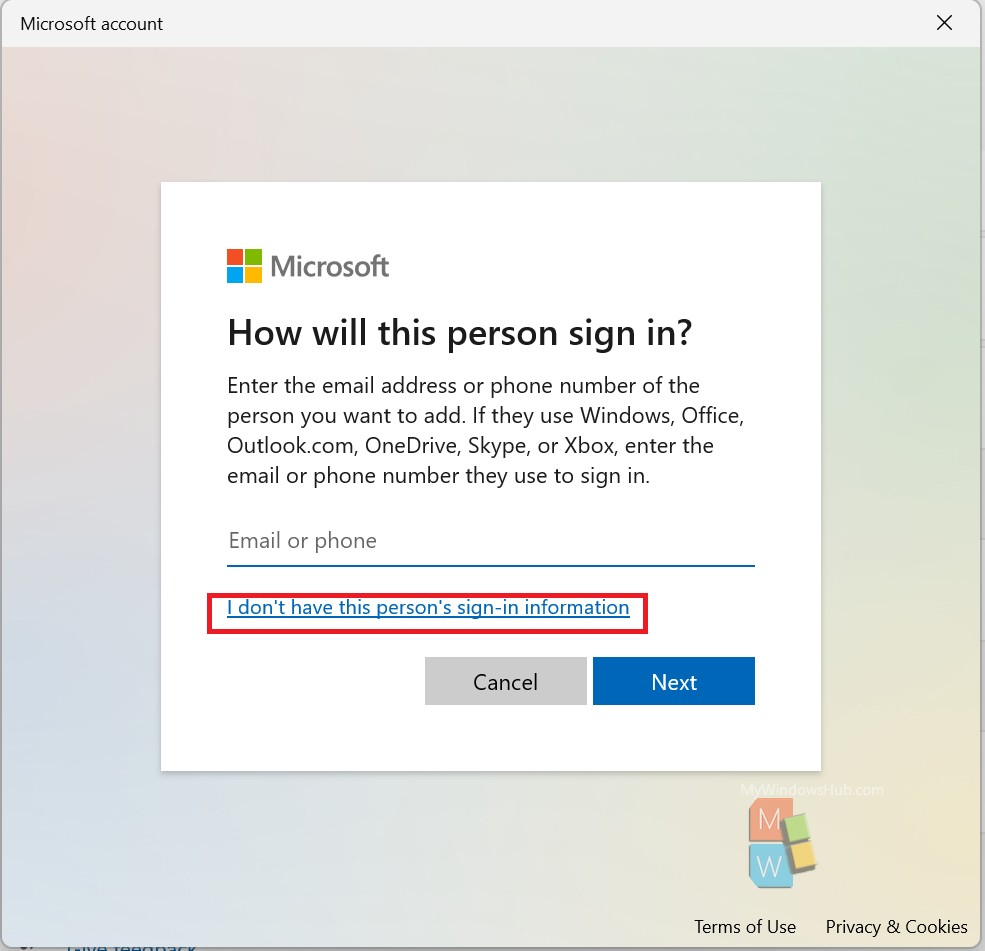
4. The Microsoft login portal opens. Click on I don’t have this person’s sign-in information.
5. Next, click on Add a user without a Microsoft account.
6. Now, enter your preferred username, password and click Next.

7. Your local account is created.