The maintenance activity currently present in Windows is totally planned to execute silently with minimal user interaction and reduced influence to the overall functioning and energy utilization. Nevertheless, the same kind of activity present in Windows 7 and earlier versions, influences the overall performance and energy efficiency due to the unsettled and deviated schedule of the numerous maintenance activities going on in Windows.
Responsiveness to users is drastically reduced at the time of execution of the maintenance activity but at the same time users are pretty easily active on their computers. The main motto of Automatic Maintenance activity is to optimize your system by amalgamating your background tasks, and also aid all 3rd party applications extend their part in including their respective maintenance activity to Windows without even hampering the overall performance. The primary issues that Automatic Maintenance majorly aims at are:
1. Deadline Scheduling
2. Energy Efficiency
3. Resource Utilization Conflicts
Automatic Maintenance eases the efficiency of the idle system time and also allows all kinds of activities to function in a timely fashion. It also assists us in enabling integrated visibility & enhanced control over the maintenance activity & also permits the 3rd party application to include their maintenance activity to Windows.
Steps to change the Automatic Maintenance settings in Windows 10
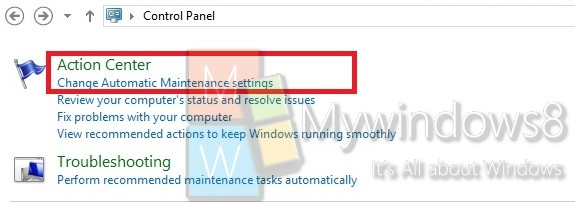
1. Go to Control Panel & click on Security and Maintenance option.

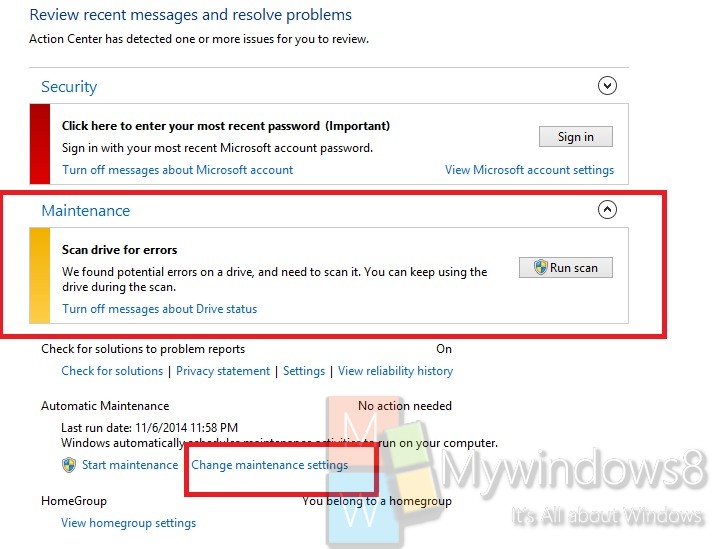
2. Once you have opened the Security and Maintenance option, expand the Maintenance, choose the Change maintenance settings link present under Automatic Maintenance.

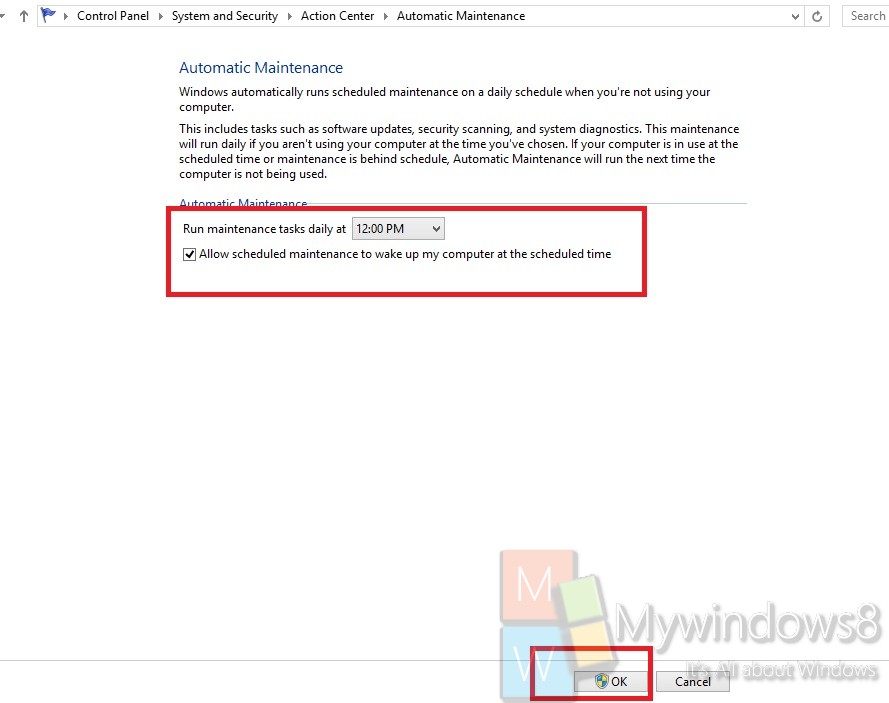
3. Choose the exact time you would prefer to have your Automatic Maintenance to be scheduled daily, after this choose the option to check/uncheck for “Allow scheduled maintenance to wake up my computer at the scheduled time”.

4. Save your preference, if prompted click on Yes/OK.
5. You can now close Control Panel.

