This article will help you to assign a Static IP Address in Windows 8. IP address can be explained to be analogical to an address of a house. Just like a house is identified by its address, house number, similarly, a device in the internet is recognized by the Internet Protocol address. So the IP address is nothing but a numerical tag attached to identify a machine.

There are two versions of IP addresses that are IPv4 and IPv6. Each version has different fashion of representation. The IPv4 addresses have address size of 32 bits, whereas the IPv6 address space has increased to 128 bits. Previously IP addresses were divided into 5 classes and the classification was based on the size of organizations to which each class of addresses was to be allocated. Number of address per network for class A was 16777216, for B it’s 65536, and for C 256. But it was noticed that a large organization was not that large to crowd a Class A network, whereas class C addresses were very less in number , too small for a medium size company, Hence classless addressing were introduced along with the concept of subnetting.
Some infrastructures needed Static IP addresses to be used. It helps in finding Domain Name Server which essentially translates domain names to IP addresses. Other uses of static addresses are locating servers inside an enterprise, in applications like Email server for inbound or outbound mail, video conferencing, hosting a website; use of IP based security cameras and many more.
Steps to Assign a Static IP Address in Windows 8
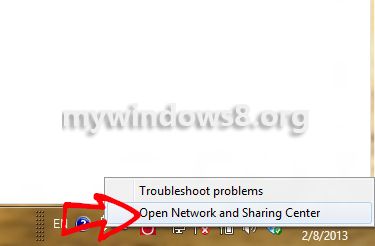
1. Right click on the Network and Sharing Centre.
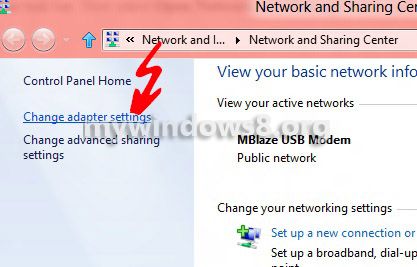
2. Click on Change Adapter Settings located on the left pane.
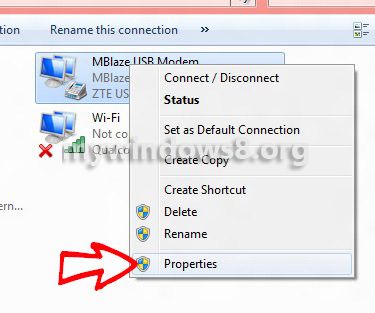
3. Right click on the Local Adapter, for eg. MBlaze USB Modem and then click on Properties.
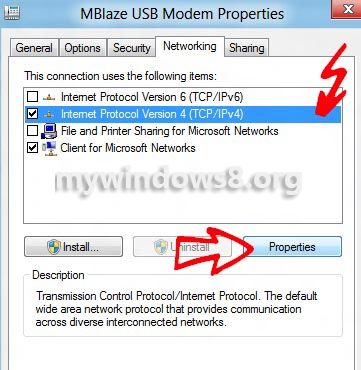
4. In the new Properties window opened, click on Networking Tab.
5. Select the option Internet Protocol Version 4 (TCP/IPv4) and click on Properties.
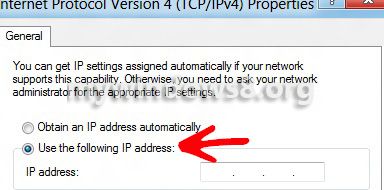
6. First check the option Use the following IP address and enter the correct IP, Subnet mask, default gateway that corresponds with your network setup. (You can find the Static IP Address from Command Prompt also: Press Windows + X keys -> Select Command Prompt (Admin)-> type command ipconfig and press Enter.)
7. Now check the option Use the following DNS server address and next enter your Preferred and Alternate DNS server addresses.
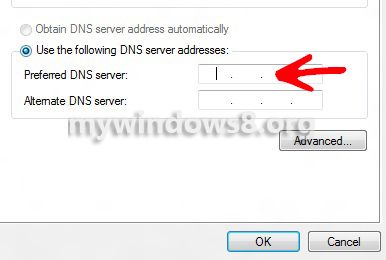
So after you have finished, click “OK” to save changes. Next Windows will verify the connection by running.


Very Good, tutor