Windows PowerShell is the modern version of Command prompt though Command Prompt still holds its importance. When you open Windows PowerShell with Windows 10 you right click on the search result and select Run as Administrator. Whenever you need to access any administrator rights, you have to do this. If you use this feature frequently and want a permanent solution rather than repeating the same process of running it as admin, then this article is for you.
Steps to Always Run PowerShell as Administrator In Windows 10
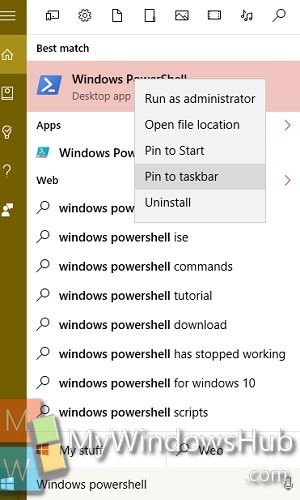
1. Open Cortana and type Windows PowerShell and right click on it. Select Pin to Taskbar.

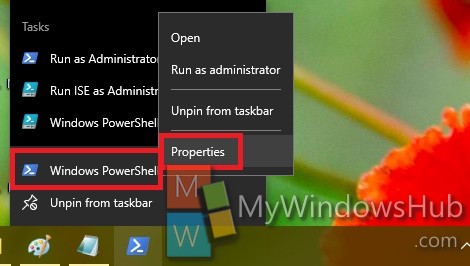
2. Once PowerShell is pinned to Taskbar, right click on it. Then take the cursor on Windows PowerShell as shown below and again right click and go to Properties.

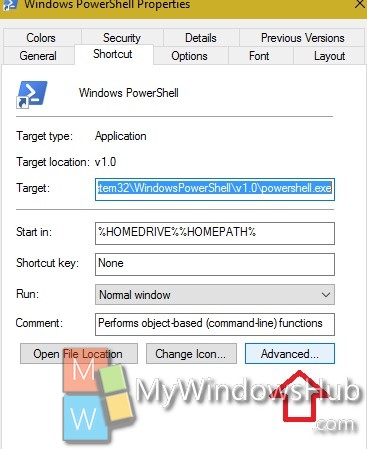
3. Now go to Shortcut tab. Click the ‘Advanced’ button at the bottom of this tab to open the Advanced Properties window.

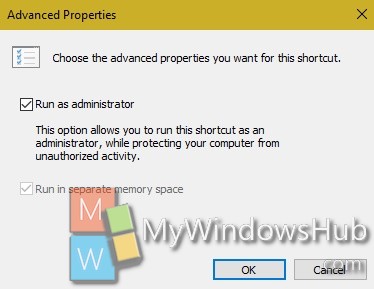
4. Enable the option ‘Run as administrator’ by checking the box beside it and click ‘OK’.

5. Click Apply and then OK.


Brilliant! Didn’t know it was so simple 🙂