Windows Explorer Context Menu is the menu that appears when you right click on an empty space on the desktop. This article will show you how to enable or disable all Windows Explorer, Desktop, File, and Folder context menus for all or specific users in Windows 7, Windows 8 and Windows 8.1. This tutorial should work in Windows 10 also.

Enable or Disable Explorer Context Menu using a .REG File
1. To Enable Windows Explorer Context Menu for All Users Download the below file.
2. To Disable Windows Explorer Context Menu for All Users, click on the Download button to download the file below.
3. Extract the required .rar file onto your desktop.
4. Double click on the extracted .reg file to attach it to the registry of your system.
5. Click on Run, Yes (UAC), Yes, and OK if prompted.
6. When completed, you can remove the downloaded .reg file if you want to.
Enable or Disable Explorer Context Menu in Group Policy
1. Open the all users, specific users or groups, or all users leaving administrators Local Group Policy Editor for how you require this policy to be applied.
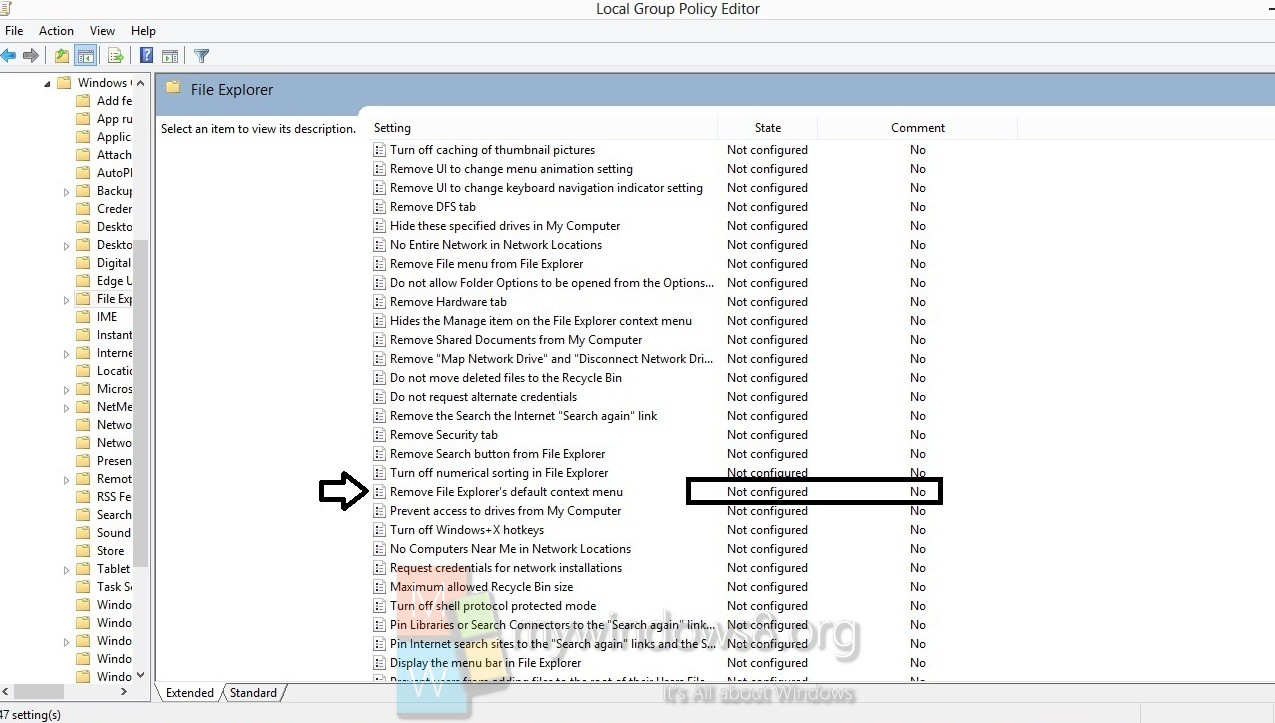
2. In the left side of the windows of Group Policy, expand User Configuration, Administrative Templates, Windows Components, and Windows Explorer (Windows 7) or File Explorer (Windows 8).

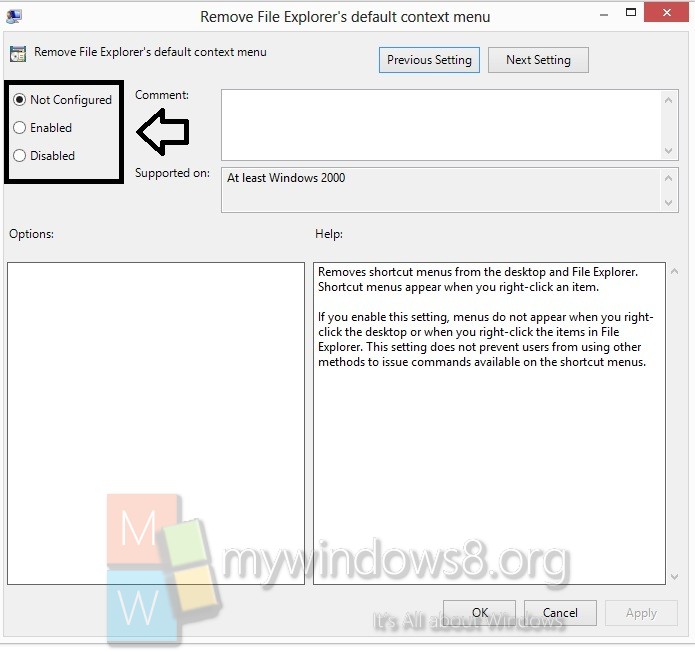
3. In the right pane, double click/tap on Remove Windows Explorer’s default context menu (Windows 7) or Remove File Explorer’s default context menu (Windows 8) to edit it. (See screenshot above)
4. To Enable Windows Explorer Context Menu, Select (the radio button) either Not Configured or Disabled.

5. To Disable Windows Explorer Context Menu,Select (the radio button) Enabled.
6. Click on OK after completing the above steps.
7. Close the group policy editor if you want.

