VBA for Office Suite or Virtual Basic For Applications is becoming popular among Office professionals. It is now a powerful programming tool for users and the best thing about VBA is that you can use it even if you don’t know anything about coding. In VBA, we have macros, which are objects that we create for customizing certain functions. We then call these macros and run them for our own requirement.
In this article, we shall see how to sort items in an Excel sheet using VBA for MS Excel.
Steps To Sort Items In An Excel Sheet Using VBA For MS Excel
First, you have to turn on the Developer Tab in MS Excel.
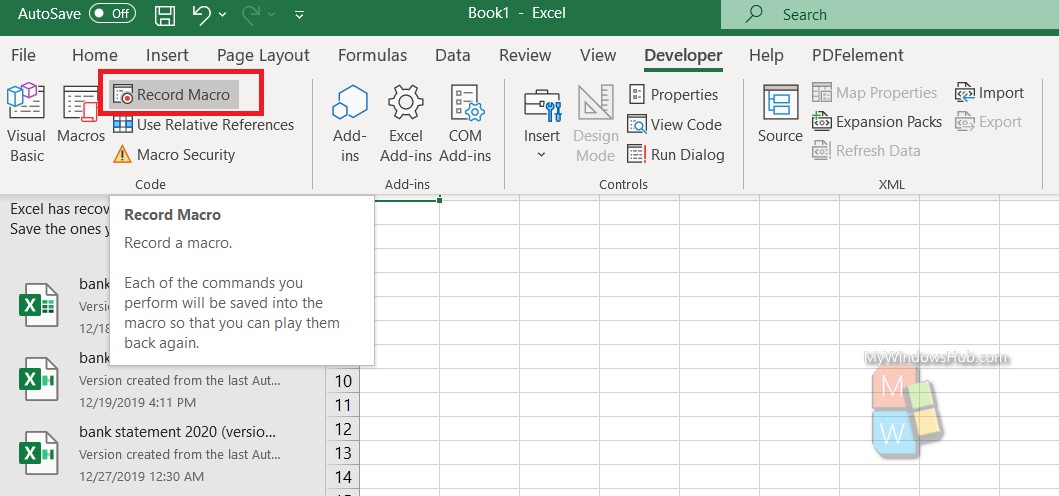
Next, tap on the Developer tab in the Ribbon. There are two types of references, one is the absolute reference and the other one is the relative reference. I have already written an article on the same topic using relative reference. But here, I shall show you without using relative reference. For sort and filter type of functions, always use Absolute Reference. Now, click on Record Macro .
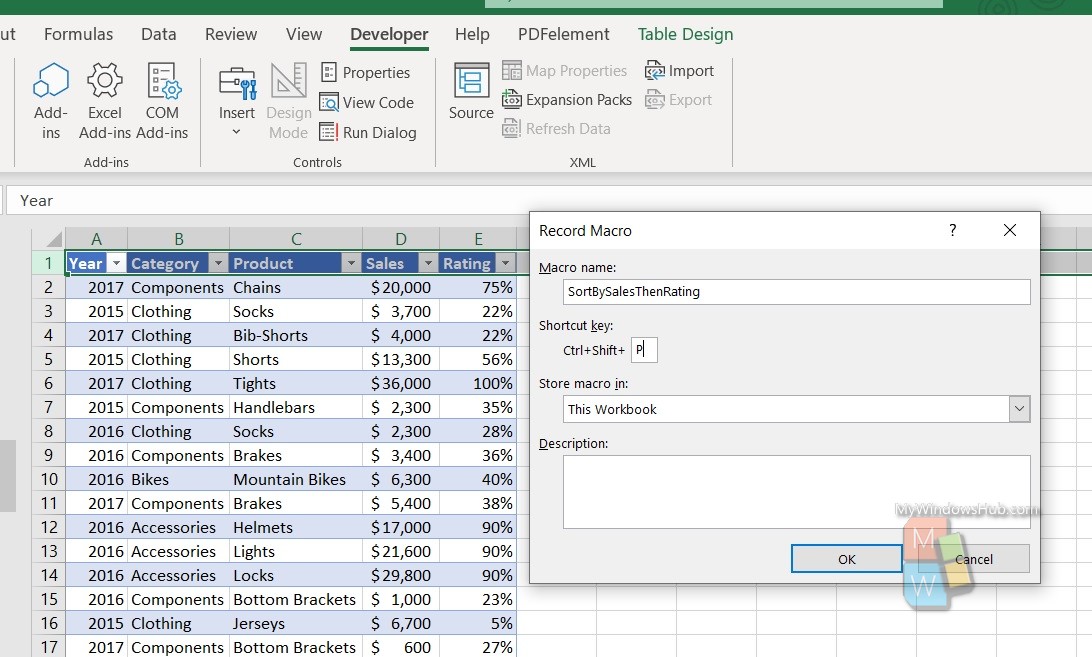
Now, the Record Macro window opens. Select a shortcut key for you. For example, I have selected Ctrl+Shift+P. I have named the shortcut as SortBySalesThenRating. This means the macro will sort the table on the basis of Sales value and then by Rating.
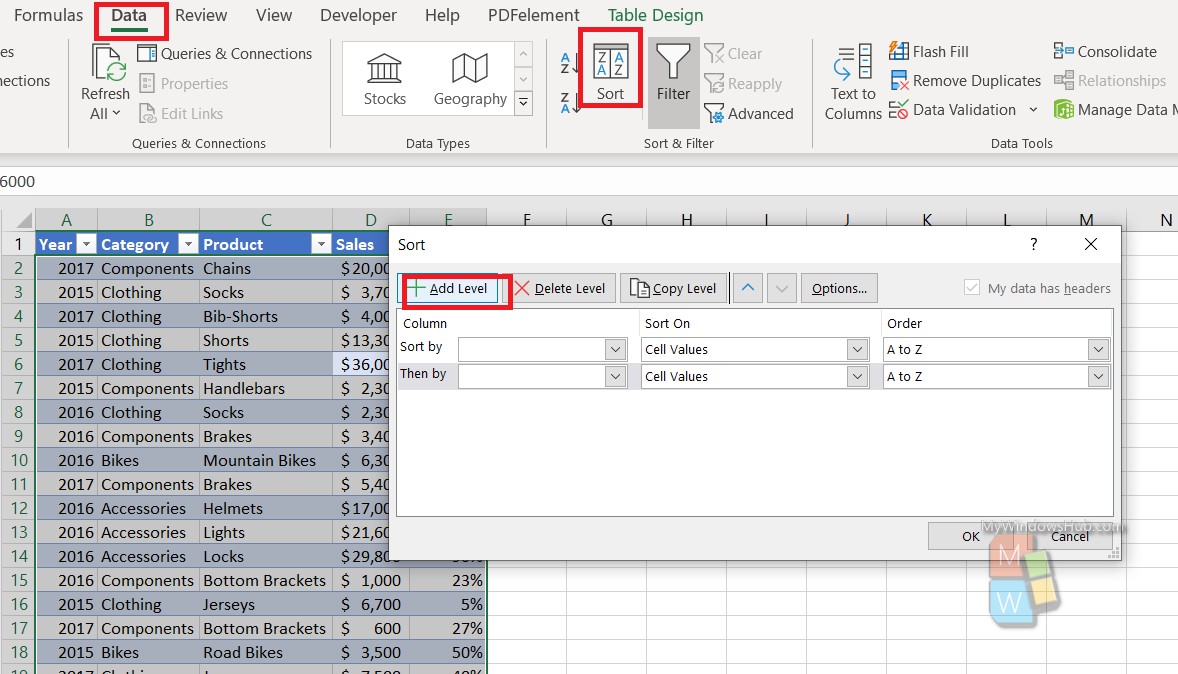
Now, head over to the Data tab, click on the Sort tool. Keep the cursor in any cell of the table before clicking the Sort tool. As the Sort window opens, click on Add Level.
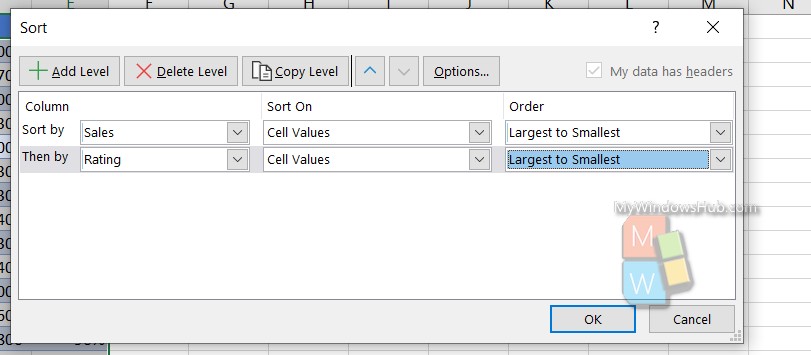
Now in the first level, click the drop down box and select Sales. Next, click on the drop down arrow of the second level and select Rating. You can also change the order from largest to smallest, if you want. Click OK.
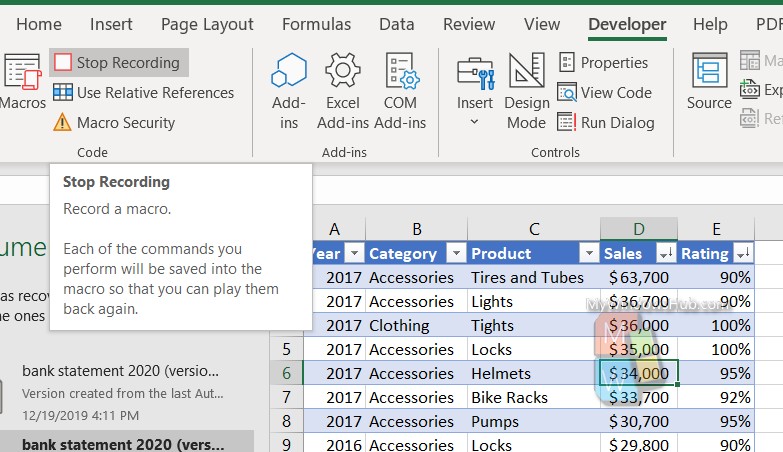
Now, go to the Developer tab and click on Stop Recording.
Now, press the Shortcut to get the sorted result.

