Check out: What is VBA and why is it important?
Here I have created a sample table for some names and birthdates along with it. The date formatting is done in mm/dd/yyyy format.
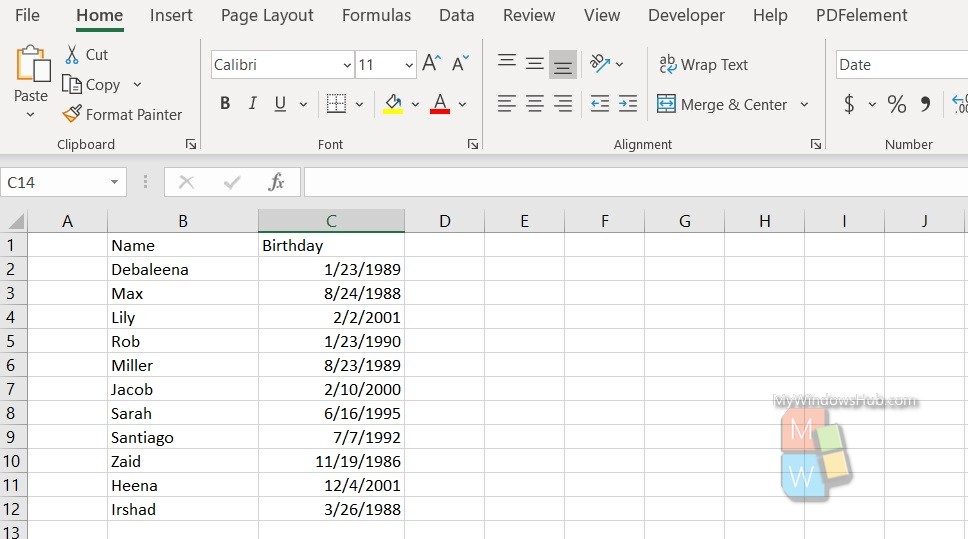
Here, I shall show you, how you can change the date format to a customized one, by creating a simple macro using Visual Basic for Applications for MS Excel. This table, that I have created is a small one, so you may be wondering why do I need to create a macro? I can simply change the date format by selecting all the cells of the Birthday column. In real life situations, we use MS Excel, when we have to deal with hundreds or thousands of rows, and innumerable worksheets. Creating a Macro will help you change the formatting of birthdate, in one shot.
Here, I shall change the formatting in a way to hide the birth year. Not everyone may want to share their age. Let’s have a look how to do that.
Steps To Change Date Formatting In MS Excel Worksheet Using VBA Macro
First, you have to turn on the Developer Tab in MS Excel.
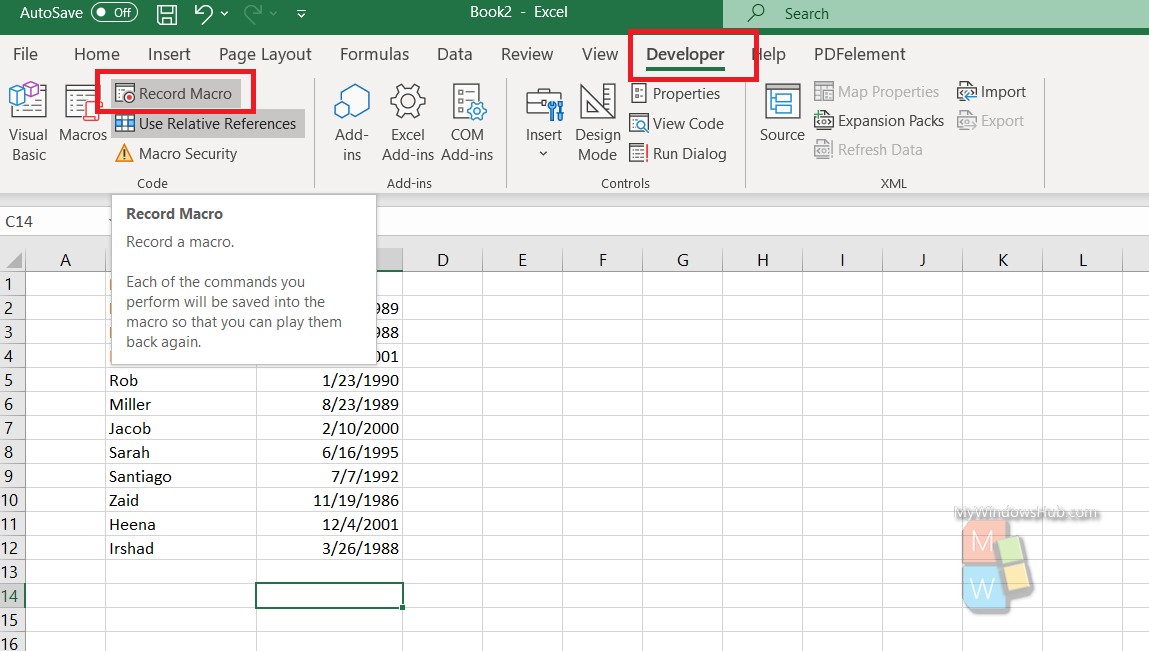
Next, click on the Developer tab and turn on the Use Relative References. Select the cell. Now, select Record Macro.
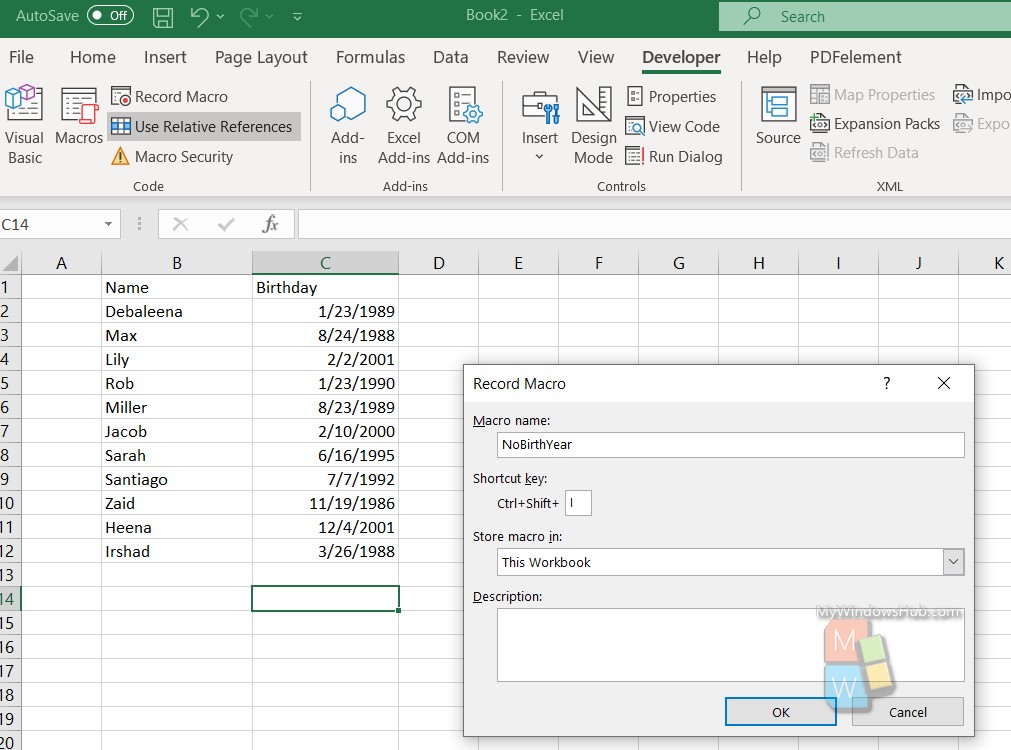
Give a name for Macro, enter a shortcut and click OK.
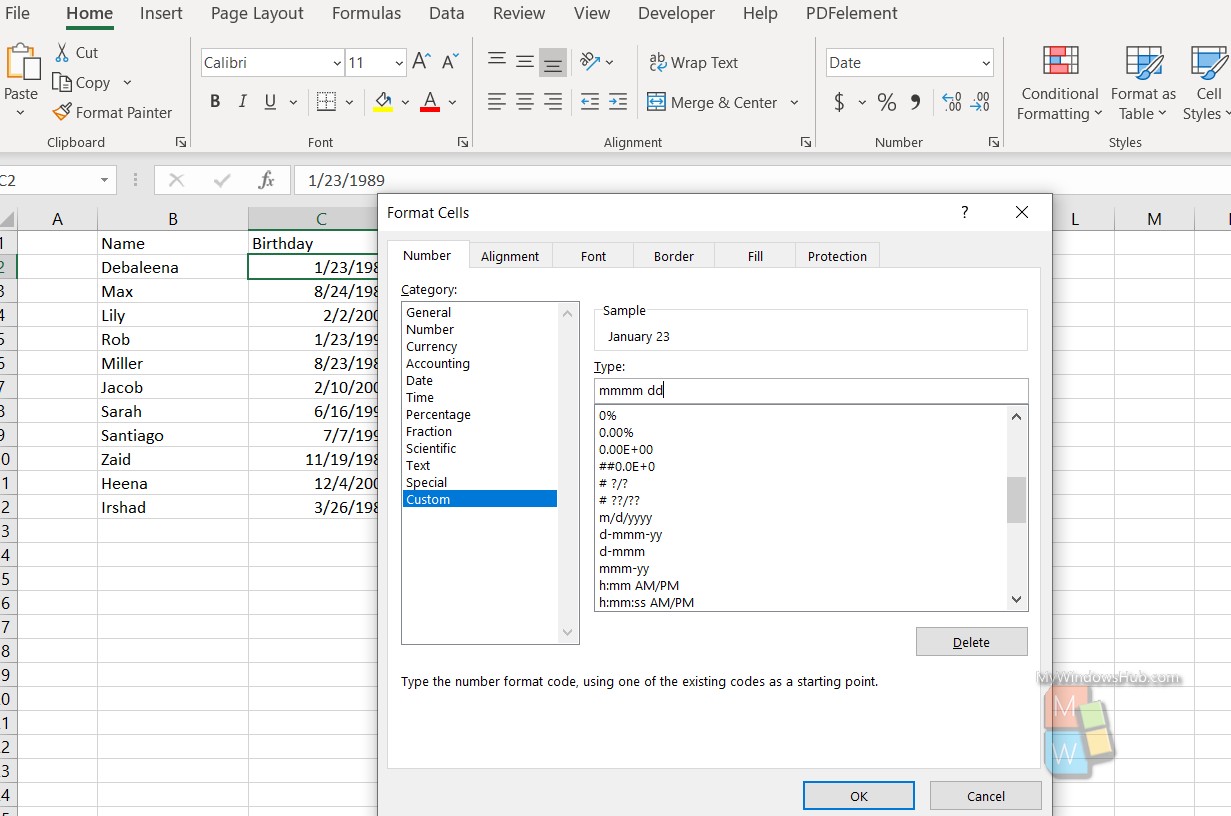
The Macro Recording has started. Go to Home tab in the Ribbon, click on the More Options drop down arrow just below the Number tab.
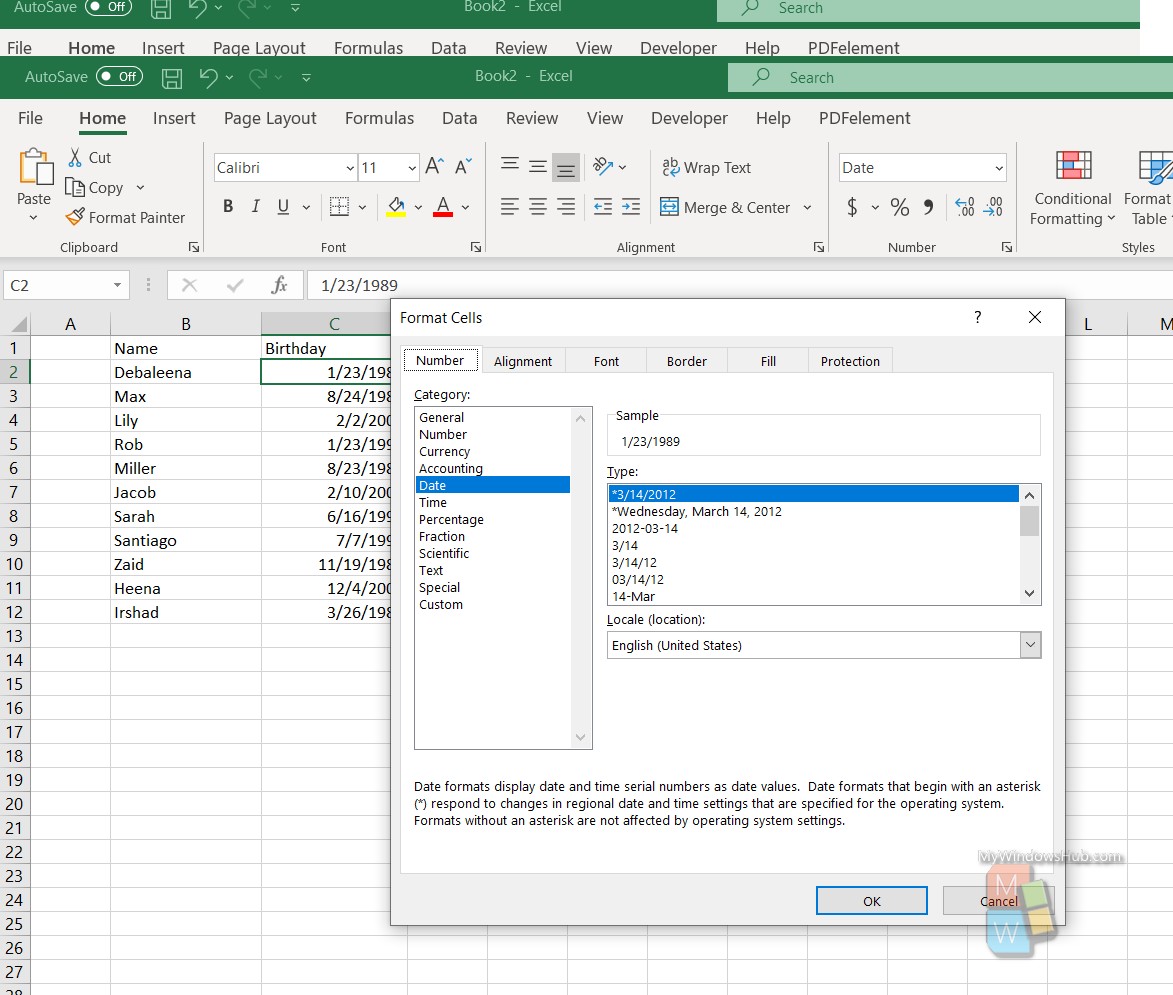
As the Number tab opens, select the Custom option in the left tab. In the right, under the Type menu, the format is given. Change the format to the one you need. As I mentioned, I will omit the year to respect privacy. So I change the format to mmmm dd. Click OK.
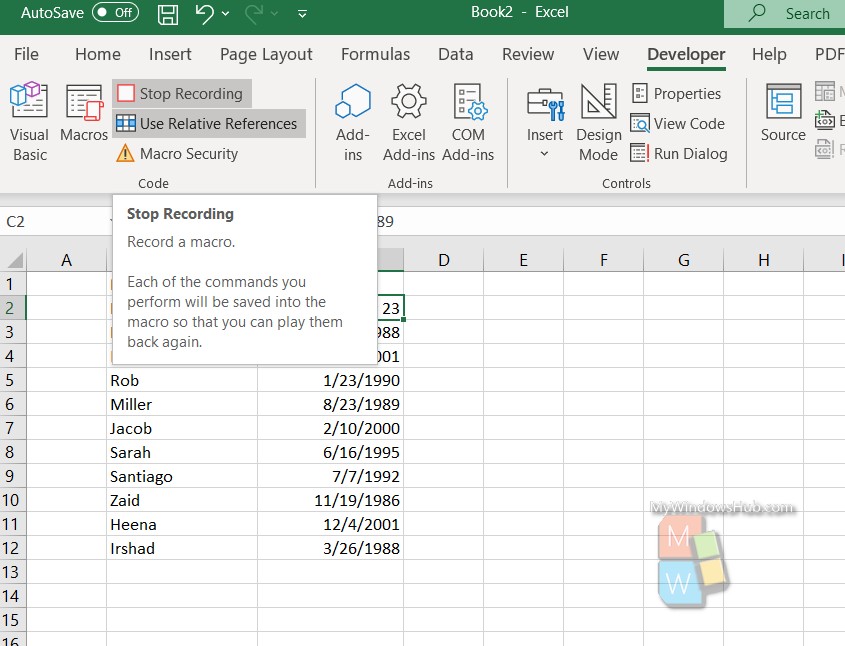
Finally, go to the Developer tab, and click on Stop Recording.
Our Macro is now created. To apply to all the cells of a column, press Ctrl+Shift+Down_Arrow to select all cells of the column. Now click the shortcut of the macro, in my case, it is Ctrl+Shift+I.
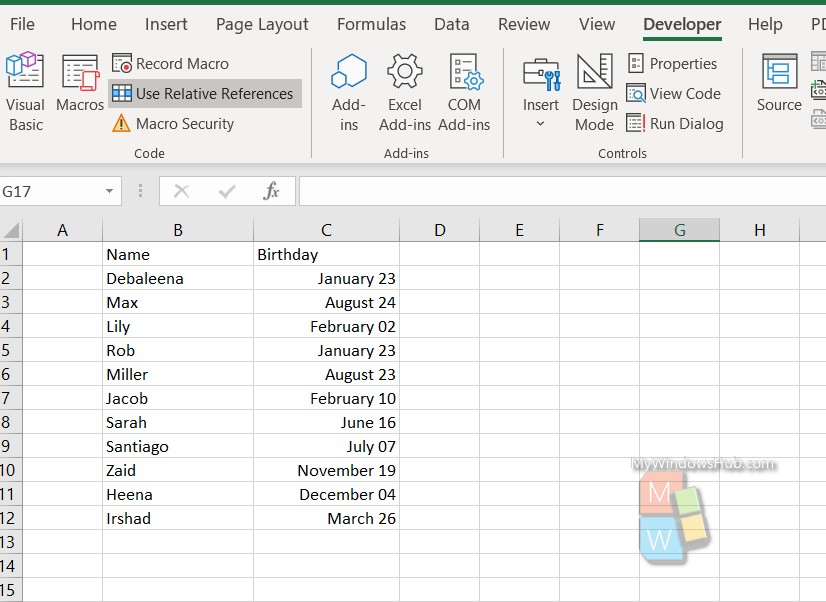
That’s all!

