File Explorer underwent a huge makeover with Windows 8. With a revamped user interface and several new features, Windows 10 has brought forward the File Explorer. The ribbon under the Home menu displays a button called ‘New Item’. The New Item button is quite similar to the ‘New’ option that we get when we right click on anywhere in the desktop. The New type is usually required to create new folder, shortcut etc. Similarly, the New item option is used to add items of a particular file type to the File explorer. The following article will show you how to add or remove Apps from New Item menu in File Explorer.
Steps to Add Apps from the New Item Menu in File Explorer In Windows 10
1. Press Win+R to open Run window. Type regedit and hit Enter to open Registry Editor.

2. Now navigate to the following location HKEY_CLASSES_ROOT and expand it.

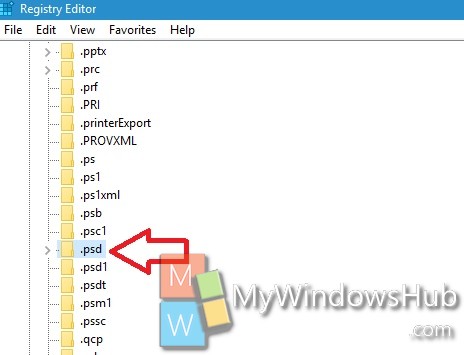
3. Find out the file extension that you want to add to the New item. For example, if you want to add Photoshop to it, then search for .psd key.

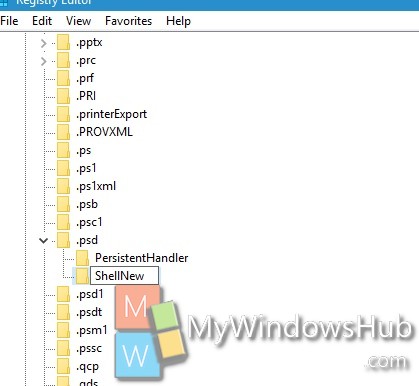
4. Now, right-click on the key, go to New, select Key and name it ‘ShellNew’.

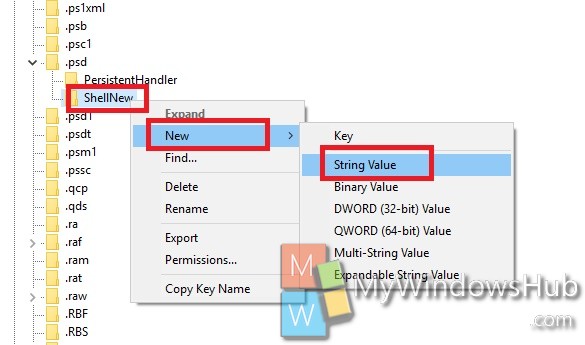
5. Next, right click on ShellNew, go to New and select String Value. Name it NullFile. Close File Explorer and open it again.

That’s all!
Steps to Remove Apps from the New Item Menu in File Explorer In Windows 10
6. Now if you want to remove App From New Item, then follow step 1 and 2. Then look for the file extension you want to remove and expand its corresponding key. Remove the ‘ShellNew’ key.
That’s all!

