Have you ever wondered what the maximum clocking speed of your CPU is? For a regular user, this might not sound fascinating; but for a gamer or a software developer who needs the best out of their CPU, they need to know how their processor performs under high load. In short, we are talking about performing a round of stress tests on your processor. Here we are going to use a tool, “Prime95” created to hunt Mersenne prime numbers. Eventually, we will perform a round of torture-test to get the maximum clocking speed. Before we begin, this is neither a benchmark nor the only way to understand your processor better. Prime95 has been around for a while and is considered as an excellent way to get started with load testing on your personal CPU.
Prime95 provides a bunch of customization before performing the stress test on your system,
- Blend (Tests everything including RAM)
- Small FFTs (Primarily tests FPU and CPU caches)
- In-Place FFTs (Maximum power consumption; tests FPU and CPU caches, some RAM)
Please note below things before we get started,
- This is very stressful and heavy testing on your CPU; please download a CPU temperature meter to monitor it constantly.
- Most of the modern CPU’s are well-calibrated if the CPU temperature goes above a threshold, then automatically shuts down to avoid hardware damage.
- If the CPU temperature shows critical in the meter, do stop the stress or torture testing.
- Prime95 is available for a wide range of operating systems, starting from Unix distro to Windows.
Now let’s learn how to use Prime95 to stress test the CPU of our PC.
How To Use Prime95 To Stress Test CPU on Windows 10 PC?
Let us first download the stress testing tool, “Prime95“.
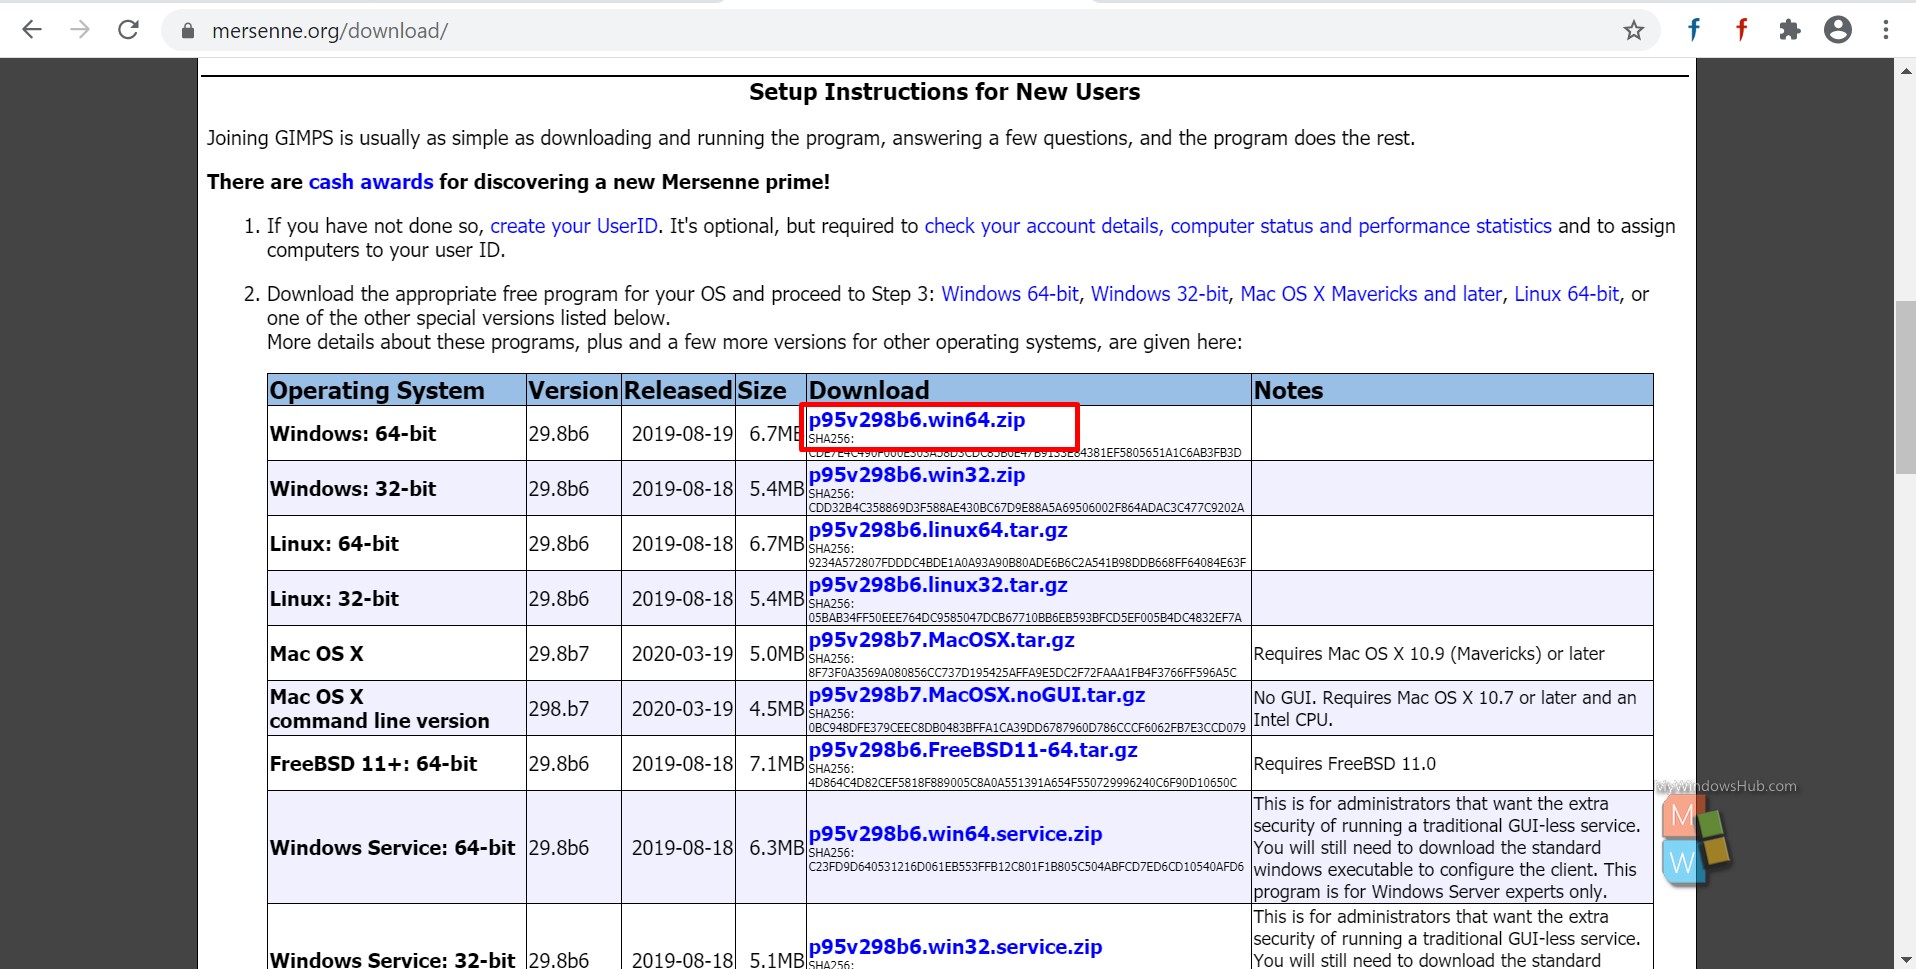
- This is a tiny program; it will get downloaded very quickly.
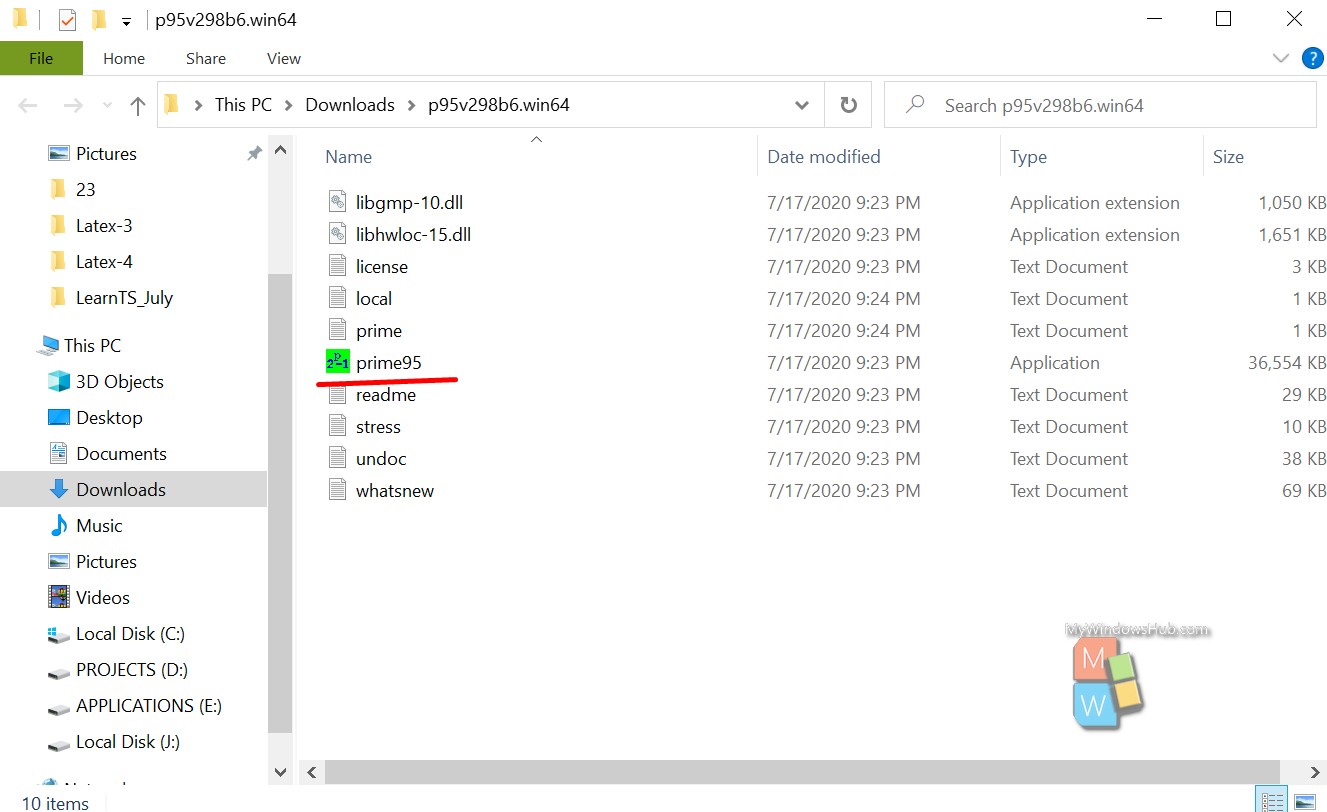
- Extract the downloaded zip file and open the executable file prime95.
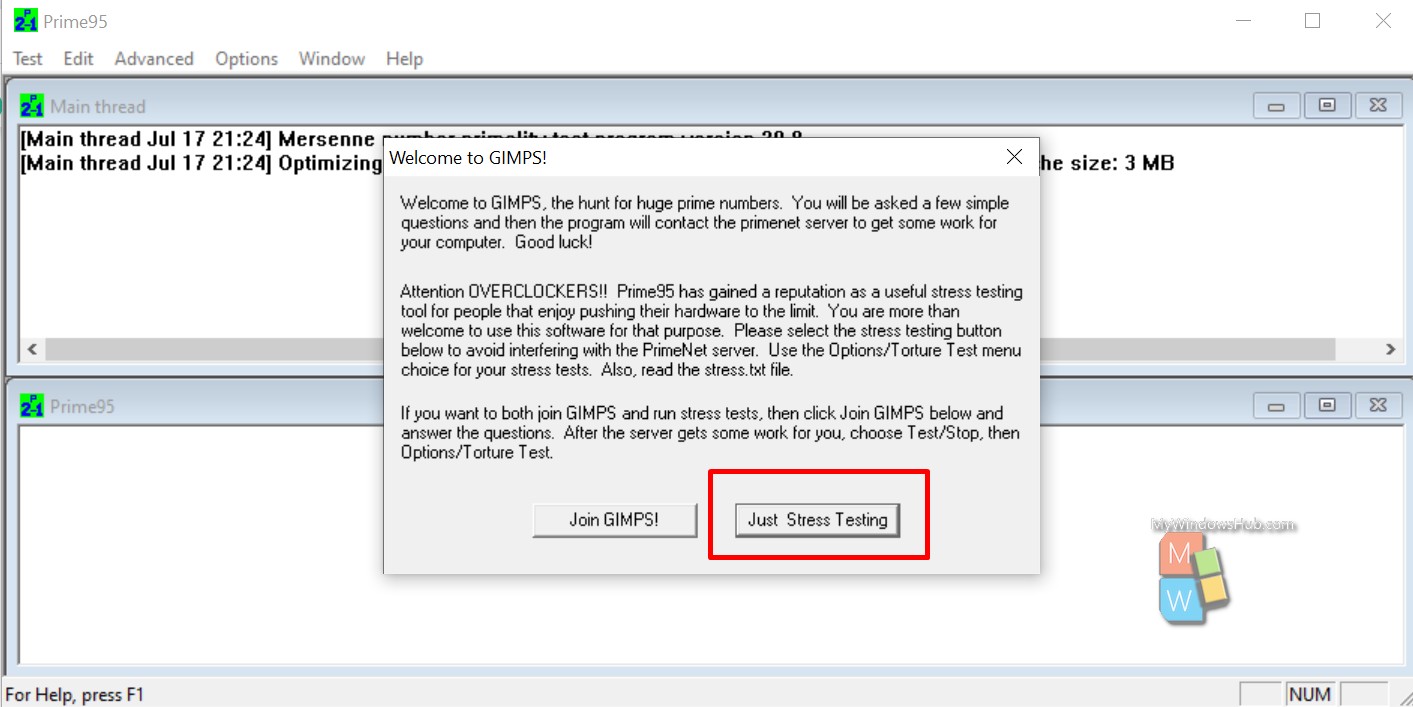
- The next dialog will ask you to join the GIMPS, press the “Just Stress Testing” to continue.
- Prime95 will take you to the below dialog, where you can set the configuration for the stress test. As a new user, you can press the “Ok” button to continue.
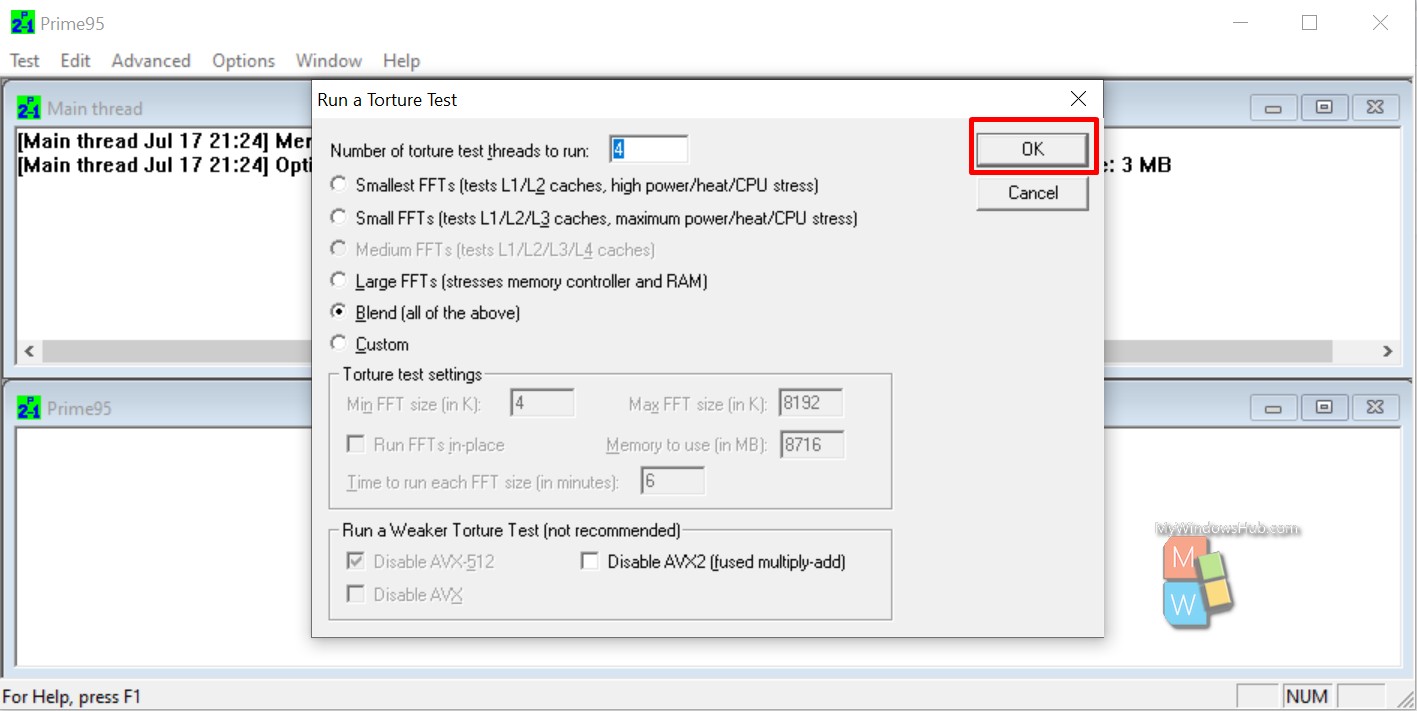
- In our case, we tried with four worker threads, and our system was unstable. Hence, we downgraded the number of worker threads from four to two, which means we will perform stress tests on two logical CPUs.
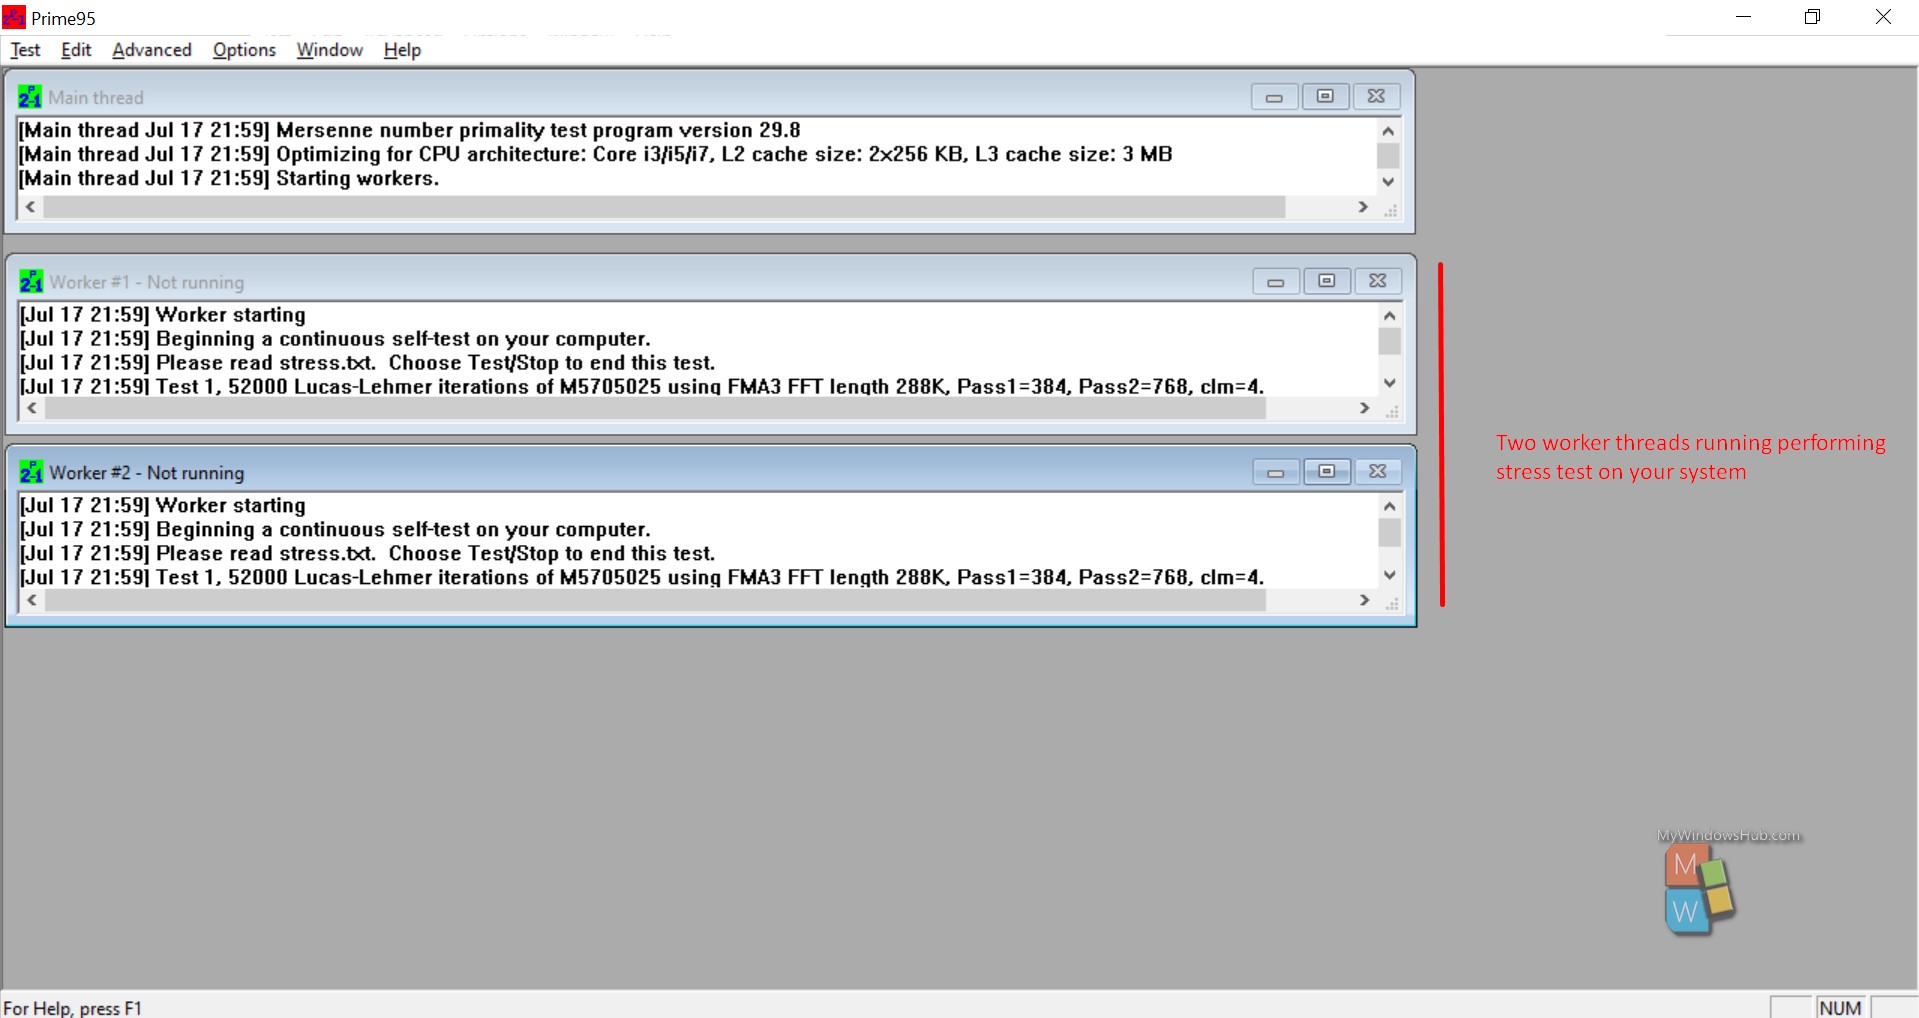
- The main thread runs the two worker threads and continuously varying the Caches, CPU Core, and RAM consumption to monitor the stress load on the CPU.

In the below screenshot, you can see the first dialog represents the main thread controlling the worker threads. The second and third dialog represents the logical CPU on which the stress testing is going on.
Note:
If any of the worker thread fails to execute the stress testing, then the main thread will stop it and shows the below message,
FATAL ERROR: Rounding was 0.XXXX, expected less than 0.XXXX
Hardware failure detected, consult stress.txt file
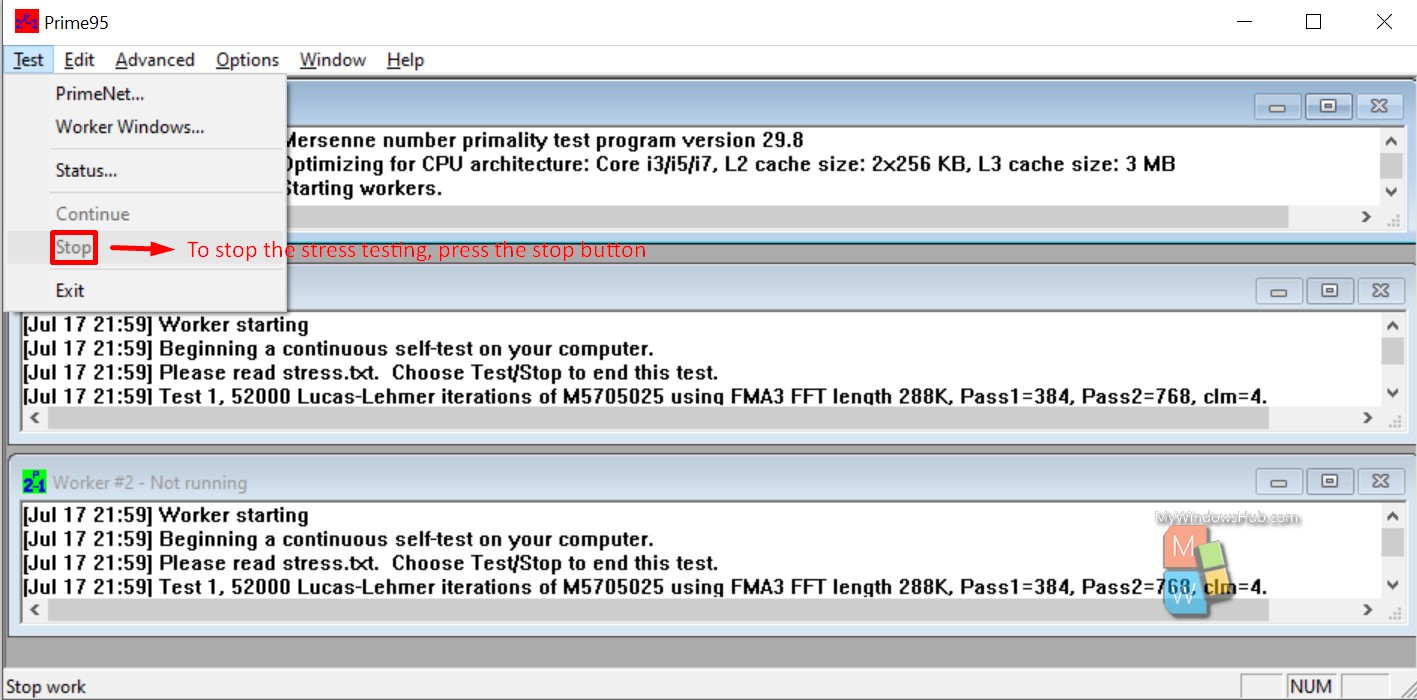
- If you feel like your CPU temperature is rising above the threshold, you can stop the stress testing by clicking the “Stop” button present under the “Test” menu.
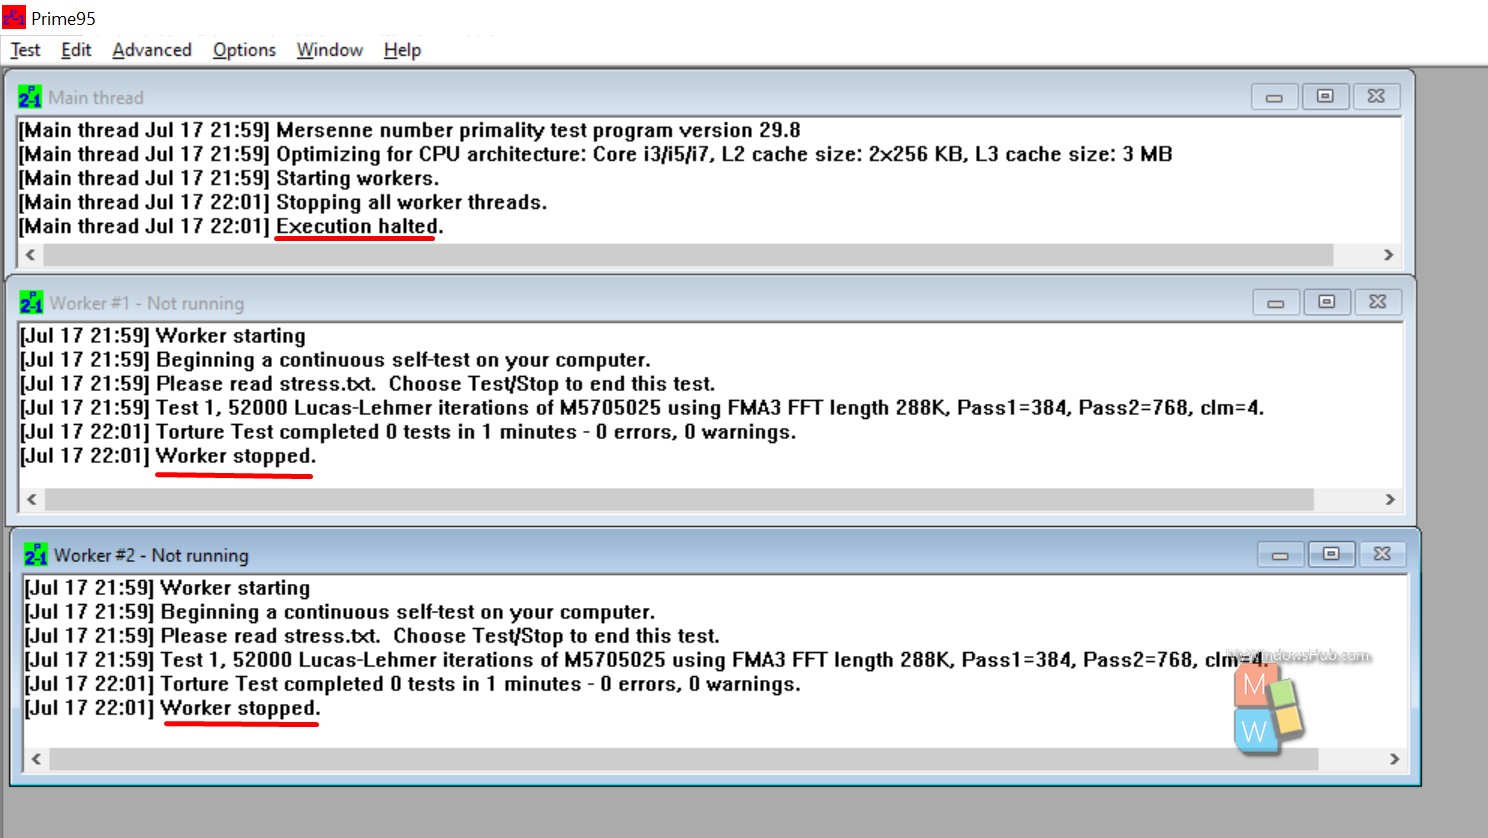
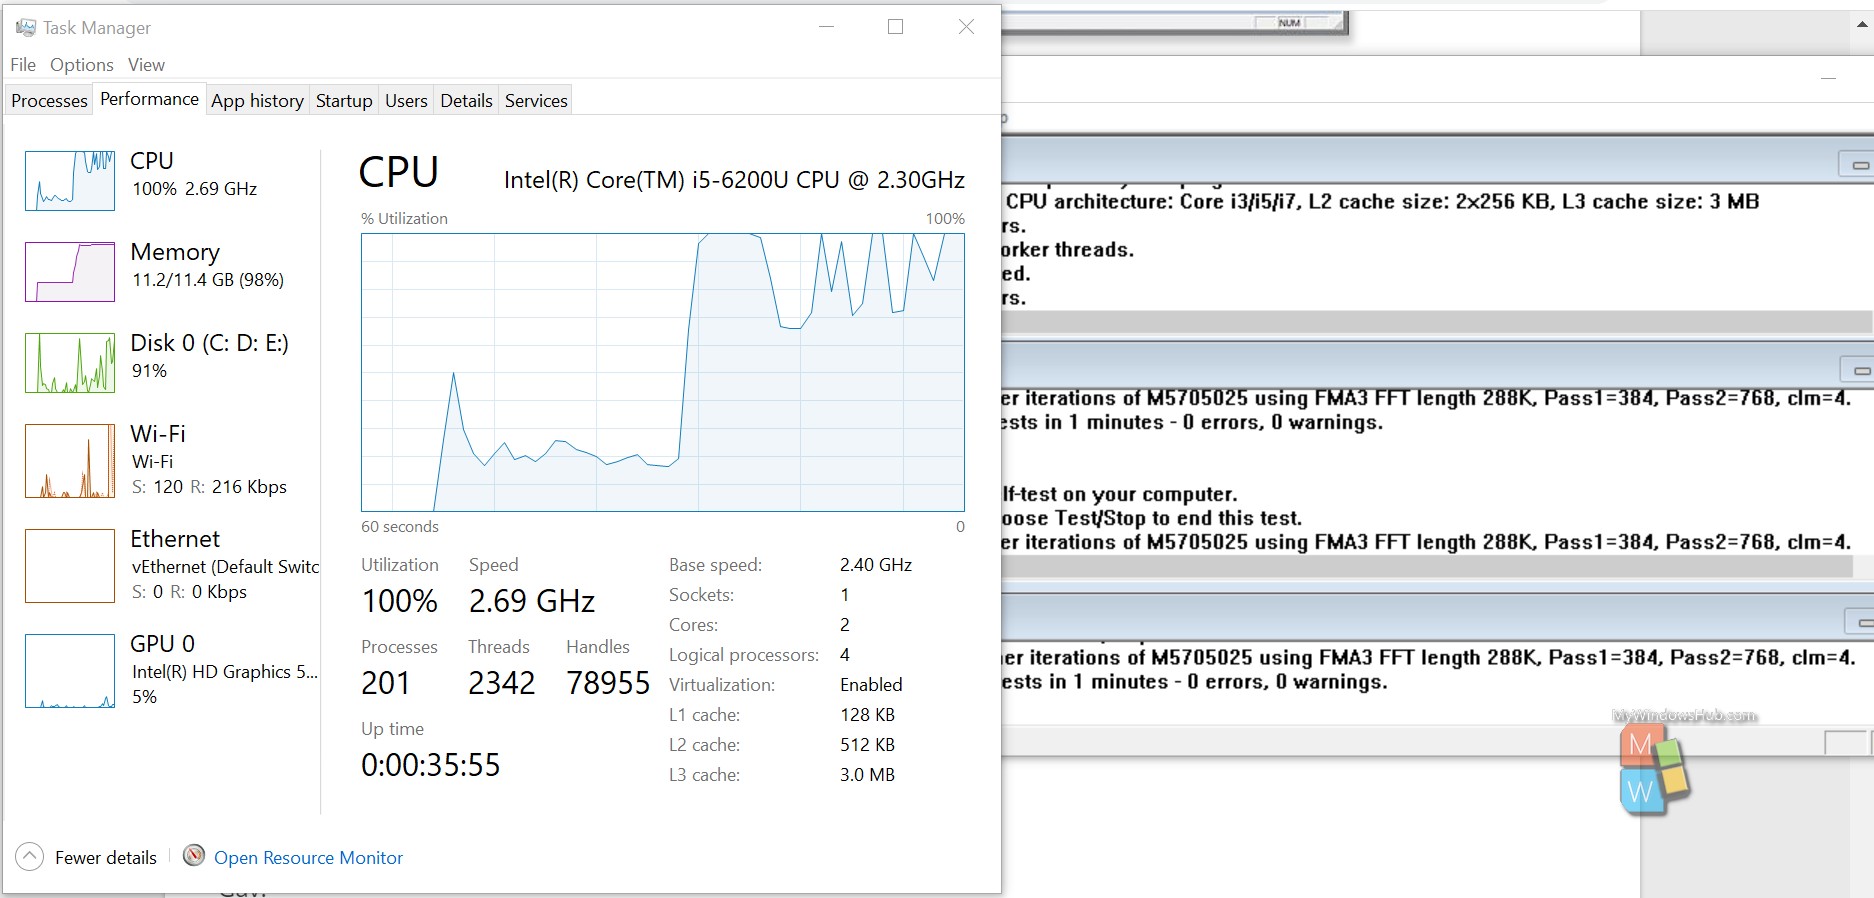
- You can see the CPU, Primary memory, and other cache usage was almost maximum during the test. If your system can go through the stress test, you shall be able to see the completed test message on the screen.
Conclusion
In this advanced Windows 10 tutorial, we have walked you through the steps to perform a stress/torture test. Prime95 was the tool that we have used to perform the testing; there are other stress tools available out there. We have seen the CPU and other resources were completely used during the process and can damage your hardware resources. You can read our article on To set maximum processor frequency on Windows 10.

